Create Content
After create a Content Type, you can see that Content Type in Top Menu under Content

For creating Content, you need to follow some steps:
1. Create Template through seeds.
Create a json file of name templates.json at ../<project-name>/VaahCms/Themes/<theme-name>/Database/Seeds/json/ this directory.
[
    {
        "template": {
            "name": "Default",
            "type": "page",
            "file_path": "frontend.default"
        },
        "groups": [
        ]
    },
    {
        "template": {
            "name": "Welcome",
            "type": "page",
            "file_path": "frontend.welcome"
        },
        "groups": [
        ]

    },
    {
        "template": {
            "name": "Home",
            "type": "page",
            "file_path": "frontend.home"
        },
        "groups": [
        ]

    }
]
You have to set blade file path in a template.json file. The content link return to this Blade File. The data in the fields of that content show in that Blade file only.
      ├── BlogTheme
          ├── Database/
              ├── Seeds/
                  ├── DatabaseTableSeeder.php
                  ├── SampleDataTableSeeder.php
                  ├── json/
                      ├── templates.json
To run this seed, you have to add some code in DatabaseTableSeeder.php file.
<?php
namespace VaahCms\Themes\BlogTheme\Database\Seeds;


use Illuminate\Database\Seeder;
use VaahCms\Modules\Cms\Libraries\CmsSeeder;

class DatabaseTableSeeder extends Seeder
{
    /**
     * Run the database seeds.
     *
     * @return void
     */
    public function run()
    {
        $theme_slug = 'blogtheme';

        $file = __DIR__.'/json/templates.json';
        CmsSeeder::templates($theme_slug, $file);
    }

    /**
     * Run the database seeds.
     *
     * @return void
     */


}
Now, you just need to reactivate the theme by visiting this url:
<public-url>/backend#/vaah/themes/
Once, the theme is activated, Template will also be created
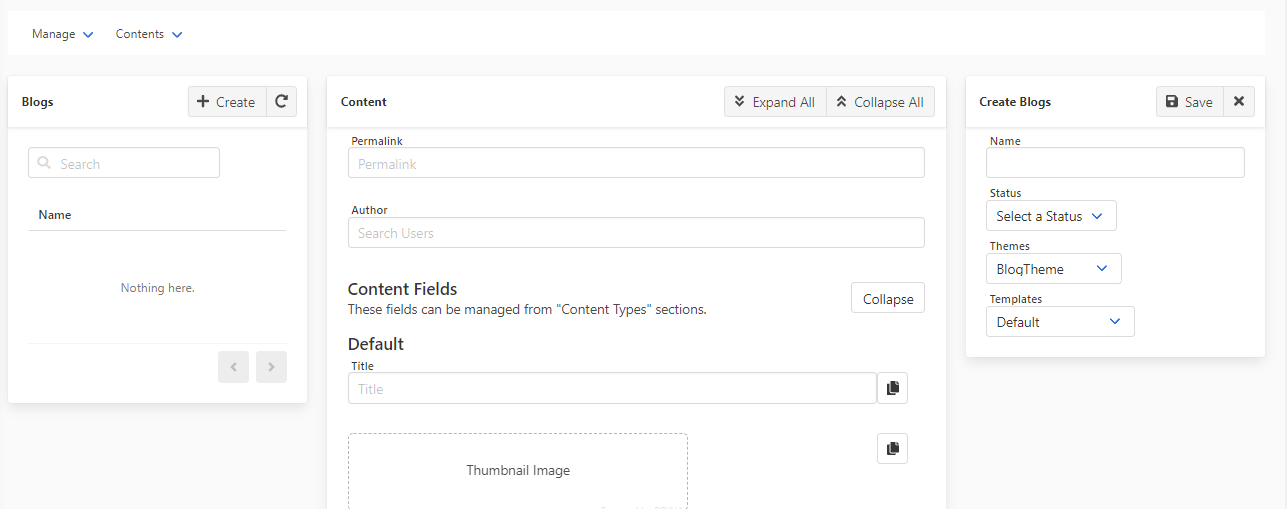
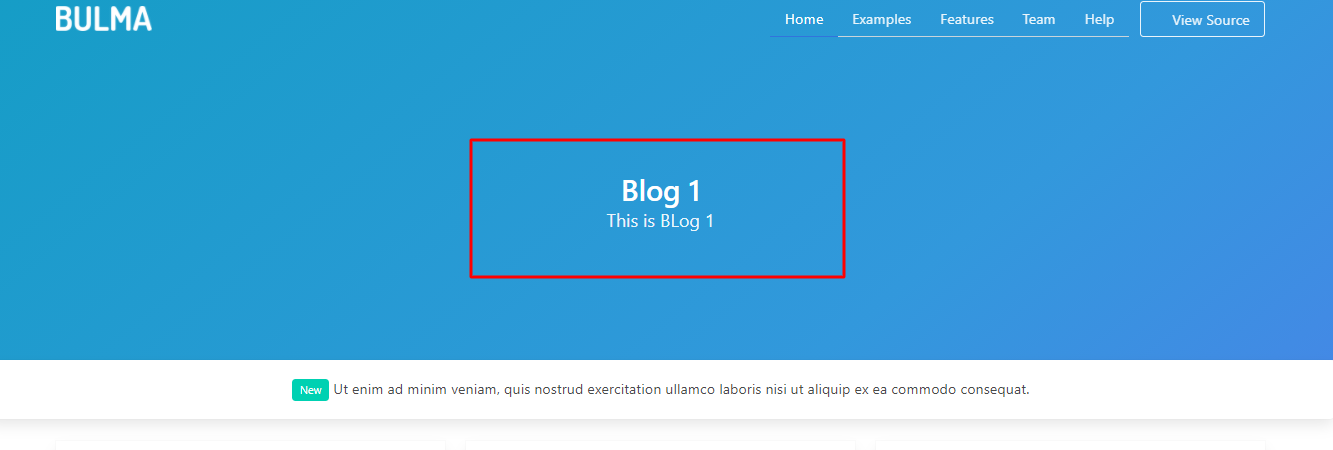
Now you can go to Blog page in Content and create a content for Blogs.
Fill out all fields in Create form. In Templates, you can see the data that you have been created through seeds. and this will decide which Blade file will open for that content.
In Templates, You can add some fields that means that fields are template specific and will be shown when you select that Template
Example:-
{
        "template": {
            "name": "Services",
            "type": "page",
            "file_path": "frontend.service"
        },
        "groups": [
            {
                "name": "Header",
                "slug": "header",
                "fields": [
                    {
                        "name": "Headline",
                        "slug": "headline",
                        "meta": {
                            "default": "Dummy Headline"
                        },
                        "type": {
                            "slug": "text"
                        }
                    },
                    {
                        "name": "Description",
                        "slug": "description",
                        "meta": {
                            "default": "This is a Dummy Content."
                        },
                        "type": {
                            "slug": "editor"
                        }
                    }
                ]
            }
        ]

    },
You can also add an author for this content.
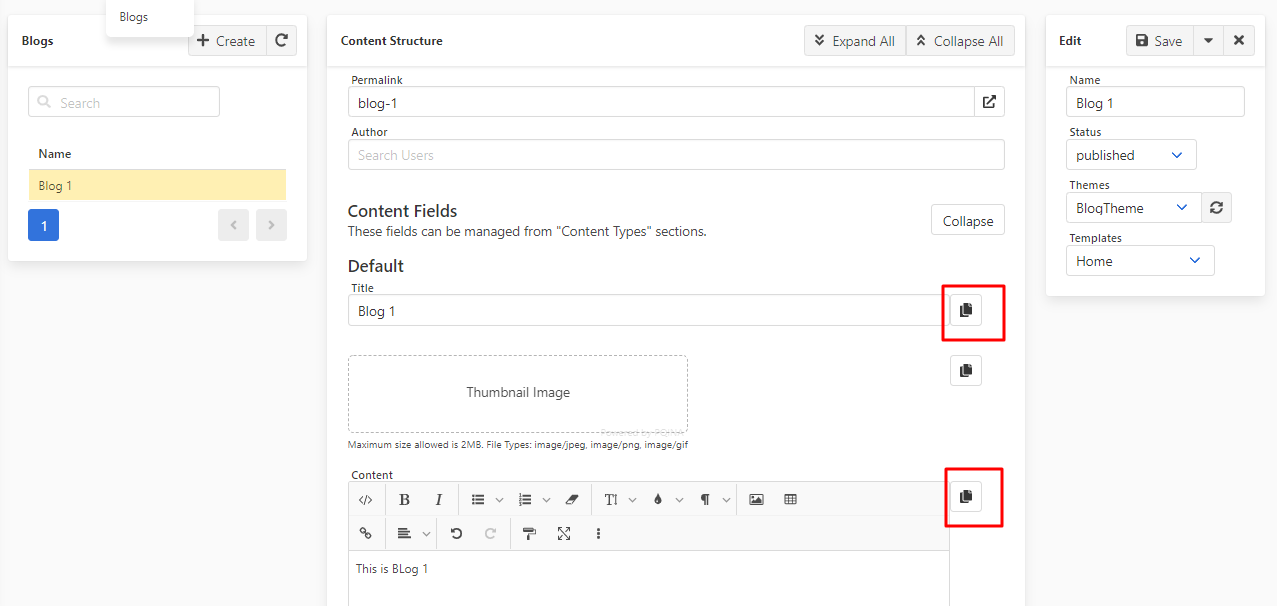
Now, you need to copy the code by a click on copy icon and paste it in a blade file. Remove the Hard Code from blade file and paste the CMS code in place of their. You can see the difference below.
{{--<div class="hero-body">
<div class="container has-text-centered">
<h1 class="title">
The new standard in <insert industry here>
</h1>
<h2 class="subtitle">
Lorem ipsum dolor sit amet, consectetur adipiscing elit,
sed do eiusmod tempor incididunt ut labore et dolore magna aliqua.
Ut enim ad minim veniam, quis nostrud exercitation ullamco
laboris nisi ut aliquip ex ea commodo consequat.
</h2>
</div>
</div>--}}
<div class="hero-body">
<div class="container has-text-centered">
<h1 class="title">
{!! get_field($data, 'title') !!}
</h1>
<h2 class="subtitle">
{!! get_field($data, 'content') !!}
</h2>
</div>
</div>
Now, You can see the content that you have input in Cms.