Jobs
Introduction
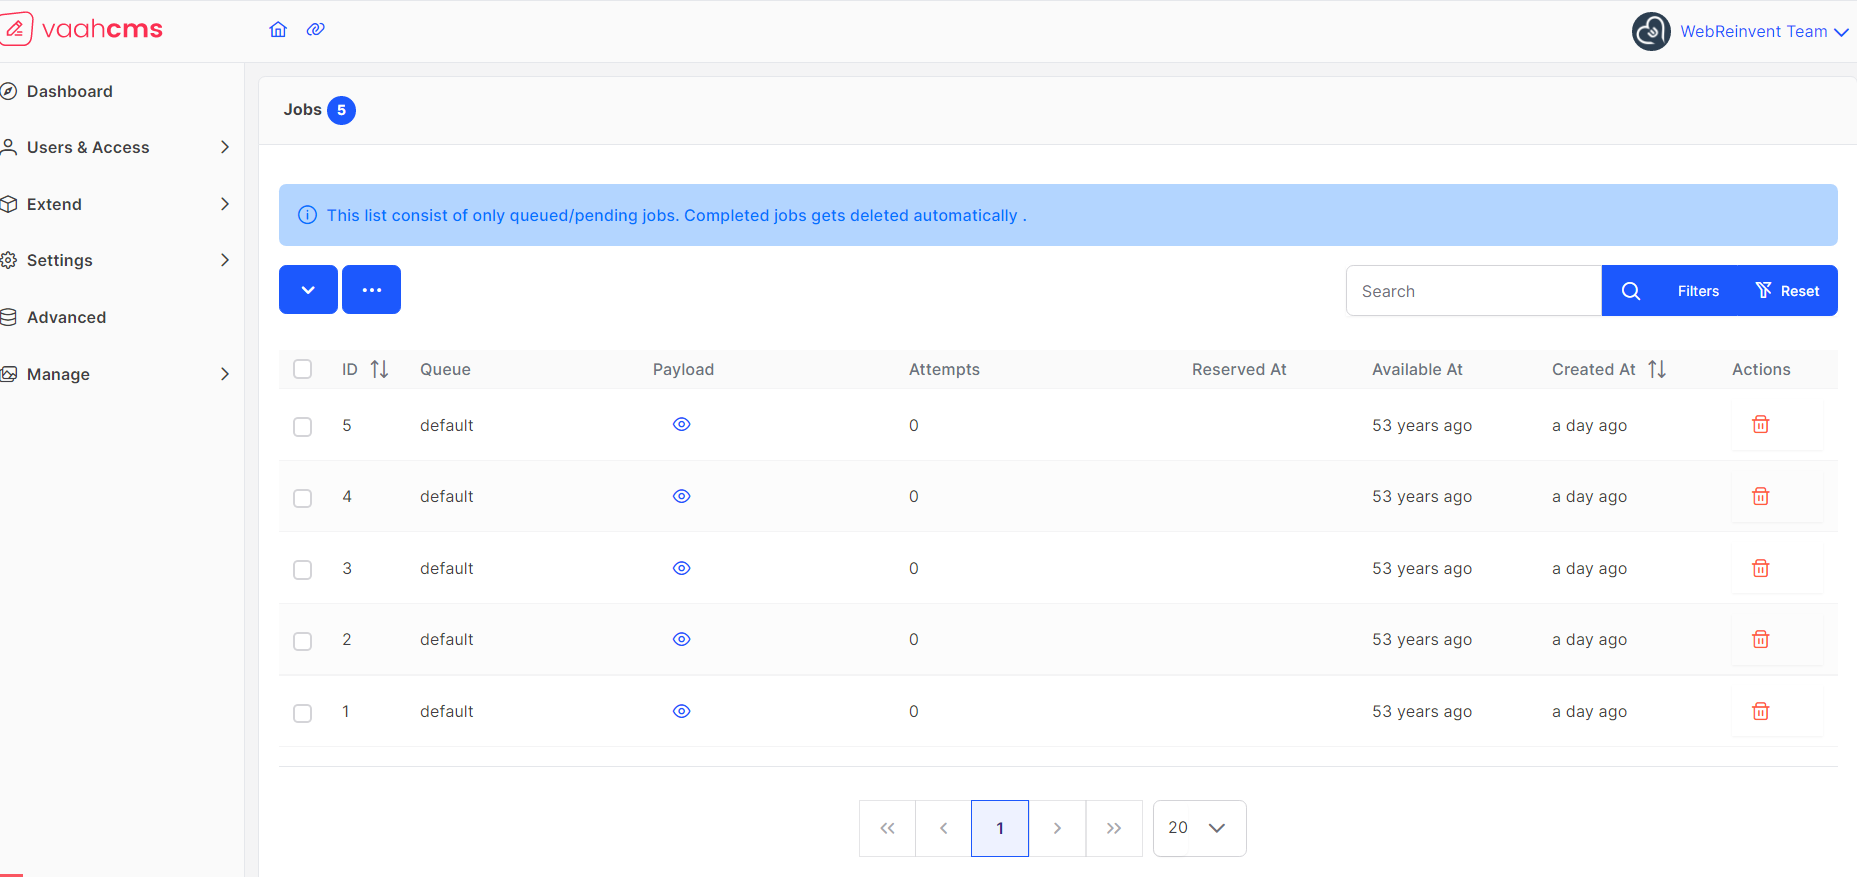
Through this feature you can monitor the assign jobs. This job section will show you the records of completed jobs only.
Visit following url you will see the Jobs section:
<public-url>/backend#/vaah/advanced/jobs
Below Image is a example of job records.

Usage
Bulk delete
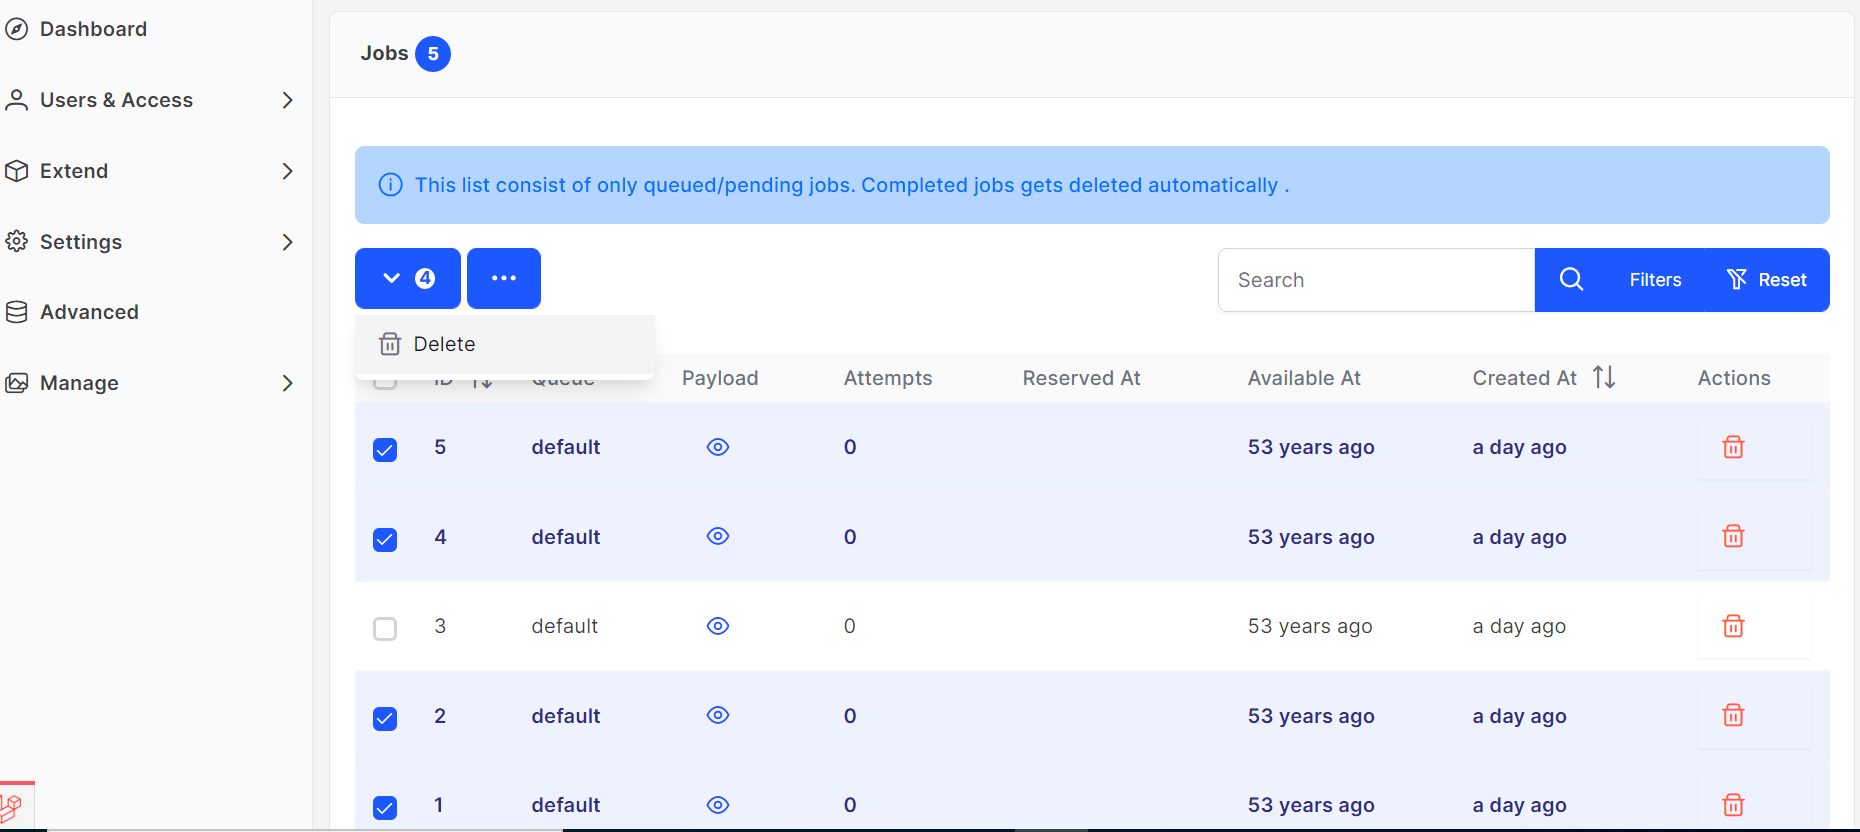
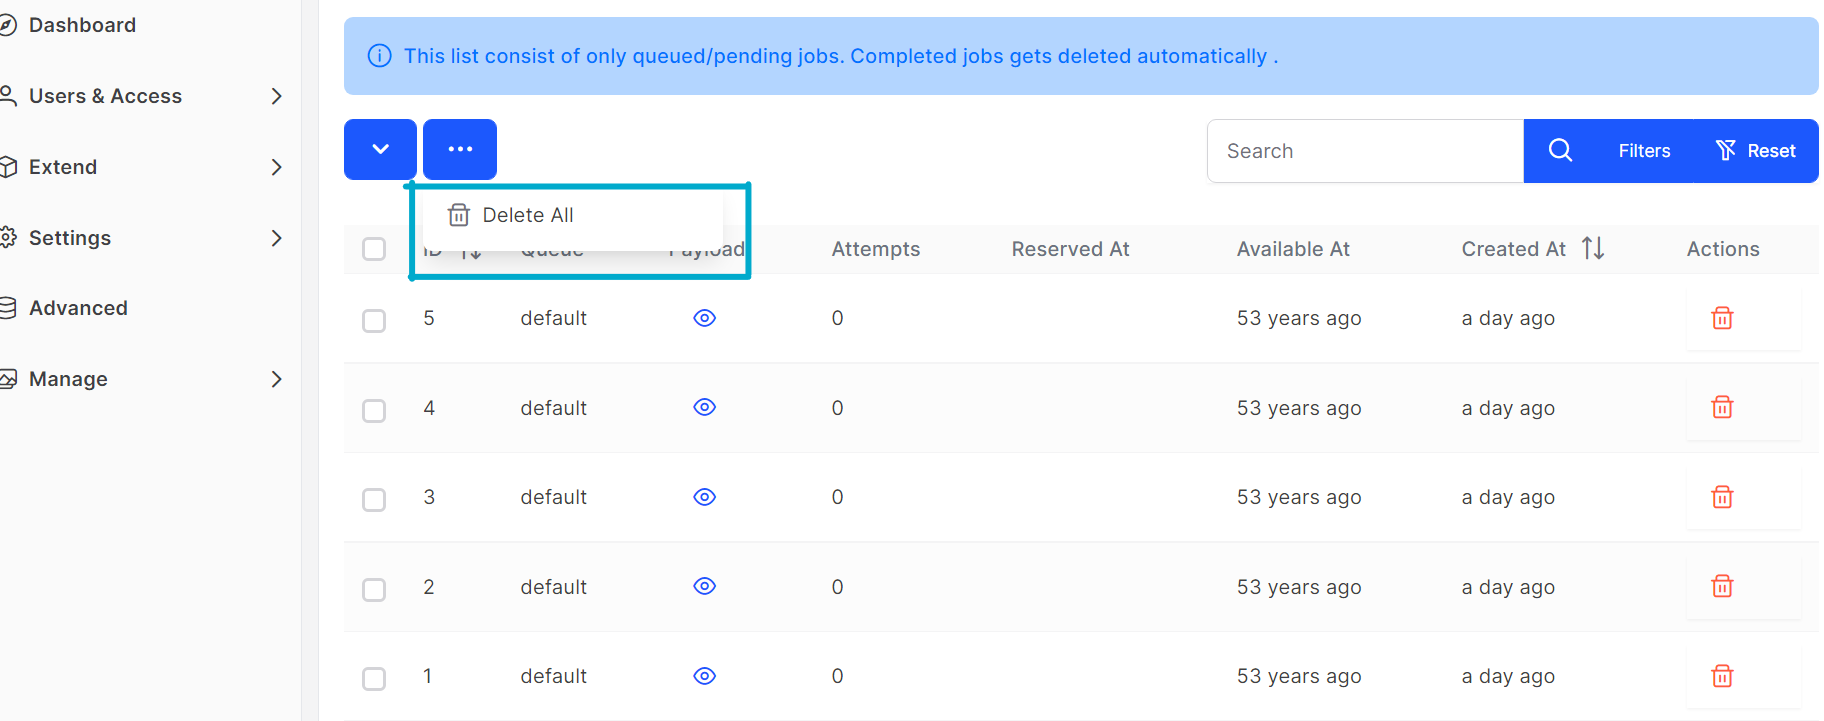
By selecting datas one can delete the records. Also there is delete all option for make it empty.
delete by selecting

delete all

Sorting
You can sort records by ID and with the date it was created.

Payload
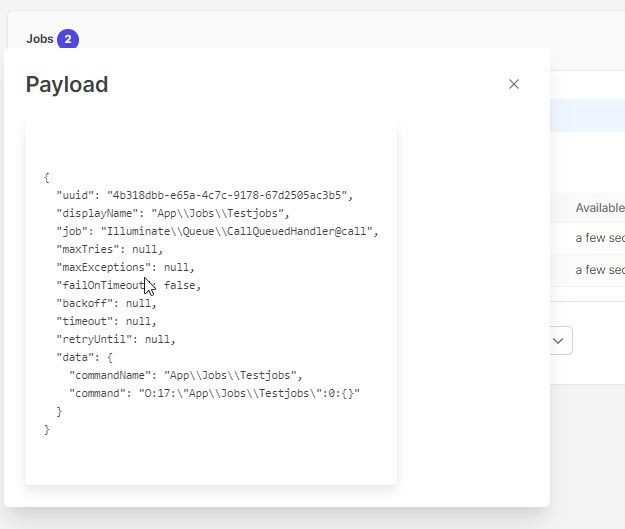
In payload column there is an eye button present, by clicking it will show the payloads in a popup,

How to use job in VaahCMS
Step-1 Configure The Queue
Let’s take an example for a better understanding. We will create an email queue using the Laravel Queue and store all the email sending jobs in the database driver.
Command “queue:table” helps you to use the database driver for the queue.
php artisan queue:table
To set a queue driver in environment file open the .env file to set the value like below:
QUEUE_CONNECTION=database
To create a Queue Job run below command:
php artisan make:job MatchSendEmail
In app/Jobs you can see the code like below:
<?PHP
namespace App\Jobs;

use Illuminate\Bus\Queueable;
use Illuminate\Contracts\Queue\ShouldQueue;
use Illuminate\Foundation\Bus\Dispatchable;
use Illuminate\Queue\InteractsWithQueue;
use Illuminate\Queue\SerializesModels;

class MatchSendEmail implements ShouldQueue
{
     use Dispatchable, InteractsWithQueue, Queueable, SerializesModels;

       /**
       * Create a new job instance.
       *
       * @return void
       */
    public function __construct()
  {
               //
   }

       /**
       * Execute the job.
       *
       * @return void
       */
     public function handle()
     {
            //
      }
 }
Step-2 Create An Email Template And Mailable
To create mailable, run below command:
php artisan make:mail HelloEmail
After this command the Mail folder will be created along with the HelloEmail.php file in the app folder.
code structure:
<?php

namespace App\Mail;

use Illuminate\Bus\Queueable;
use Illuminate\Mail\Mailable;
use Illuminate\Mail\Mailables\Content;
use Illuminate\Mail\Mailables\Envelope;
use Illuminate\Queue\SerializesModels;

class HelloEmail extends Mailable
{
    use Queueable, SerializesModels;

    /**
     * Create a new message instance.
     */
    public function __construct()
    {
        //
    }

    /**
     * Get the message envelope.
     */
    public function envelope(): Envelope
    {
        return new Envelope(
            from:'from@example.com',
            subject: 'Subject',
        );
    }

    /**
     * Get the message content definition.
     */
    public function content(): Content
    {
        return new Content(
            view: 'view.name',
        );
    }

    /**
     * Get the attachments for the message.
     *
     * @return array<int, \Illuminate\Mail\Mailables\Attachment>
     */
    public function attachments(): array
    {
        return [];
    }
}
Now you need to create a folder called “emails” in the “resources/views” folder and create the file named “hello.blade.php” in the “email” folder. It will contain the simple HTML code below:
<h1>Hello,</h1>
<p>Welcome to laravel platform.</p>
Now you need to change the “view.name” text with the newly created email view file name along with the folder name in “HelloEmail.php” like below:
return $this->view('emails.hello');
Also, you need to add the email sending logic in the “handle()” method in the app/Jobs/MatchSendEmail.php file. But first, we need to add “Mail” and “HelloMail” namespaces to use it in the logic.
<?php

namespace App\Jobs;

use Mail;
use App\Mail\HelloEmail;

use Illuminate\Bus\Queueable;
use Illuminate\Contracts\Queue\ShouldQueue;
use Illuminate\Foundation\Bus\Dispatchable;
use Illuminate\Queue\InteractsWithQueue;
use Illuminate\Queue\SerializesModels;

class MatchSendEmail implements ShouldQueue
{
use Dispatchable, InteractsWithQueue, Queueable, SerializesModels;

/**
* Create a new job instance.
*
* @return void
*/
public function __construct()
{
//
}

/**
* Execute the job.
*
* @return void
*/
public function handle()
{
$email = new HelloEmail();
Mail::to('test@test.com')->send($email);
}
}
Step-3 Testing
Add the below line in your routes/web.php file.
Route::get('send-test-email', 'EmailController@sendEmail');
Add a new controller file called “EmailController.php” file in the app/Http/Controllers/ folder. The Code of the file will look like this.
<?php
namespace App\Http\Controllers;

use Illuminate\Http\Request;
use App\Jobs\MatchSendEmail;

class EmailController extends Controller
{
public function sendEmail()
{
$emailJob = new MatchSendEmail();
dispatch($emailJob);
}
}
Then visit url
<project_url>/send-test-email
And it will add the job in the “jobs” table.
How to run method in jobs
Step-1 create a job
To create a Queue Job run below command:
php artisan make:job RunMethods
In app/Jobs you can see the code like below:
<?PHP
namespace App\Jobs;

use Illuminate\Bus\Queueable;
use Illuminate\Contracts\Queue\ShouldQueue;
use Illuminate\Foundation\Bus\Dispatchable;
use Illuminate\Queue\InteractsWithQueue;
use Illuminate\Queue\SerializesModels;

class RunMethods implements ShouldQueue
{
     use Dispatchable, InteractsWithQueue, Queueable, SerializesModels;

       /**
       * Create a new job instance.
       *
       * @return void
       */
    public function __construct()
  {
               //
   }
    protected function start() {
        // your start logic
    }

    protected function stop() {
        // your stop logic
    }

    protected function process() {
        // will be overrittten
    }

       /**
       * Execute the job.
       *
       * @return void
       */
     public function handle()
     {
          $this->start();
          $this->process();
          $this->stop();
      }
 }
Step-2 Testing
Add the below line in your routes/web.php file.
Route::get('run-method', 'JobMethdController@sendEmail');
Add a new controller file called “JobMethodController.php” file in the app/Http/Controllers/ folder. The Code of the file will look like this.
<?php
namespace App\Http\Controllers;

use Illuminate\Http\Request;
use App\Jobs\RunMethods;

class JobMethodController extends Controller
{
public function sendEmail()
{
$jobMethod = new RunMethods();
dispatch($jobMethod);
}
}
How to run jobs from database
- Priority to run jobs :-
high,medium,lowanddefaultthese are the order of execution of the jobs.
php artisan queue:work --queue=high,medium,low,default --env=env_filename
If you want to run without cache use following command:
php artisan queue:listen --queue=high,medium,low,default --env=env_filename
php artisan queue:listen --queue=high,medium,low,default --env=develop
Note
If you make any changes in code of your Job class, then you must restart the queue:work command.