Generate Taxonomy CRUD
Introduction
Taxonomy likely refers to a feature or functionality within
the VaahCMS that allows you to manage and organize content using a system of classifications or categories.
Taxonomies are typically used to categorize content into different groups based on specific criteria.
NOTE
Follow this link to learn how to Access the Taxonomy Data:
Taxonomies Data
Taxonomy refer to a tool or mechanism for creating and managing categories or classifications for content.
These categories can be used to organize and group content items, making it easier to manage and navigate through a website or application.
Before you can use the taxonomies CRUD functionality in VaahCMS, you need to ensure that the module is generated and activated. The module likely provides the necessary infrastructure and user interface to create and manage taxonomies for your content.
NOTE
Follow this link to learn how to set up modules and themes using:
VaahCLI
Features & Demos
The Taxonomy CRUD functionality offers a robust set of features for efficiently managing and organizing your taxonomies:
- Create a New
Taxonomies - Create a
TaxonomoiesType(Parent) - Edit/Update the details of an already existing
Taxonomies. - Clone
Taxonomiesdetails. - Autofill
Taxonomiesfields. - Sort the
Taxonomieslist in ascending/descending order. - Perform Bulk Actions to change the status, trash, or delete
Taxonomies. - List All existing
Taxonomies. - Filter the
Taxonomieslist by searching using differentfields. - Filter the
Taxonomieslist by different status, including trashedTaxonomies. - Delete an existing
Taxonomies. - Delete or temporarily trash an already existing
Taxonomies.
Create taxonomies
the importance of creating modules as the foundation for organizing and managing various functionalities. Additionally, it highlights that a single module has the flexibility to contain multiple CRUD (Create, Read, Update, Delete) operations Click here to know about how to generate module.
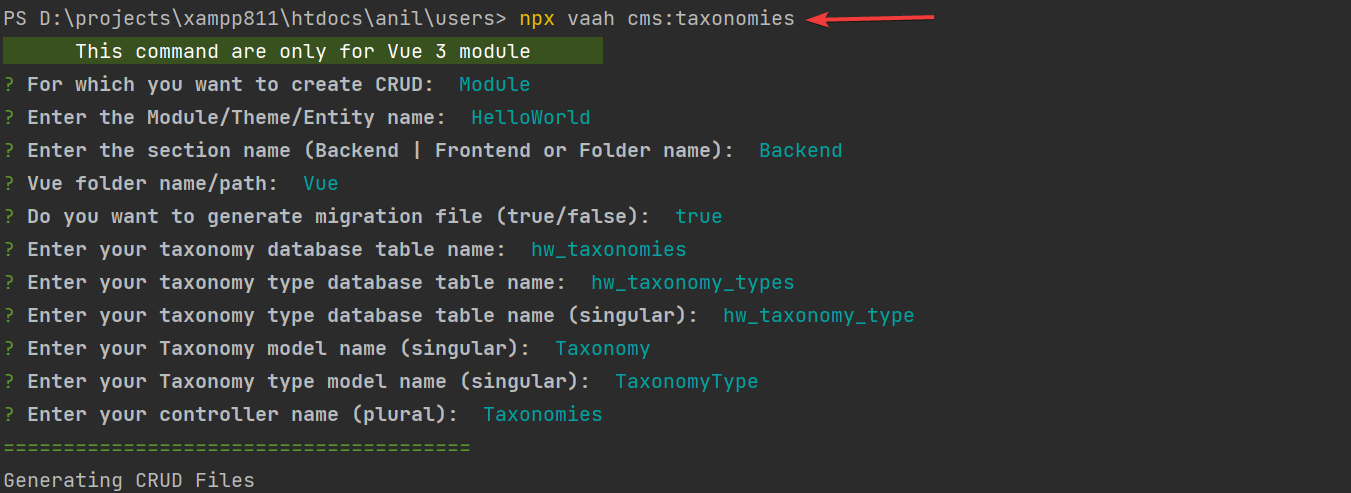
npx vaah cms:taxonomies
When presented with the command options, select Module by pressing the arrow keys and then hitting Enter if you're using a module for your application.
If your preference is to create taxonomies CRUD within themes, choose Themes instead.
In our specific scenario, where we're creating taxonomies CRUD within a module, please be sure to select Module and press Enter to proceed with the setup :
  This command are only for Vue 3 module
  For which you want to create CRUD:  (Use arrow keys)
> Module............................................................0
  Theme.............................................................1
  Custom Path.......................................................2

  //........................................Press enter on the module
When you selected module, this message is displayed in your terminal
For which you want to create CRUD: Module
If you've created multiple modules within your VaahCMS project, simply type the name of the specific
module where you intend to generate the taxonomies CRUD.
Enter the Module/Theme/Entity name: <module-name>
In this prompt, simply press Enter.
Enter the section name (Backend | Frontend or Folder name): Backend
In this prompt, simply press Enter.
Vue folder name/path: Vue
For generating a migration file, enter true and press Enter.
If you don't want to generate one, enter false and press Enter.In our specific scenario we choose true.
Do you want to generate migration file (true/false): true
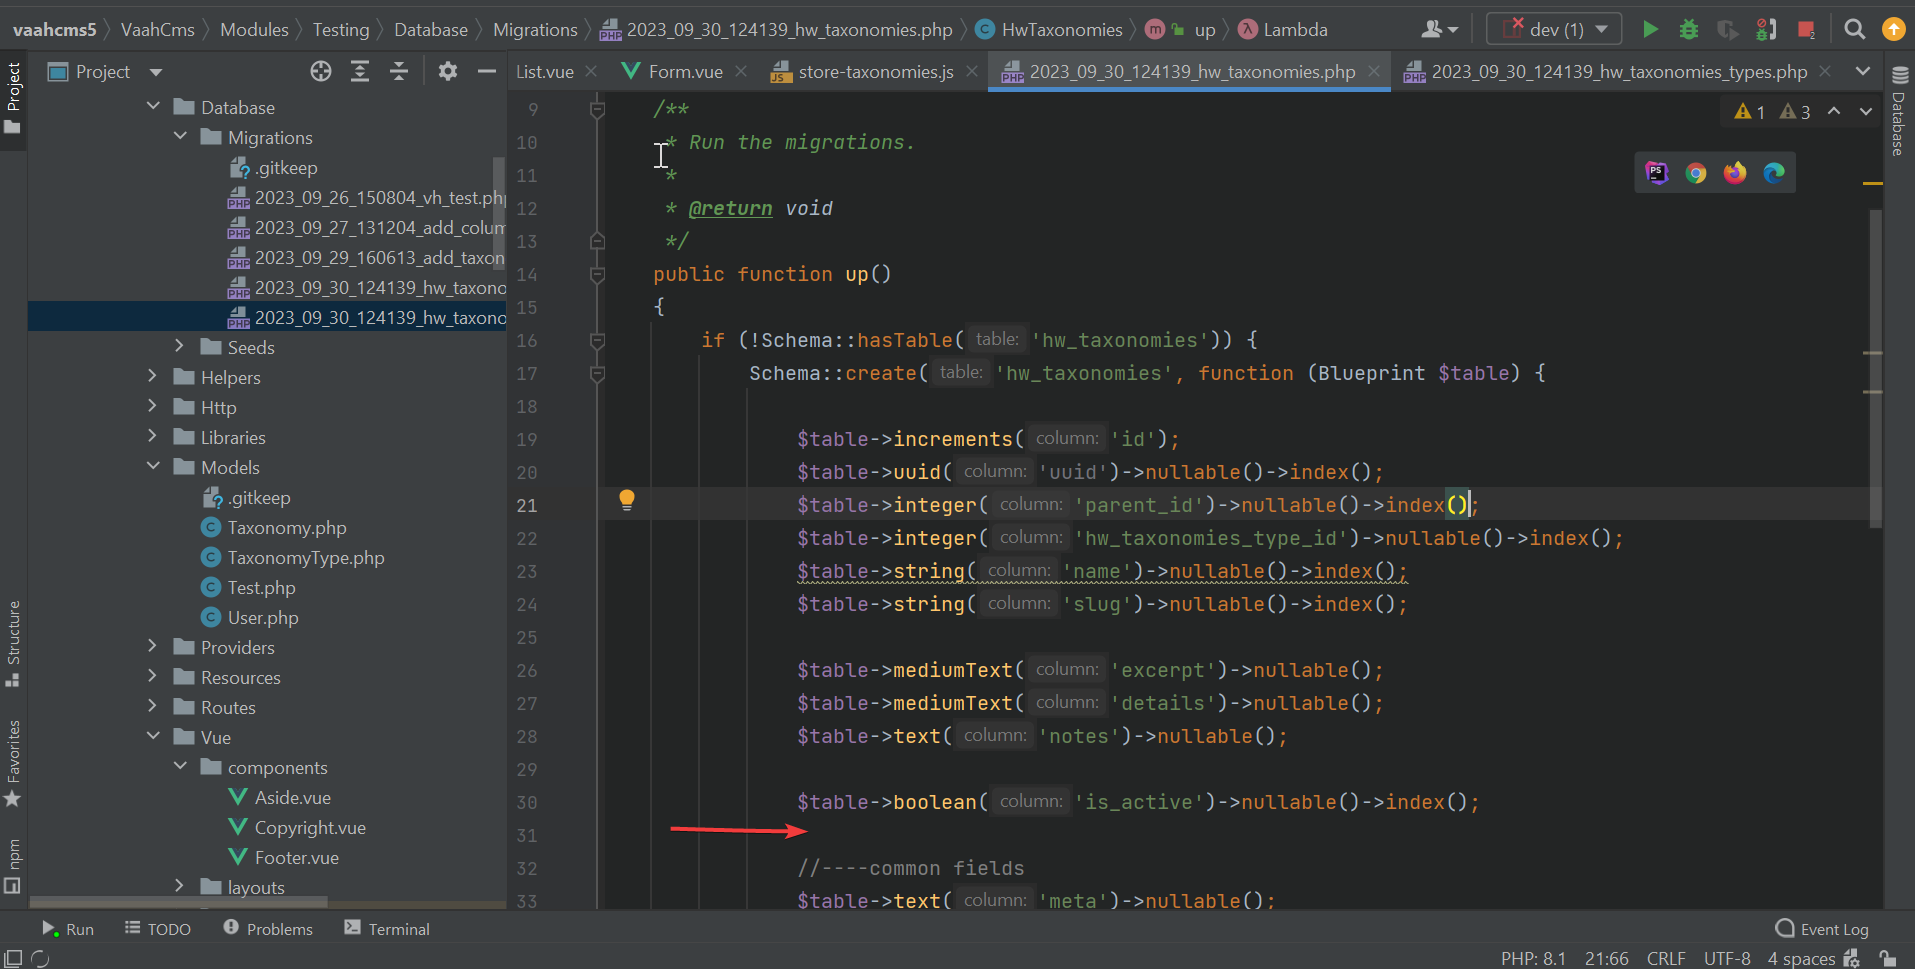
When prompted, please enter the desired table name for your taxonomy database, and then press Enter.
In this case, the table name is hw_taxonomies.
Enter your taxonomy database table name: hw_taxonomies
When prompted, provide the table name for your taxonomy types database, and then press Enter.
In this example, the table name is hw_taxonomy_types.
Enter your taxonomy type database table name: hw_taxonomy_types
When prompted, input the singular form of the table name for your taxonomy types database, and then press Enter.
In this case, the singular table name is hw_taxonomy_type.
Enter your taxonomy type database table name (singular): hw_taxonomy_type
Enter the singular form of the model name for your Taxonomy, and then press Enter.
In this case, the singular model name is Taxonomy.
Enter your Taxonomy model name (singular): Taxonomy
Provide the singular form of the model name for your Taxonomy type, and then press Enter.
In this case, the singular model name is TaxonomyType.
Enter your Taxonomy type model name (singular): TaxonomyType
Input the plural form of the controller name, and then press Enter.
In this case, the plural controller name is Taxonomies
Enter your controller name (plural): Taxonomies
Follow These Steps To Set up Taxonomy Crud:
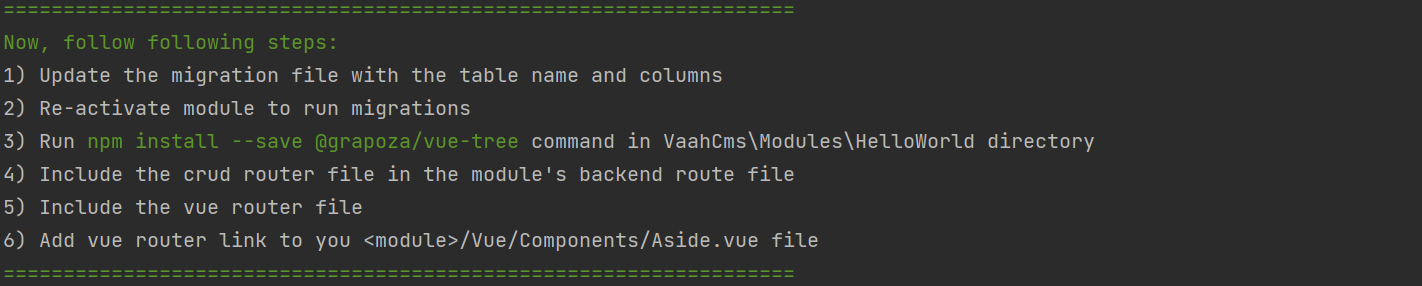
Step 1
If you want to include additional columns in an existing database table you can add the column name in the migration using below image, you have the option to add them before performing a migration. In this context, before migration refers to the period when you activate a module. Once the module is activated, the migration process occurs automatically, and any specified changes,
including the addition of new columns, are applied to the database schema.
Step 2
To run migrations, you need to re-activate your module. This involves deactivating the module and then activating it again.
This process is necessary to trigger and execute the migration tasks. Deactivating and reactivating the module essentially refreshes its state and allows the system to apply any pending migrations,
ensuring that your database is updated with the latest changes and schema modifications.

Step 3
Run npm install --save @grapoza/vue-tree command in VaahCms\Modules<module-name> \Vue directory.
This command installs the necessary dependencies to generate a Vue tree component, allowing you to visualize and interact with your taxonomies in a hierarchical structure within your module's Vue application.
Run npm install --save @grapoza/vue-tree command
Step 4
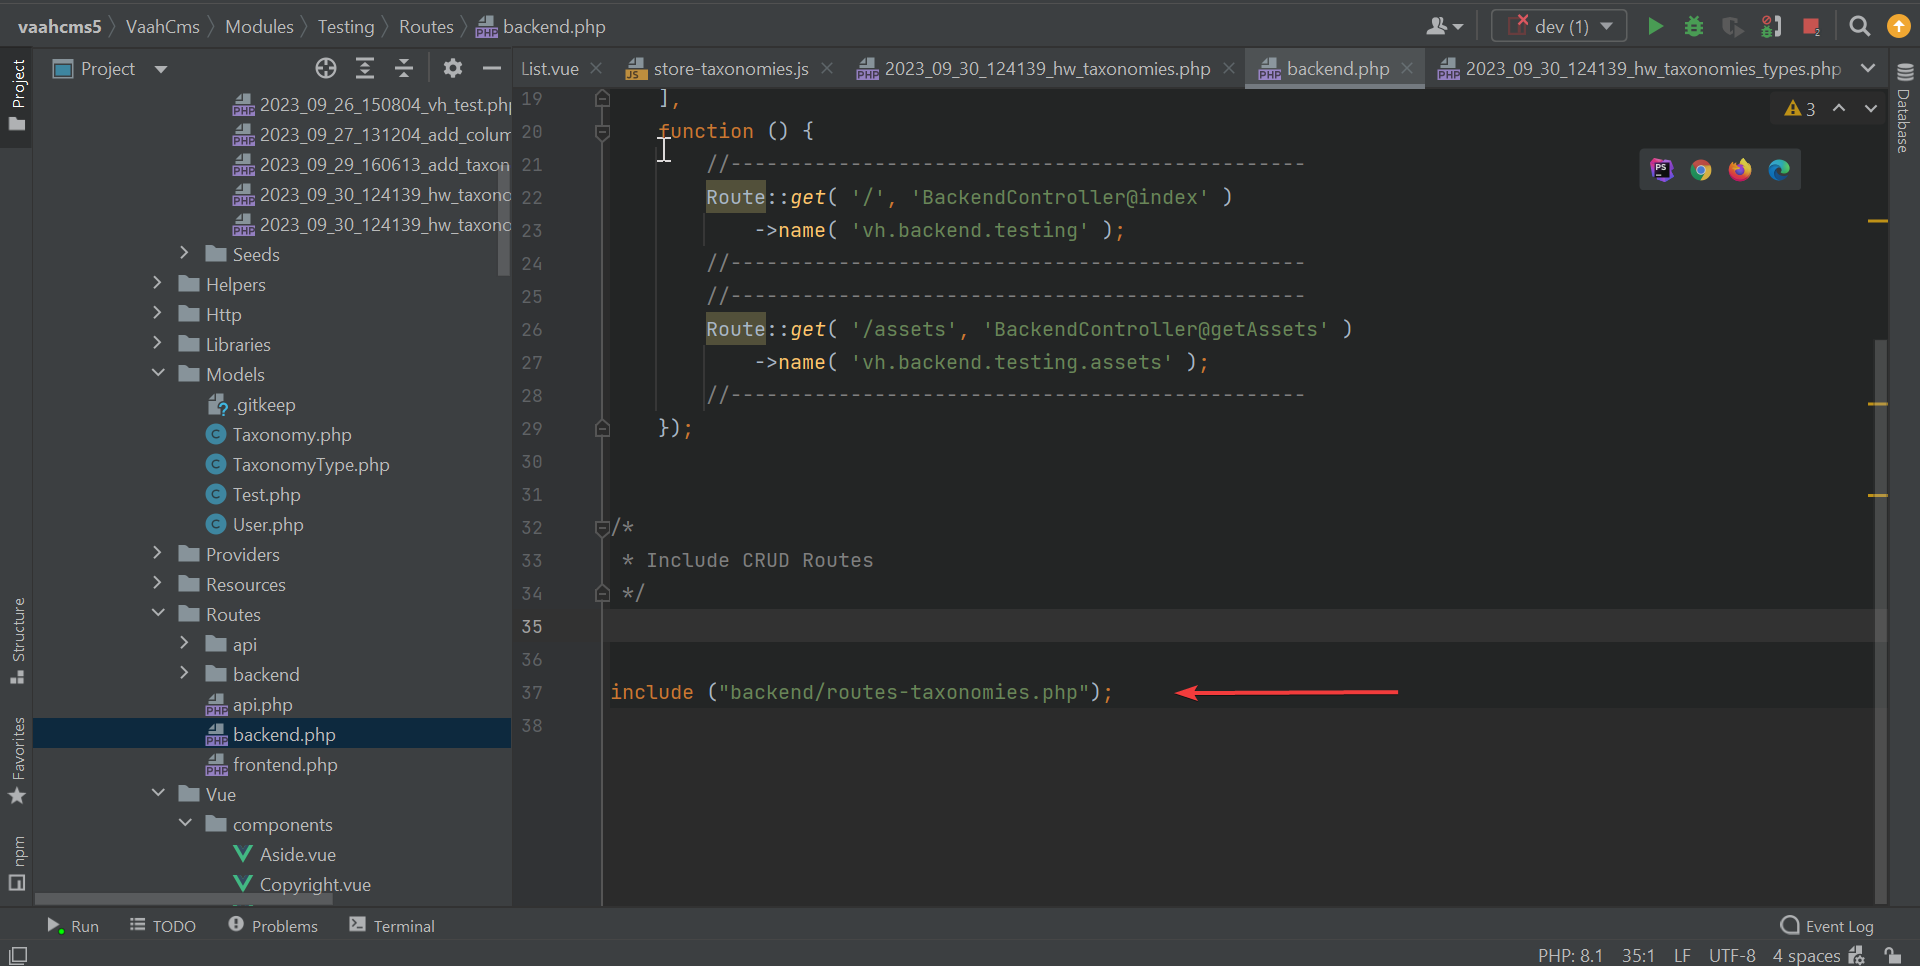
To integrate the Laravel router file into your module, you need to include it in the route file specific to that module. This ensures that the routes defined in the Laravel router file are accessible and functional.
VaahCms/Modules/<module-name>/Routes/backend.php
Add this code in the last.
//-------------------------------------------------------
include("backend/routes-taxonomies.php");
//-------------------------------------------------------
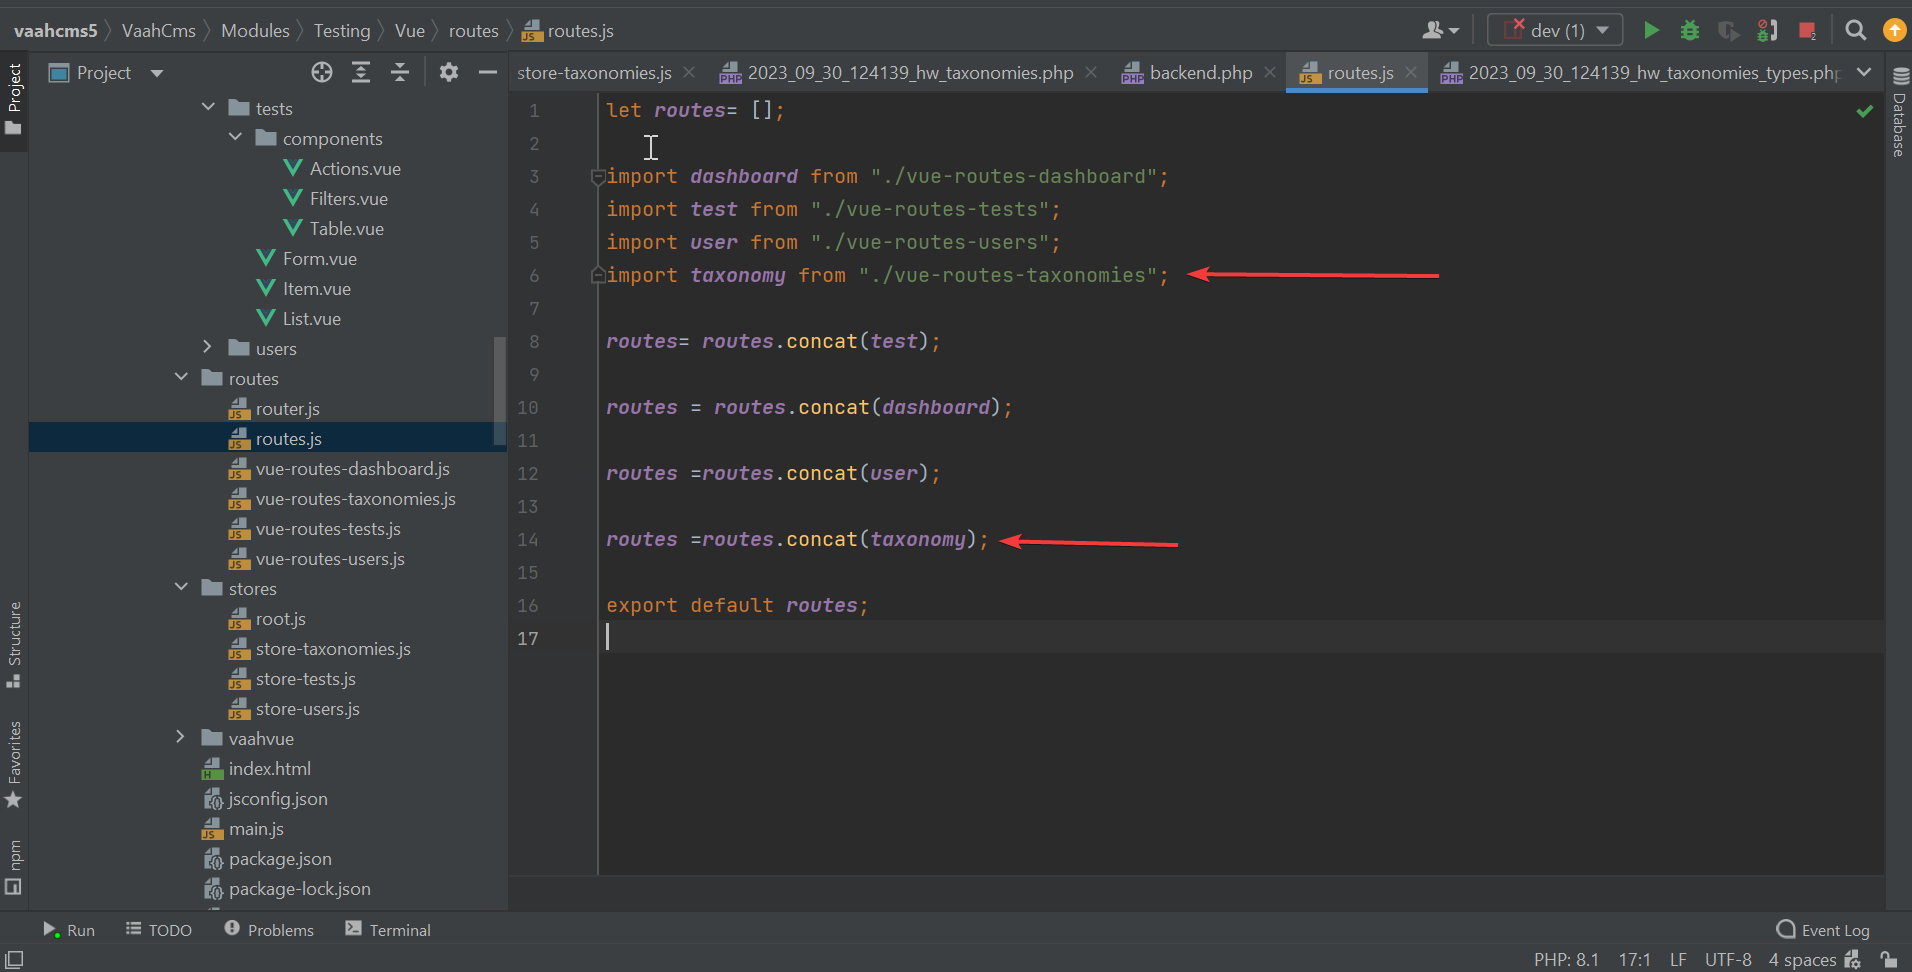
Step 5
You can do this by adding the provided code snippet to the mentioned file path. This action ensures that the Vue router file is recognized and its routes are accessible within your module's Vue application
VaahCms/Modules/<module-name>/Vue/routes/routes.js
Add this code to the above path.
//-------------------------------------------------------
import taxonomies from "./vue-routes-taxonomies";

routes = routes.concat(taxonomies);
//-------------------------------------------------------
Step 6
To activate the router file when clicking on Taxonomies, you should navigate to the aside.vue component located
in VaahCms/Modules/<module-name>/Vue/components/ and include the provided code within the items section of the module.
//-------------------------------------------------------
        label: '<module-name>',
        items: [
           {
                label: 'Taxonomies',
                icon: 'fa-regular fa-chart-bar',
                to: "/taxonomies"
            },
        ]
//-------------------------------------------------------
Call router file when clicking on the Taxonomies
VaahCms/Modules/<module-name>/Vue/components/aside.vue
Add this code to items of the module.
(VaahCms/Modules/<module-name>/Vue/components/aside.vue).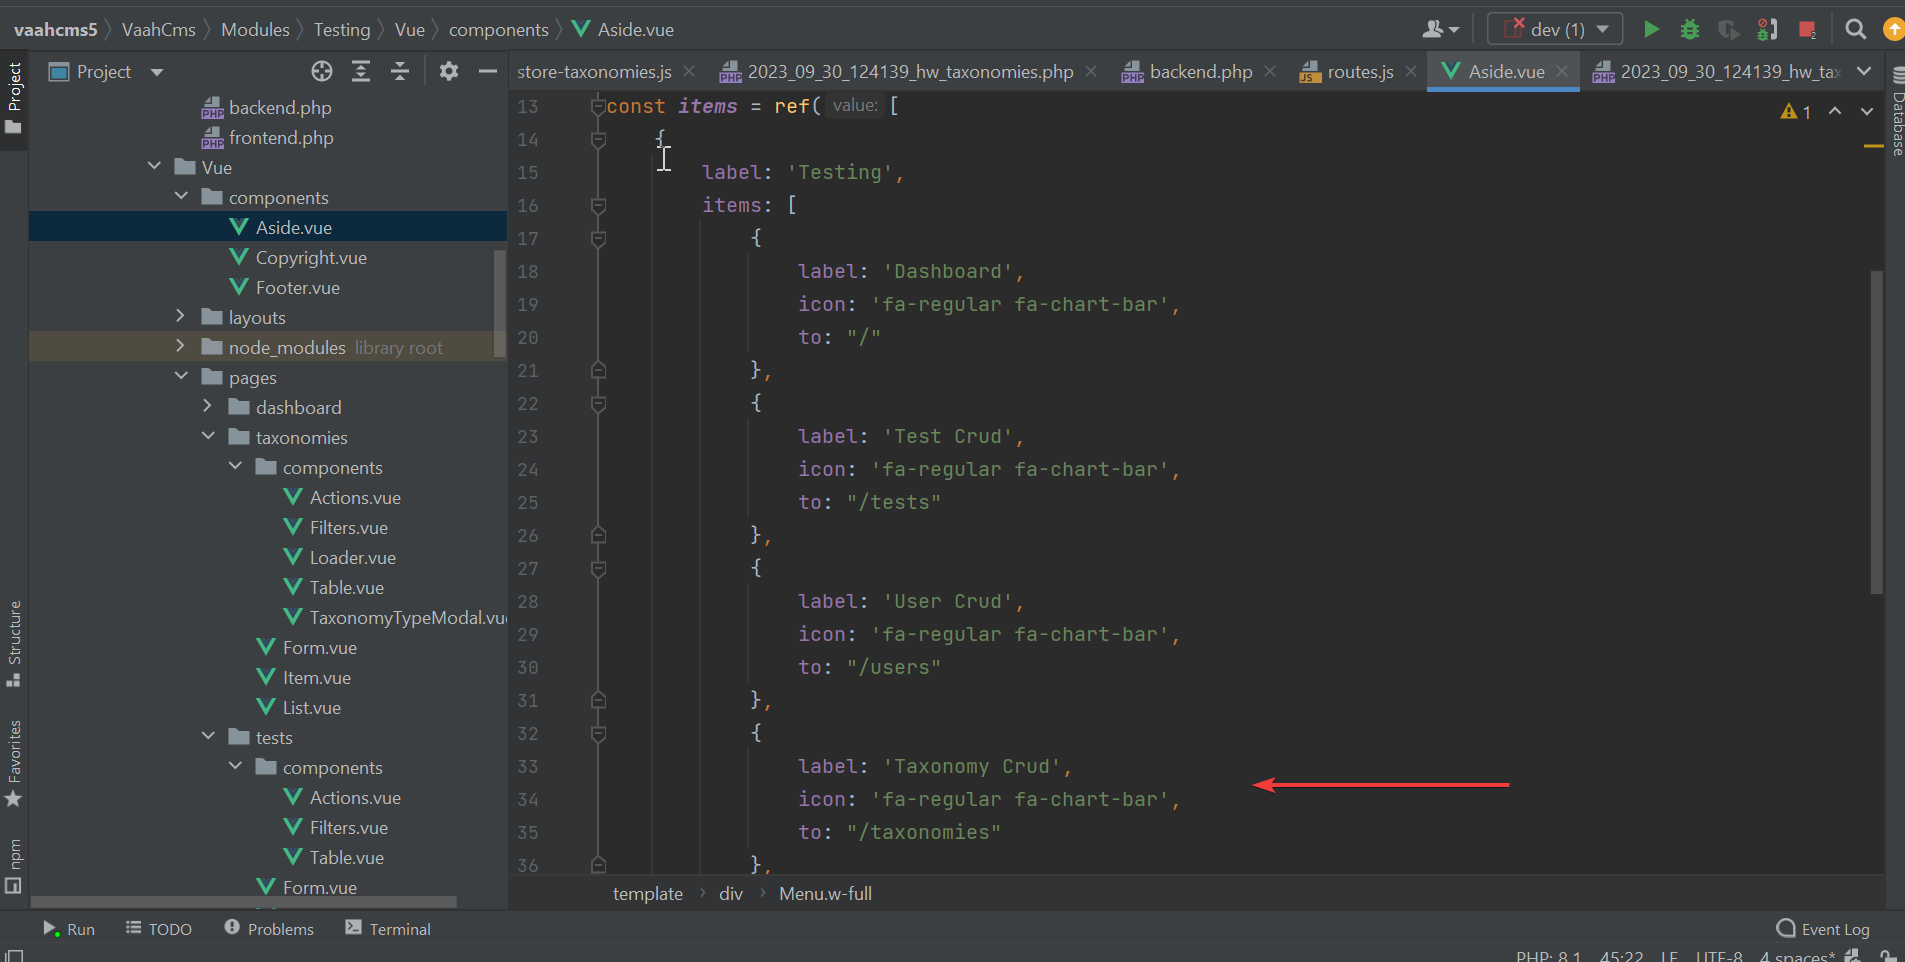
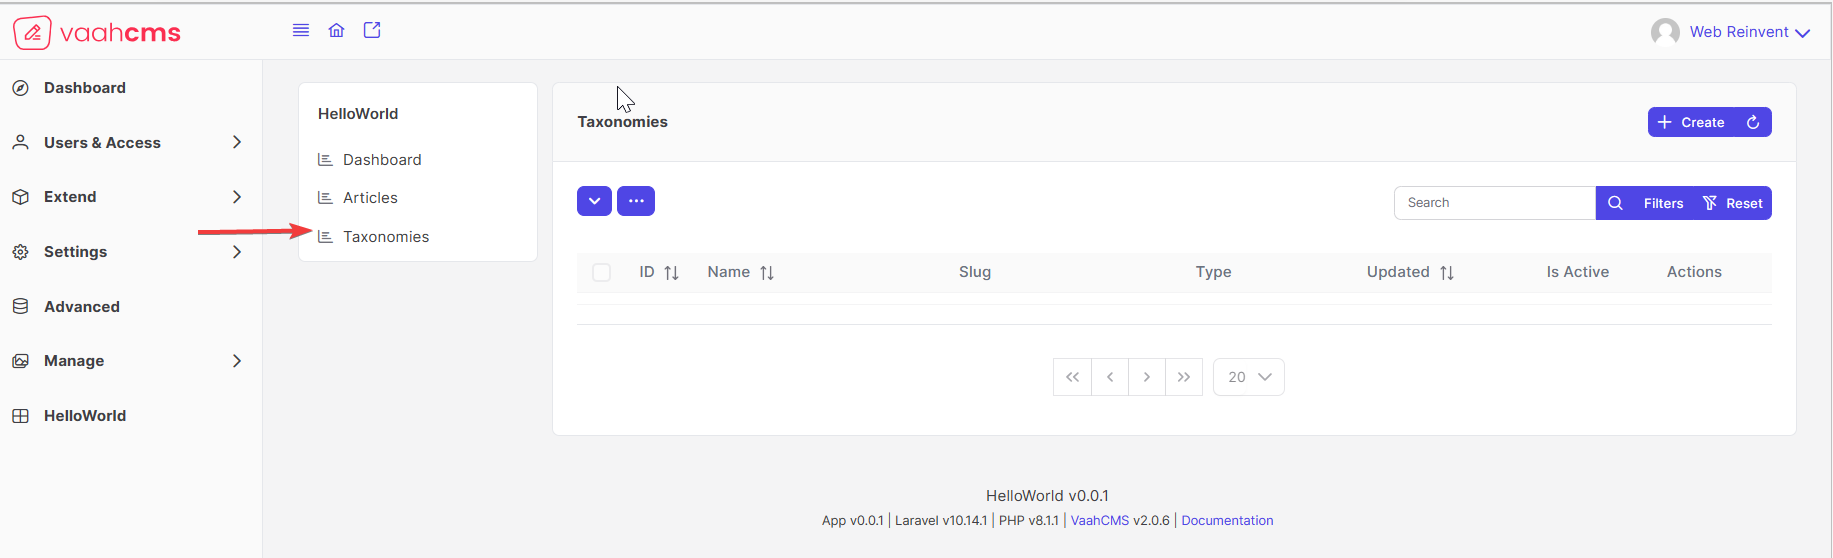
Now check this result of taxonomies
To enhance your comprehension, we recommend watching this video for a more in-depth explanation.