Notification
Introduction
Through this panel you can control all the notification related things like what subject, body, from etc.
Visit following url you will see the Notification section:
<public-url>/backend#/vaah/settings/notifications
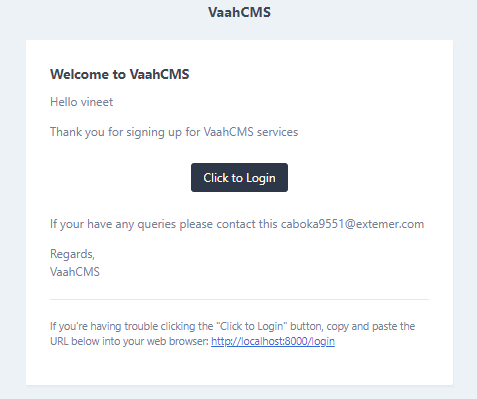
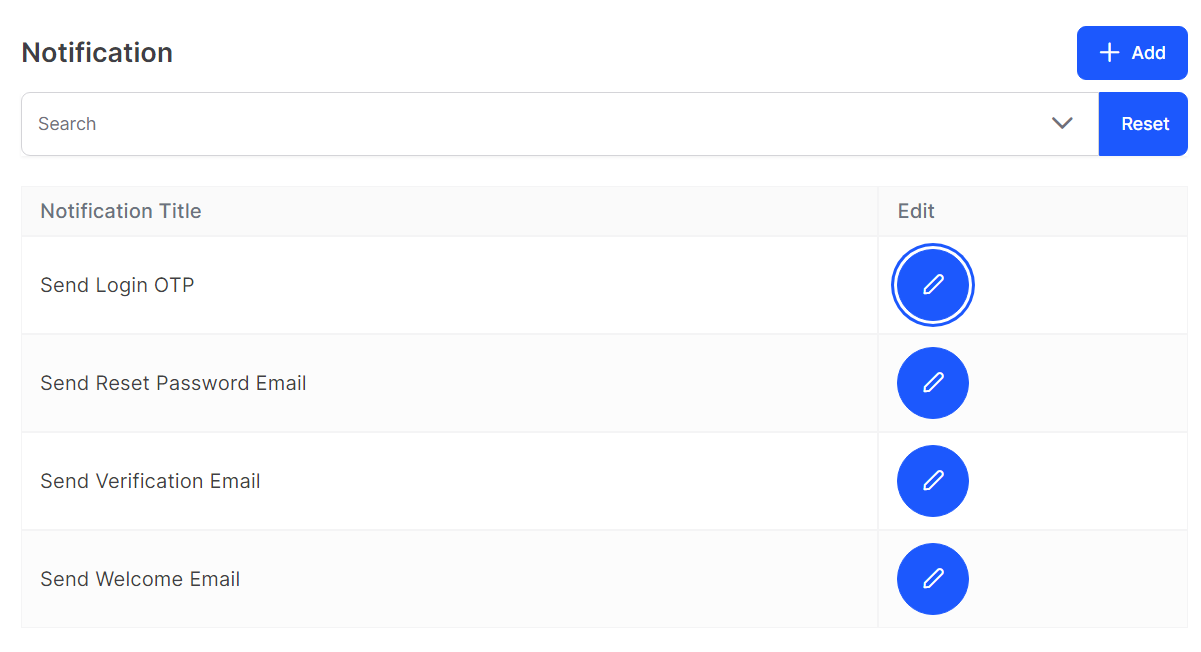
Below Image is an example of notification.

Usage
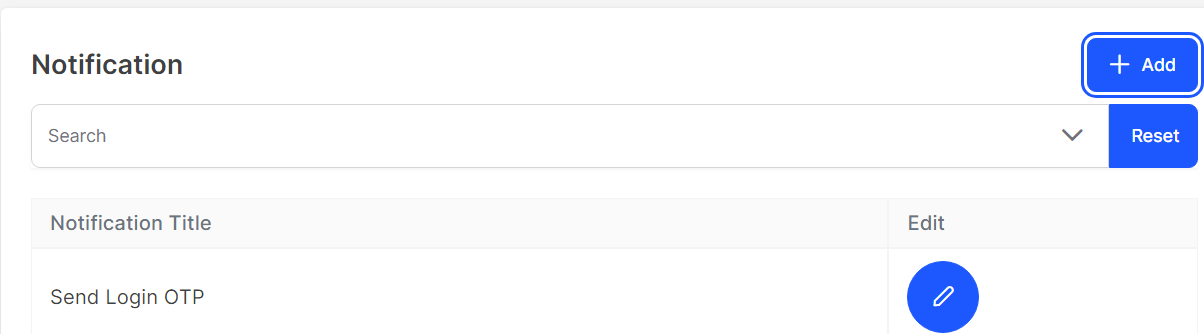
Add into notifications
For adding need to click Add button, at the top-right corner.
like below image :
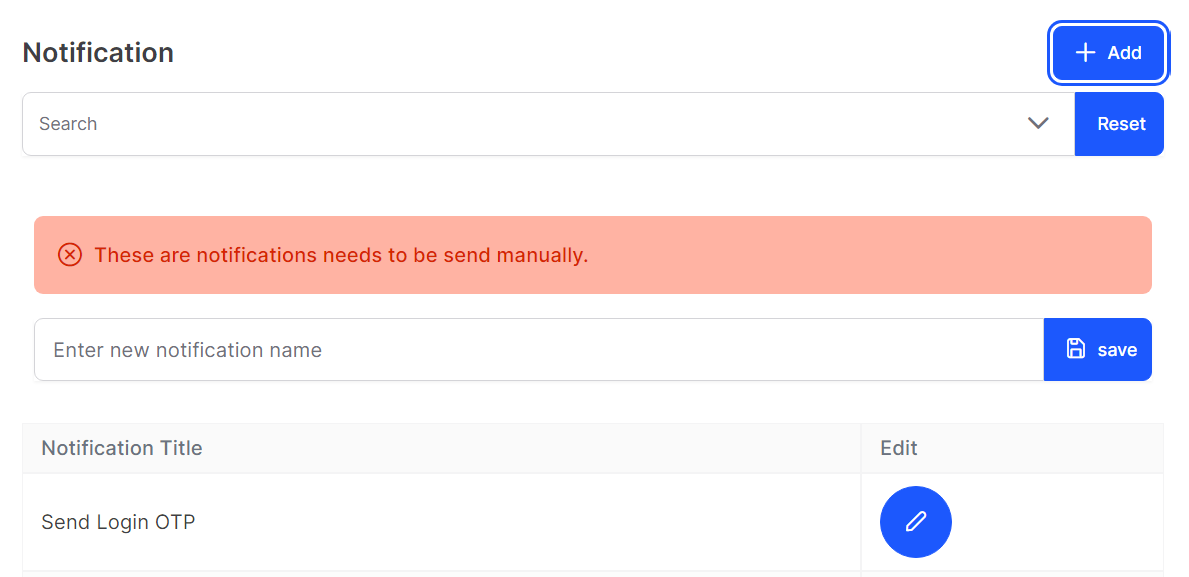
After clicking Add a text field section will expand below message with save button.
Fill the field by notification name and click on save it will appear in the list below.
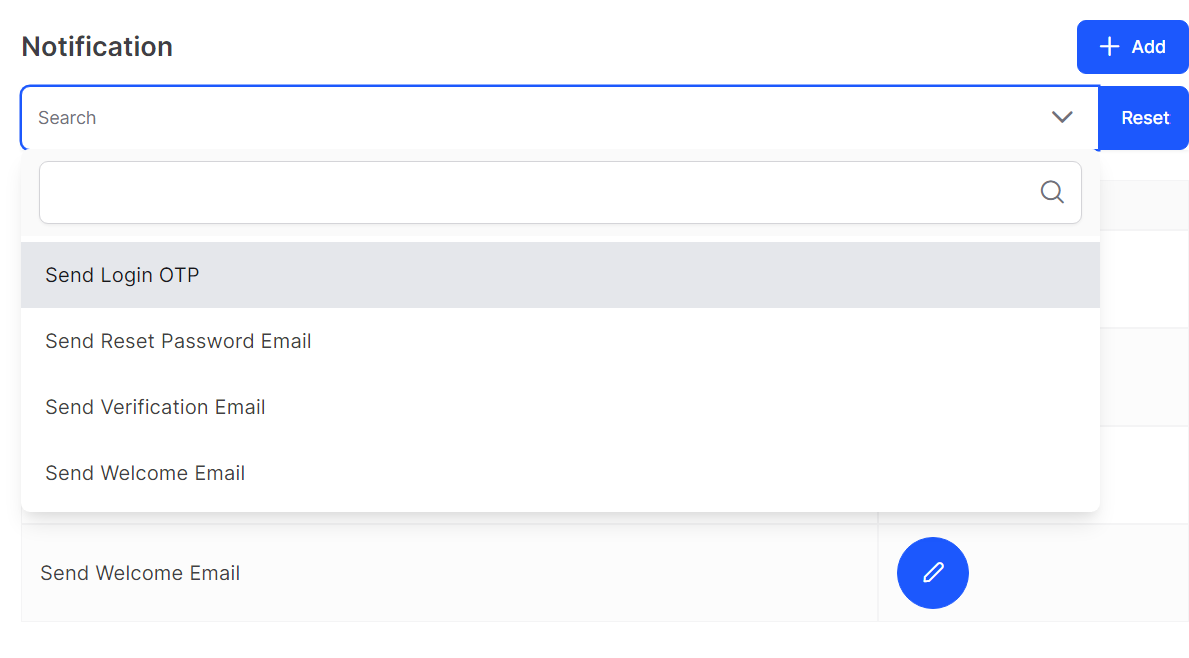
Filter of notification
A search field is there which will filter according to notification title, by using filter one can edit notifications.
Below video for better understanding.
How to edit notification
To edit notification you need to click the edit button present on the right side of the list.
After clicking this button edit page will open like below image :
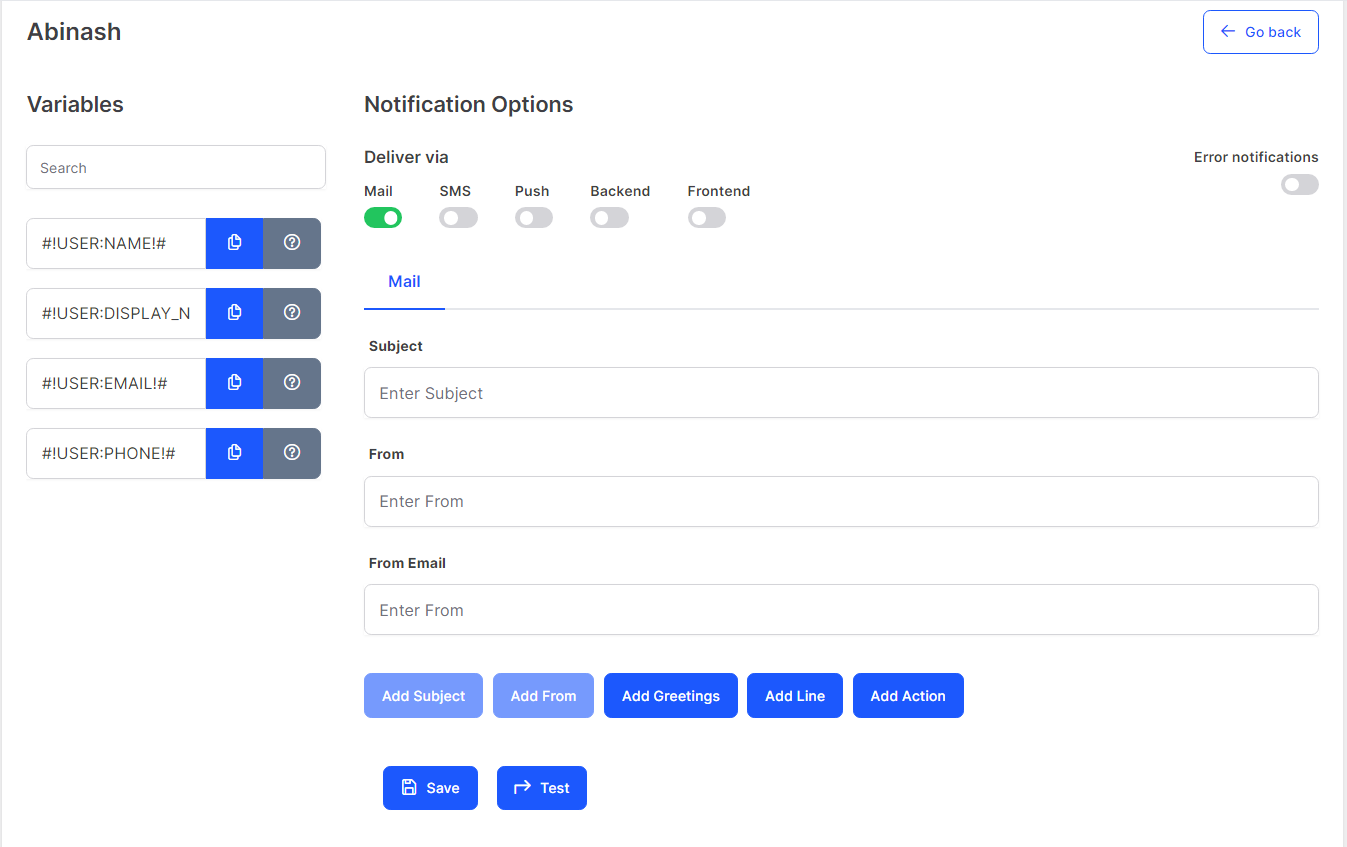
Go Back button will redirect to notification list page
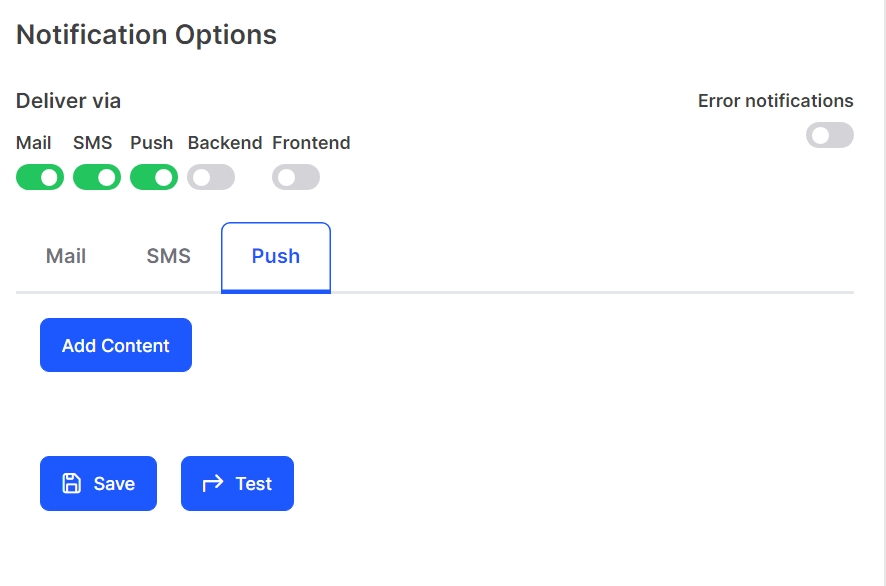
There is various options to send notification like below image:
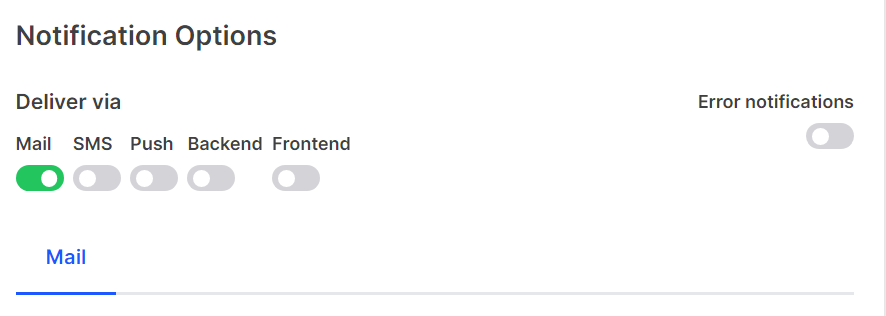
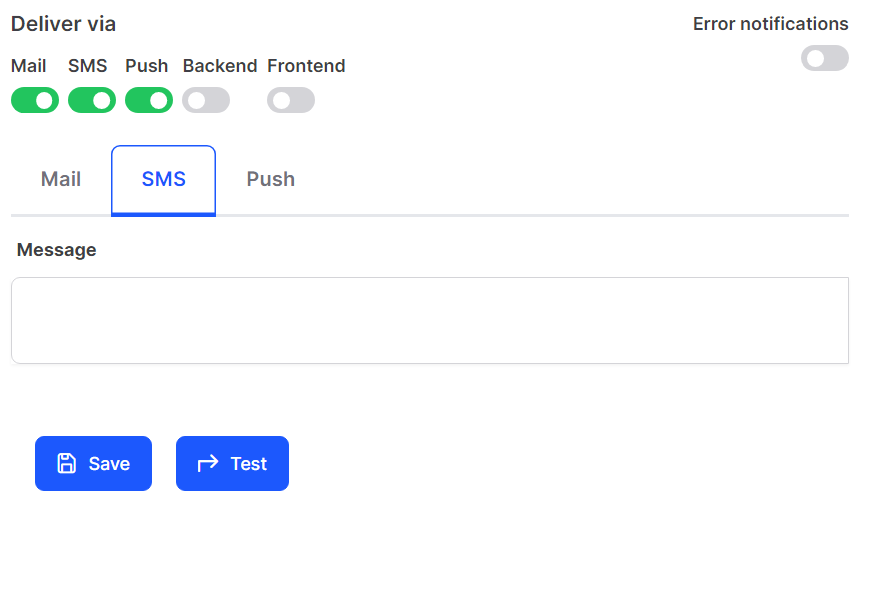
One can use those options by enabling toggles. Once toggle is enabled then respective tab will appear below.
Like below image :
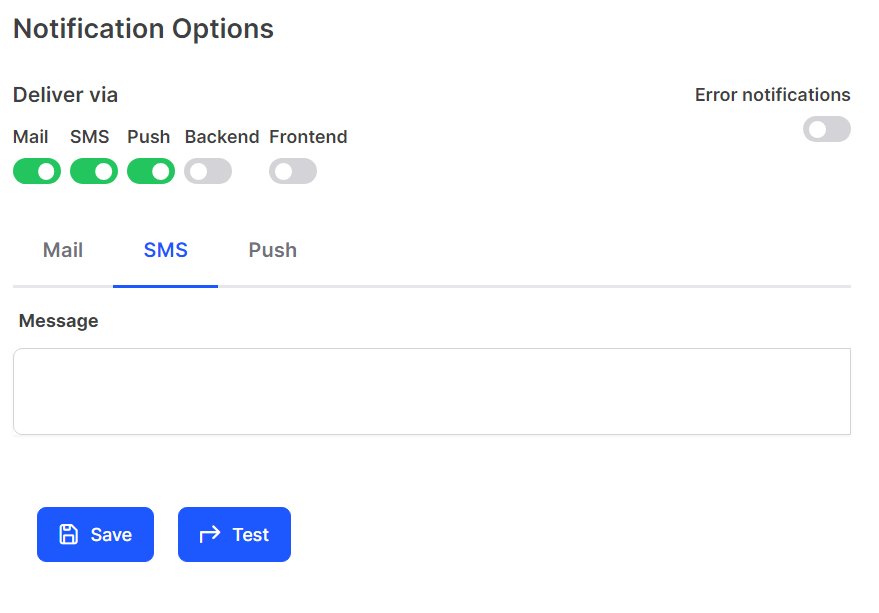
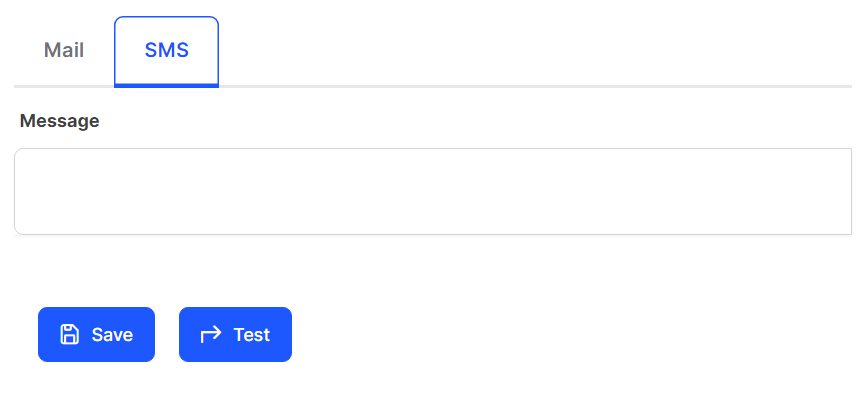
Once Tab is visible then click on tab and a button Add content will appear. By clicking it will add fields for content.
After put content according to requirement one can save it by clicking save button present in the bottom-left corner
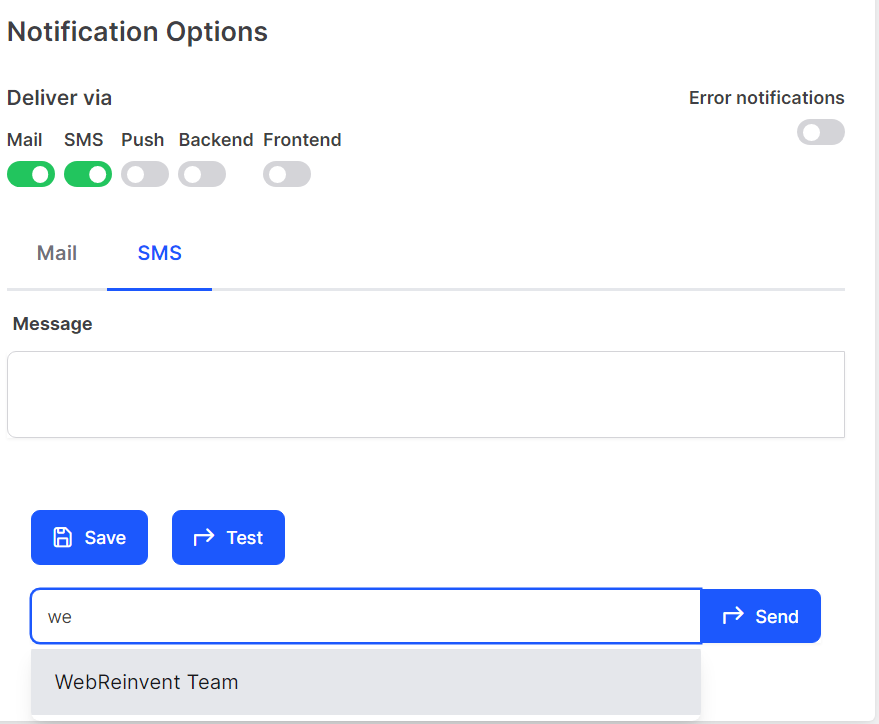
Or test by clicking Test button besides it.
A text field will be available in a extended section under Test button by clicking Test button.
One can type anything it will search users and by selecting user notification can be tested clicking Send button.
Follow below videos for better understanding:
Create notification via Seeds
You need to create two json files in your module or theme at following locations:
<theme-or-module-path>/Database/Seeds/json/notifications.json with following content:
[
    {
        "name": "<notification-name>",
        "via_mail": 1,
        "via_sms": 0,
        "via_push": 0,
        "via_backend": 1,
        "via_frontend": 0
    }
]
You can choose the various via by which you want to send the notification.
<theme-or-module-path>/Database/Seeds/json/notification_contents.json
In this file slug is coming from the <notification-name> and each {} object represent the a line for the notification.
[
    {
        "slug": "<notification-name-slug>",
        "via": "mail",
        "sort": 0,
        "key": "subject",
        "value": "Welcome Email"
    },
    {
        "slug": "<notification-name-slug>",
        "via": "mail",
        "sort": 1,
        "key": "from",
        "meta": {
            "name": "#!ENV:MAIL_FROM_NAME!#"
        },
        "value": "#!ENV:MAIL_FROM_ADDRESS!#"
    },
    {
        "slug": "<notification-name-slug>",
        "via": "mail",
        "sort": 2,
        "key": "line",
        "value": "Hello #!USER:NAME!#"
    },
    {
        "slug": "<notification-name-slug>",
        "via": "backend",
        "sort": 0,
        "key": "content",
        "value": "Lorem ipsum #!ENV:APP_NAME!#. Thanks!"
    },
    {
        "slug": "<notification-name-slug>",
        "via": "backend",
        "sort": 1,
        "key": "action",
        "value": "Click",
        "meta": {
            "action":"#!ROUTE:VH.VERIFICATION!#"
        }
    }
]
| Name | Description |
|---|---|
slug | It is the slug of the notification name. |
via | Represent that this {} object belong to how the notification will be sent. |
sort | Index or sequence of the each object. |
key | This represent the type of object. mail can have following keys : greeting, line, action, from, subjectbackend can have following keys: content, action |
value | Value contain the actual content of the key. This can have dynamic values like #!ENV:APP_NAME!# will be replace by the APP_NAME |
| meta | Any additional information required. Eg: For key action it requires Label and Link like a hyperlink requires a Label and Link |
Now to these notification should be created, whenever the module or theme gets activated. So, now we need to use DatabaseTableSeeder.php , add following methods to seed these notifications:
Include use Illuminate\Support\Facades\DB in your DatabaseTableSeeder.php
...
public function run()
{
        $this->seedNotifications();
        $this->seedNotificationContent();
}
 public function seedNotifications()
{
        $list = VaahSeeder::getListFromJson(__DIR__ . "/json/notifications.json");
        VaahSeeder::storeSeedsWithUuid('vh_notifications', $list, 'slug', true, 'name', false);
}
public function seedNotificationContent()
{
        $list = VaahSeeder::getListFromJson(__DIR__ . "/json/notification_contents.json");

        foreach ($list as $item) {
            $notification = \DB::table('vh_notifications')
                ->where('slug', $item['slug'])
                ->first();

            if (!$notification) {
                continue;
            }

            $exist = \DB::table('vh_notification_contents')
                ->where('vh_notification_id', $notification->id)
                ->where('sort', $item['sort'])
                ->where('via', $item['via'])
                ->first();

            $item['vh_notification_id'] = $notification->id;

            if (isset($item['meta'])) {
                $item['meta'] = json_encode($item['meta']);
            }

            unset($item['slug']);


            if (!$exist) {
                DB::table('vh_notification_contents')->insert($item);
            } else {
                DB::table('vh_notification_contents')
                    ->where('vh_notification_id', $notification->id)
                    ->where('sort', $item['sort'])
                    ->where('via', $item['via'])
                    ->update($item);
            }
        }
}
...
Follow below videos for better understanding:
How to show notification variables?
If you want to show variables name in notification sidebar.
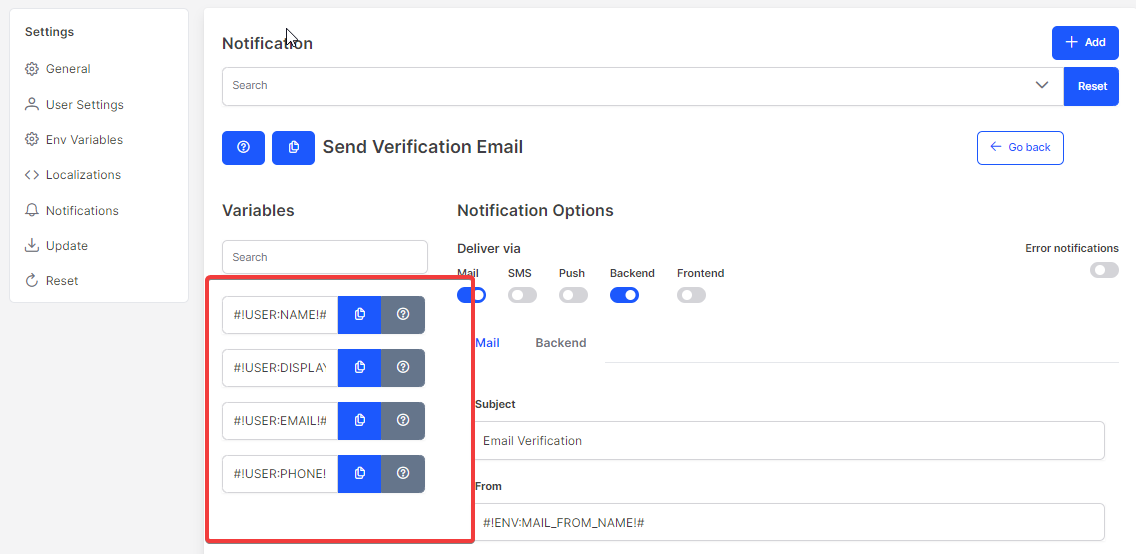
You need to add getNotificationVariables method in ExtendController of your Theme or Module.
public function getNotificationVariables()
{

    $list = [
        [
            'name'=>'#!USER:NAME!#',
            'details'=>'Will be replaced with name.',
        ],
        [
            'name'=>'#!USER:DISPLAY_NAME!#',
            'details'=>'Will be replaced with display name.',
        ],
        [
            'name'=>'#!USER:EMAIL!#',
            'details'=>'Will be replaced with email.',
        ],
        [
            'name'=>'#!USER:PHONE!#',
            'details'=>'Will be replaced with phone.',
        ]
    ];

    $response['success'] = true;
    $response['data'] = $list;

    return $response;
}
How to add notification actions?
If you want to add action variables in notification.
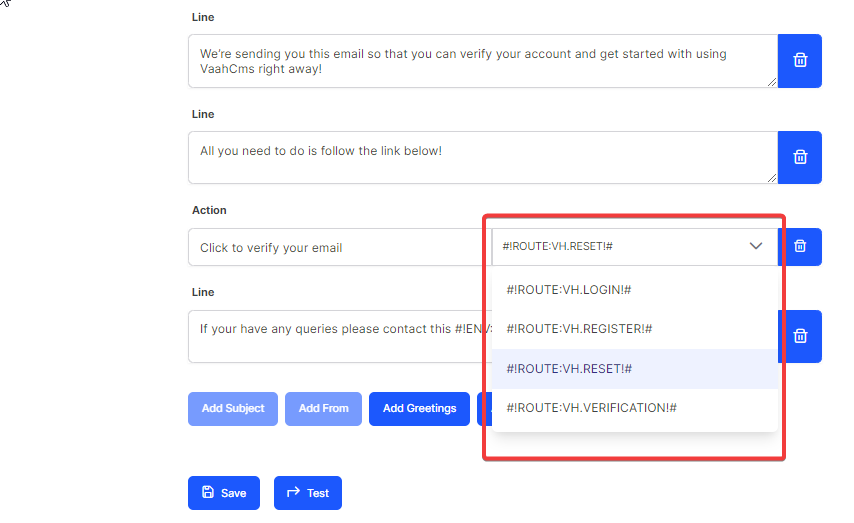
You need to add getNotificationActions method in ExtendController of your Theme or Module.
public function getNotificationActions()
{

    $list = [
        [
            'name'=>'#!ROUTE:VH.LOGIN!#'
        ],
        [
            'name'=>'#!ROUTE:VH.REGISTER!#'
        ],
        [
            'name'=>'#!ROUTE:VH.RESET!#'
        ],
        [
            'name'=>'#!ROUTE:VH.VERIFICATION!#'
        ]
    ];

    $response['success'] = true;
    $response['data'] = $list;

    return $response;
}
How to use variable strings?
There are three types of variable strings.
#!USER:VARIABLE_NAME!#: If the notification contains #!USER:NAME!# string and then the $input array must be: $inputs = "user_id" => X. This will replace the string with value provided in the User Entity.#!PARAM:VARIABLE_NAME!#: If the notification contains #!PARAM:NAME!# string and then the $input array must be: $inputs = "name" => "John". This will replace the string with value provided in the inputs.#!ROUTE:VARIABLE_NAME!#: If the notification contains #!ROUTE:VH.LOGIN!# string. This will replace the string withurlof thatroute nameprovided in thePHP Routes.
$notification = \WebReinvent\VaahCms\Models\Notification::where('slug', "<notification-slug>")->first();

if($notification)
{

    $inputs = [
            "user_id" => xxx,
            "notification_id" => xxx,
        ];

    \WebReinvent\VaahCms\Models\Notification::send(
        $notification, $user, $inputs
    );
}
How to add Custom Url?
To add custom url, you need to add param string of custom url: #!PARAM:CUSTOM_URL!#.
You can add this param string in Notification Actions.
public function getNotificationActions()
{

    $list = [
        [
            'name'=>'#!PARAM:CUSTOM_URL!#'
        ]
    ];

    $response['success'] = true;
    $response['data'] = $list;

    return $response;
}
This is how you can add custom url in method.
custom_url name based on your #!PARAM:CUSTOM_URL!#
$notification = \WebReinvent\VaahCms\Models\Notification::where('slug', "<notification-slug>")->first();

if($notification)
{

    $inputs = [
            "user_id" => xxx,
            "notification_id" => xxx,
            "custom_url" => 'https://custom-url',
        ];

    \WebReinvent\VaahCms\Models\Notification::send(
        $notification, $user, $inputs
    );
}
Follow below videos for better understanding:
How to add Dynamic variable in Url
To add dynamic variable in Url, you need to add route string #!ROUTE:VARIABLE_NAME!#.
For extend your Action Variable You need to add getNotificationActions method in ExtendController of your Module.
 public function getNotificationActions()
    {

        $list = [
            [
                'name'=>'#!ROUTE:VARIABLE_NAME!#'
            ],
        ];

        $response['success'] = true;
        $response['data'] = $list;

        return $response;
    }
Add your variable route in <module-path>/Routes/backend.php
 Route::get( '/reset/{code}', 'ExampleController@Examplefunction' )
            ->name( 'variable_name' );
This is how you can add dynamic variable in Url.
$notification = \WebReinvent\VaahCms\Models\Notification::where('slug', "<notification-slug>")->first();

        if($notification)
        {

            $inputs = [
                "user_id" => xxx,
                "notification_id" => xxx,
                "route" => [
                    "code" => variable,
                ]
            ];

            \WebReinvent\VaahCms\Models\Notification::send(
                $notification, $user, $inputs
            );
        }
Follow below videos for better understanding:
Sending without Laravel Queues
If you want to send the notification without Laravel queues, you can use following code
$notification = \WebReinvent\VaahCms\Models\Notification::where('slug', "<notification-slug>")->first();

if($notification)
{

    $inputs = [
            "user_id" => xxx,
            "notification_id" => xxx,
        ];

    \WebReinvent\VaahCms\Models\Notification::send(
        $notification, $user, $inputs
    );
}
Sending notifications with Laravel Queues
Note: By default VaahCMS does not use Laravel queues/jobs to send the notification. You must enable it, read Setup Notifications with queues section to know more
To send notification with Laravel Queues, you can use following code:
$notification = \WebReinvent\VaahCms\Models\Notification::where('slug', "<notification-slug>")->first();

if($notification)
{

    $inputs = [
            "user_id" => xxx,
            "notification_id" => xxx,
        ];

    \WebReinvent\VaahCms\Models\Notification::dispatch(
        $notification, $user, $inputs, $priority
    );
}
| Name | Description |
|---|---|
$notification | is the instance of WebReinvent\VaahCms\Entities\Notification |
$user | is the instance of WebReinvent\VaahCms\Entities\User |
$inputs | is the a data array contain values of strings. user_id and notification_id are required params. Eg. 1. If the notification contains #!PARAM:NAME!# string and then the $input array must be: $inputs = "name" => "John" This will replace the string with value provided in the inputs. 2. If the notification contains #!USER:NAME!# string and then the $input array must be: $inputs = "user_id" => X This will replace the string with value provided in the User Entity. |
$priority | it is the order of execution of the jobs. You can provide following values: high ,medium, low, & default |
Setup Laravel Queues for VaahCMS
Follow the following steps:
- Set
QUEUE_CONNECTIONtodatabasein your activeenvfile - Visit
Setting > General > Site Settings > Laravel Queuesin yourbackend dashboardand enable it. - Run or setup
cron/daemonjob for
php artisan queue:work --queue=high,medium,low,default --env=env_filename
If you want to run without cache use following command:
php artisan queue:listen --queue=high,medium,low,default --env=env_filename eg:
php artisan queue:listen --queue=high,medium,low,default --env=develop
If you make any changes in code of your Job class, then you must restart the queue:work command.
Note: When sending notifications, be sure to set the MAIL_FROM_ADDRESS and MAIL_FROM_NAME in your env file. This value will be used as the sender of the email and name of your mail notification messages.
Follow below videos for better understanding:
Notification Seeds
notifications.json
[
    {
        "name": "Send Welcome Email",
        "via_mail": 1,
        "via_sms": 0,
        "via_push": 0,
        "via_backend": 1,
        "via_frontend": 0
    }
]
notification_contents.json
[
    {
        "slug": "send-welcome-email",
        "via": "mail",
        "sort": 0,
        "key": "subject",
        "value": "Welcome Email"
    },
    {
        "slug": "send-welcome-email",
        "via": "mail",
        "sort": 1,
        "key": "from",
        "meta": {
            "name": "#!ENV:MAIL_FROM_NAME!#"
        },
        "value": "#!ENV:MAIL_FROM_ADDRESS!#"
    },
    {
        "slug": "send-welcome-email",
        "via": "mail",
        "sort": 2,
        "key": "line",
        "value": "Hello #!USER:NAME!#"
    },
    {
        "slug": "send-welcome-email",
        "via": "mail",
        "sort": 3,
        "key": "greetings",
        "value": "Welcome to #!ENV:APP_NAME!#"
    },
    {
        "slug": "send-welcome-email",
        "via": "mail",
        "sort": 4,
        "key": "line",
        "value": "Thank you for signing up for #!ENV:APP_NAME!# services"
    },
    {
        "slug": "send-welcome-email",
        "via": "mail",
        "sort": 5,
        "key": "action",
        "value": "Click to Login",
        "meta": {
            "action":"#!ROUTE:VH.LOGIN!#"
        }
    },
    {
        "slug": "send-welcome-email",
        "via": "mail",
        "sort": 6,
        "key": "line",
        "value": "If your have any queries please contact this #!ENV:MAIL_FROM_ADDRESS!#"
    }
]
Use following code to seed Notification.
Include use Illuminate\Support\Facades\DB in your DatabaseTableSeeder.php
For run seeder Deactivate and Active your module.
public function run()
{
        $this->seedNotifications();
        $this->seedNotificationContent();
}
 public function seedNotifications()
{
        $list = VaahSeeder::getListFromJson(__DIR__ . "/json/notifications.json");
        VaahSeeder::storeSeedsWithUuid('vh_notifications', $list, 'slug', true, 'name', false);
}
public function seedNotificationContent()
{
        $list = VaahSeeder::getListFromJson(__DIR__ . "/json/notification_contents.json");

        foreach ($list as $item) {
            $notification = \DB::table('vh_notifications')
                ->where('slug', $item['slug'])
                ->first();

            if (!$notification) {
                continue;
            }

            $exist = \DB::table('vh_notification_contents')
                ->where('vh_notification_id', $notification->id)
                ->where('sort', $item['sort'])
                ->where('via', $item['via'])
                ->first();

            $item['vh_notification_id'] = $notification->id;

            if (isset($item['meta'])) {
                $item['meta'] = json_encode($item['meta']);
            }

            unset($item['slug']);


            if (!$exist) {
                DB::table('vh_notification_contents')->insert($item);
            } else {
                DB::table('vh_notification_contents')
                    ->where('vh_notification_id', $notification->id)
                    ->where('sort', $item['sort'])
                    ->where('via', $item['via'])
                    ->update($item);
            }
        }
}
Use following code to send a Notification.
$notification = \WebReinvent\VaahCms\Models\Notification::where('slug', "send-welcome-email")->first();

if($notification)
{

    $inputs = [
            "user_id" => xxx,
            "notification_id" => xxx,
        ];

    \WebReinvent\VaahCms\Models\Notification::send(
        $notification, $user, $inputs
    );
}
The notification channel will then translate the message components into a beautiful, responsive HTML email template with a plain-text counterpart. Here is an example of an email generated by the notification: