.p12 Certificate
Setup
- To do the setup of remote push notification service you will need to setup one of the below thing.
- .p12 Certificate (Refer this documentation)
- OR p8 Token-Based Connection to APNs
Step 1. Requirements
- An iOS mobile app. (This is not for websites / web push)
- An Apple Developer Account with Admin Role.
- A Mac computer with Xcode 11+
- Your Xcode project should have the Push Notification capability added. Otherwise your project may not be shown in the Apple Developer Center.
Step 2. Identifier/ Provisioning
🚧 Deprecated Provisionator.
We have deprecated the Provisionator tool and recommend updating your application to instead use a .p8 token to connect to APNs.
If you would still like to use the .p12 certificate, you can continue following this guide to generate your certificate.
- If you are renewing a certificate or your app already has an existing App ID or Provisioning Profile, skip to Step 3. Generate a Push Certificate.
- If your App does not have an existing App ID or Provisioning Profile setup, then login to your Apple Developer Account and navigate to Certificates, Identifiers & Profiles->Identifiers and select the Blue + button.
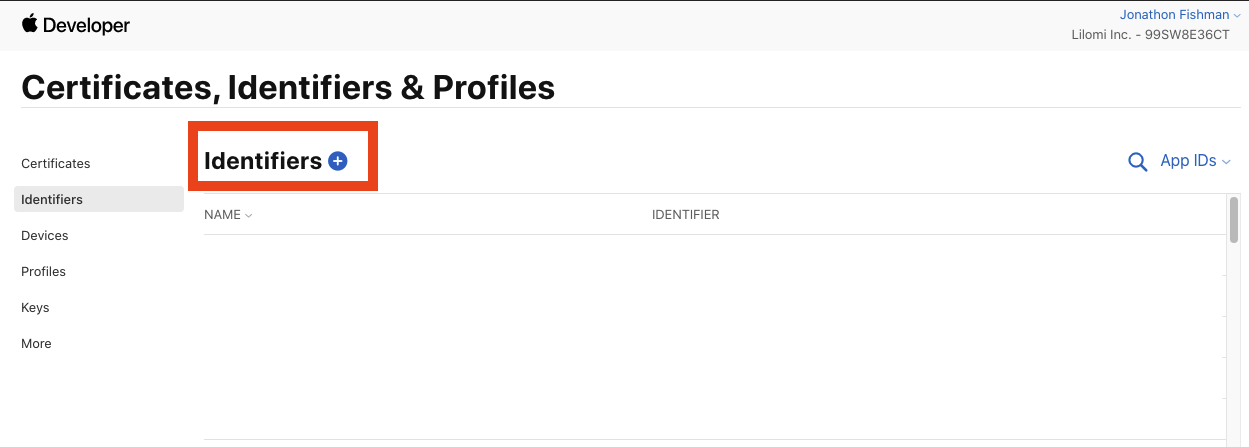
- Select App IDs and Continue
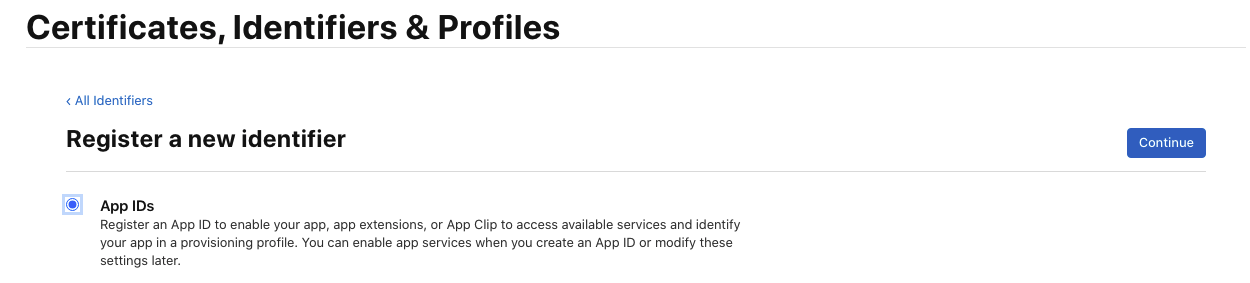
- Select App and Continue

- Provide a "Description" and your Explicit "Bundle ID". This must be the same as the "Bundle Identifier" you set for your project in Xcode.
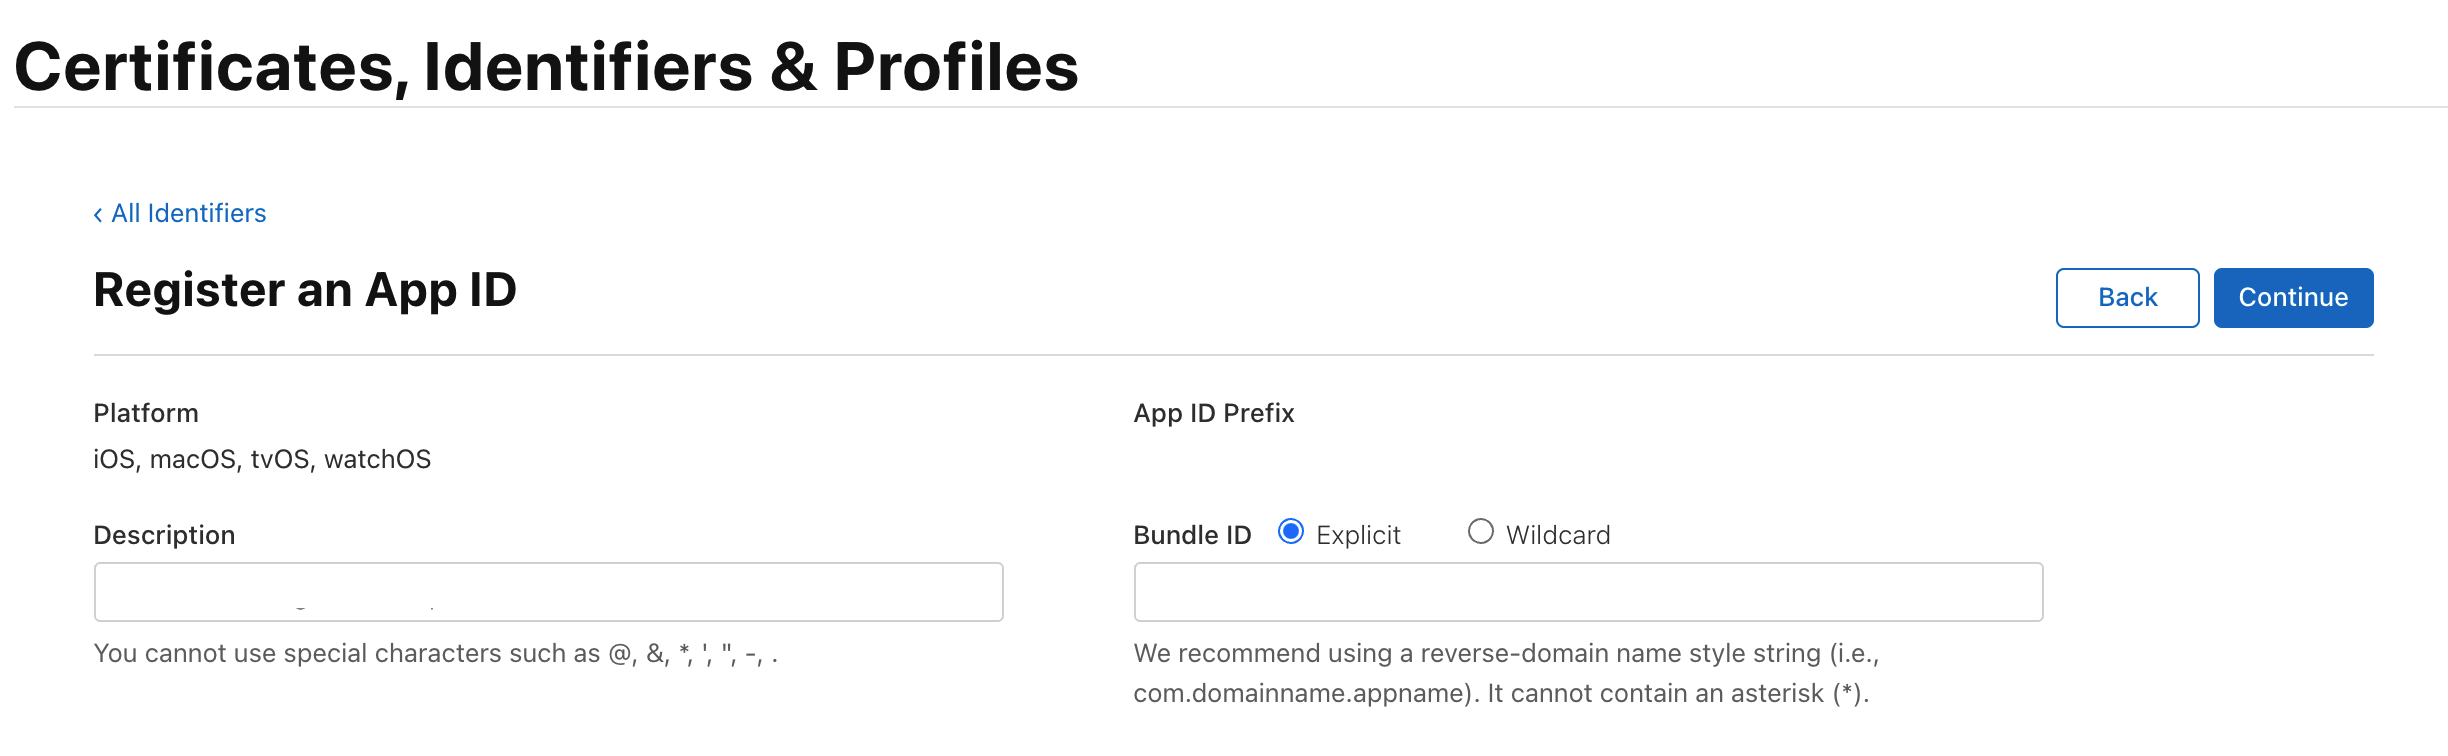
- Press Continue and on the next page, select Register
Step 3. Generate a Push Certificate
🚧 Previous Certificate Revocation
Previous .p12 Push Certificates for this Bundle ID will be revoked and cannot be used once you generate a new certificate with this method.
Request a Certificate From a Certificate Authority
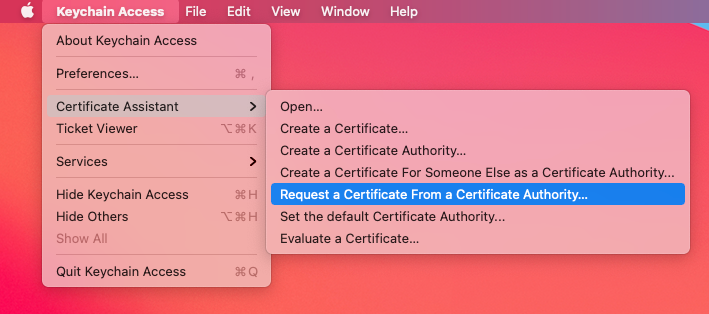
- Open the Keychain Access App on your macOS system. It may be located in Applications > Utilities > Keychain Access
- Select Keychain Access > Certificate Assistant > Request a Certificate From a Certificate Authority...
- Next, select the Saved to disk option and enter your information in the required fields. Then click Continue.
- This creates a certification request file that will be used later.
Add Capabilities
- In your Apple Developer Account under Certificates, IDs & Profiles > Identifiers, select Identifiers.
- Find and select your Identifier to enable Push Notifications, but do not click Configure.
- If you do not see your Identifier, follow Step 2. Identifier/ Provisioning.
Select Push Notification Certificate
- Go to Certificates and create a new certificate by clicking the blue + (plus) button.
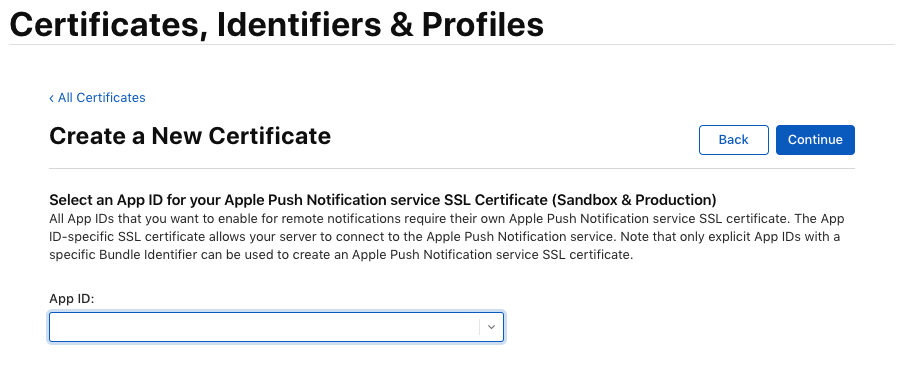
- Under Services, select Apple Push Notification service SSL (Sandbox & Production) and click Continue.
- The certificate will be applicable to both Sandbox and Production environments, so you do not need a separate key for each one.

Select your App
- Choose your App ID with matching Bundle ID from the App ID pop-up menu, and click Continue.
Upload your Certificate Signing Request
- Click Choose File.., select the CertSigningRequest file you saved, click Open, and then click Continue.

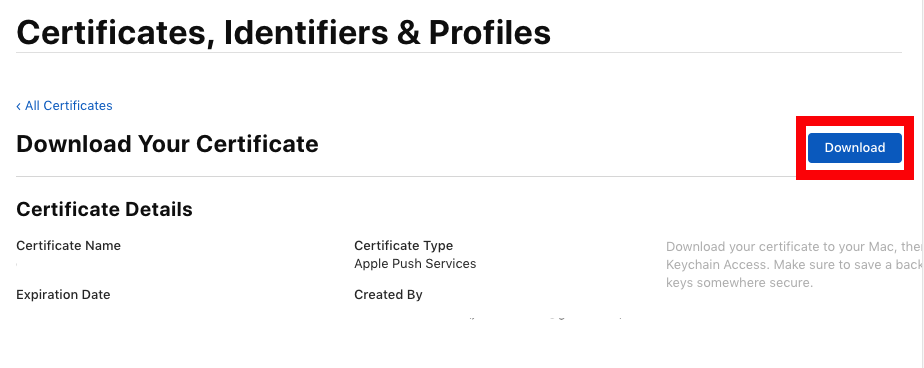
- Click Download to save the certificate to your computer.
Creating a Private Key
- Open the .cer file you downloaded in the last step by double-clicking on it in Finder.

- After a few seconds, the Keychain Access program should open. Select Login > My Certificates, then right-click on your Apple Push Services key in the list and select Export "Apple Push Services...".

- Give the file a unique name using the .p12 extension, and click Save. You will have the option to protect the file with a password.
Step 4. Provisioning Profiles
- Skip if selected "Automatically manage signing" in Xcode.
- If you did not select "Automatically manage signing", then follow these steps.
Create Your Profile
- Go to your Apple Developer Account > Certificates, Identifiers & Profiles > Profiles.

- Next find any that are for your app and remove them if they do not have App Groups and Push Notifications in Enabled Capabilities:

- Create a Profile by pressing the "+" button

- Select the type of profile you need to create and press Continue.
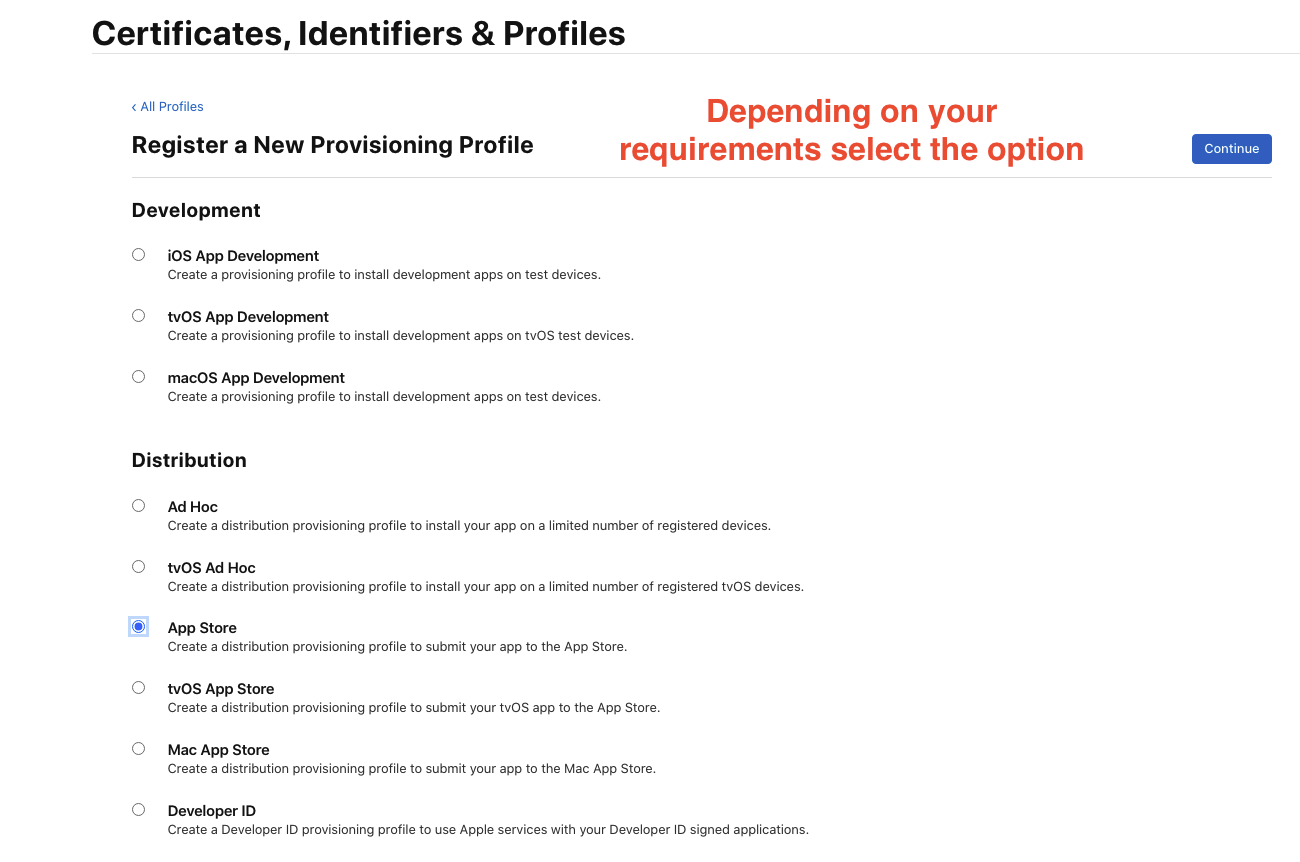
- Select the Development or Distribution Certificate to associate with the Profile. Then click Continue.

- Name your Provisioning Profile.
Best Practices
When creating a new profile, make sure to enter a unique name in the "Provisioning Profile Name:" field.
For example, if you are creating an Ad-Hoc Provisioning Profile to test push notifications with a Production Push Certificate .p12 file. Use the format AppName_AdHoc so you know the app and type of profile that it is.
- Select Generate.
- On the last page Download your profile.
- Re-sync your Developer Account in Xcode by going to Xcode > Preferences... then click on the "View Details..." button. Then, click the refresh button on the bottom left of the popup. See Apple's documentation for more detailed instructions.
- Make sure you pick your new provisioning profile from Build Settings>Code Signing>Provisioning Profile in Xcode.