Vendor Crud
Purpose
A vendor is a person, company, or entity that sells goods or services. In the context of business and commerce, a vendor is often someone who supplies products or services to customers, either directly or through a distribution channel. Vendors can operate in various industries, providing a wide range of goods and services.
Understand Vendor
Imagine you're organizing a big party. You need decorations, food, and drinks. Now, think of vendors as the different people or businesses you'd buy these things from.
Supplier (or Seller):
This is like the person selling balloons, streamers, and other party decorations. They're providing the materials you need.
Manufacturer:
Picture someone making custom-made cakes for your party. They take the ingredients (supplied by others) and create the final product.
End-User:
That's you, the person throwing the party, using the products and services provided by vendors to make your event a success.
Features & Demos
The Vendors CRUD (Create, Read, Update, Delete) functionality offers a wide range of features,
including the ability to display all Vendors. Furthermore, it provides bulk actions that allow you
to delete multiple pieces of Vendors with a single click and update Vendors, offering the following features:
- Create a New
Vendor - Edit/Update the details of an already existing
Vendor. - Clone
Vendordetails. - Autofill
Vendorfields. - Sort the
Vendorlist in ascending/descending order. - Perform Bulk Actions to change the status, trash, or delete
Vendor. - List All existing
Vendor. - Filter the
Vendorlist by searching using differentfields. - Filter the
Vendorlist by different status, including trashedVendor. - Delete an existing
Vendor. - Delete or temporarily trash an already existing
Vendor.
Overview Of Vendor Crud
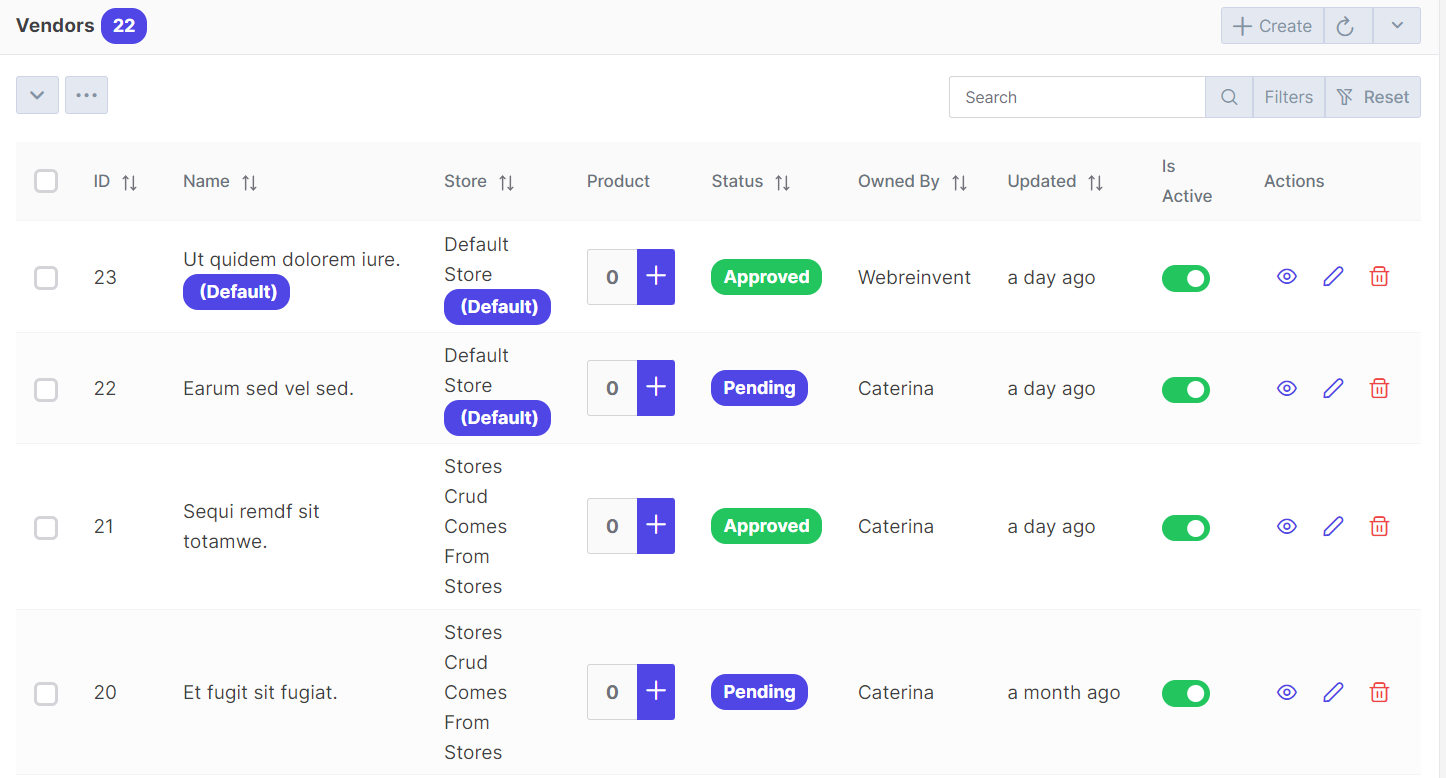
First time when you interact with Vendor in VaahStore, it will appear like this: at the top,
you'll find Vendor name, along with options such as a Create button for adding new vendor,
a Reload button for retrieving the entire list of data, and a dropdown button for creating multiple entries with a single click.
And a left-side you can access all other crud like store, vendor etc.
Requirement to create a Vendor
| Fields | Descriptions | |
|---|---|---|
| Name | This field contains the name of the Vendor. | |
| Slug | The slug is automatically generated based on the entered name. | |
| Store | Select the store associated with the vendor.Initially set to the default store, you can change this as needed. | |
| Business Type | Specify the type of the vendor's business. | |
| Approved By | Select the staff member responsible for approving this vendor. | |
| Owned By | Specify the owner of the vendor. | |
| Status | Determine the status of the vendor using this field. | |
| Status Notes | Provide additional notes explaining the decision for the selected status. | |
| Years in Business | Enter the number of years the vendor has been in business. | |
| Services Offered | Describe the services offered by the vendor in this field. | |
| Country Code | Enter the country code associated with the vendor. | |
| Phone | Enter the phone number of the vendor in this field. | |
| Enter the email address of the vendor. | ||
| Address | Enter the physical address of the vendor. | |
| Document Type | Select the type of document under the business details form. | |
| Document Details | Provide details related to the selected document type. | |
| Upload File | Attach the file associated with the selected document type. | |
| Is Default | Set this field to make the current vendor the default option for VaahStore. | |
| Auto Approve Product | Enable this option if you want products associated with this vendor to be automatically approved without manual intervention. | |
| Is Active | Activate or deactivate vendors using this field. |
Vendor Table
The Vendor Table contains all the vendors registered in VaahStore. Using this table, you can search for any vendor in the list using the search filter. The table also provides you with the option to view and update the details of the vendors,exclusively accessible to those with the necessary permissions and roles.
NOTE
Want to Know about Permissions And Roles: Click Here
Add product to vendor
Once you have created a vendor, you can easily add products directly to the vendor. To do this, follow these steps:
Step 1.
Look for the table that displays all the vendors in your system. This table provides a comprehensive list of vendors and their details.
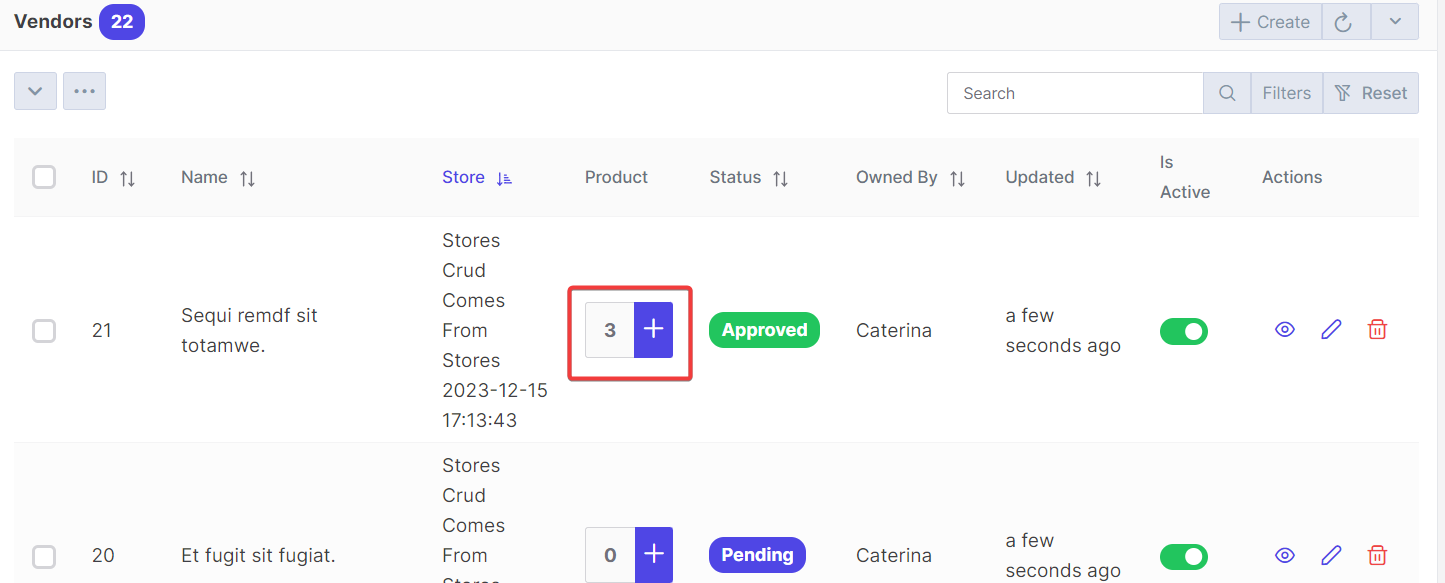
Step 2.
In the table, locate the Product column. Here, you will find the total count of products associated with each vendor.
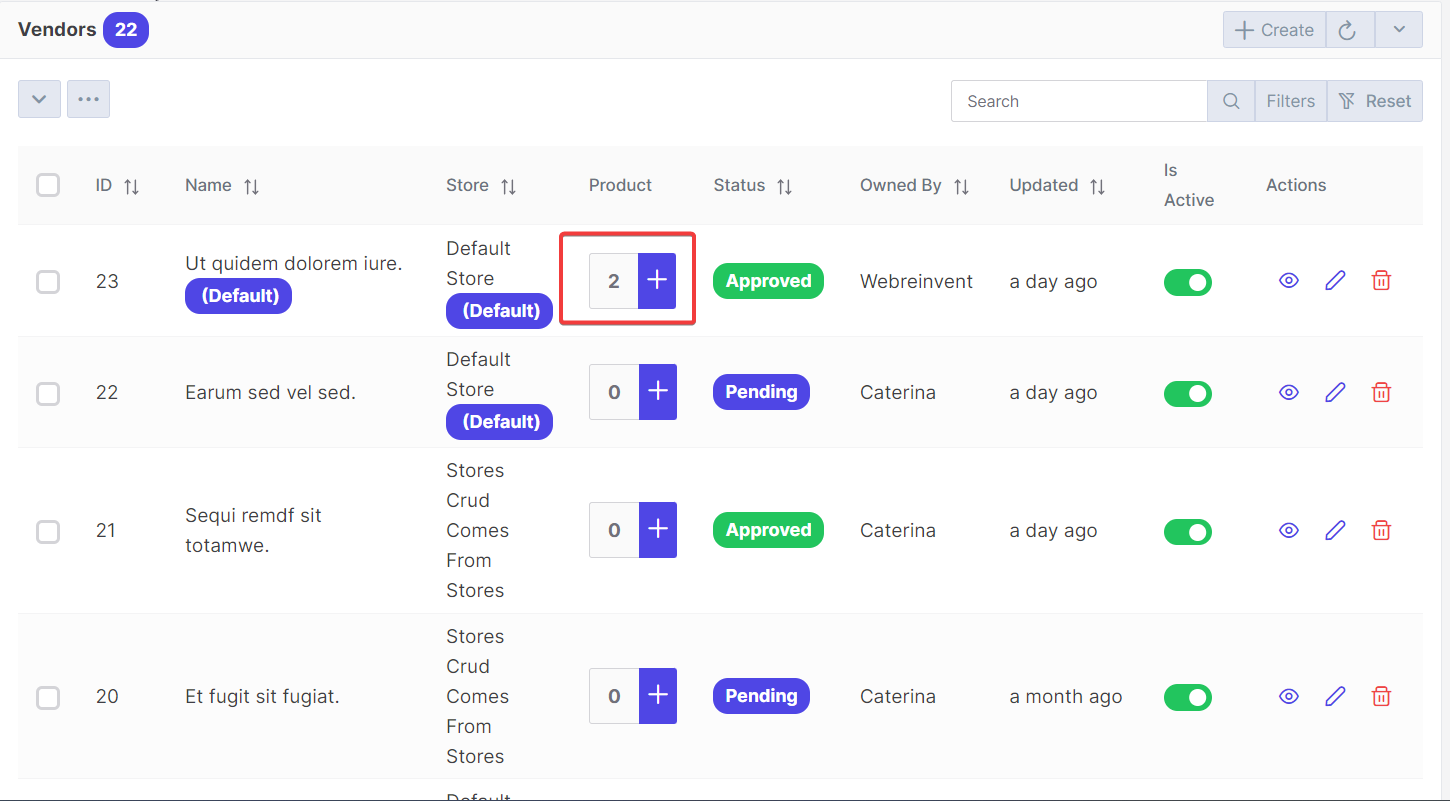
Step 3.
To add a new product to a specific vendor, click on the + option under the Product column for that vendor.
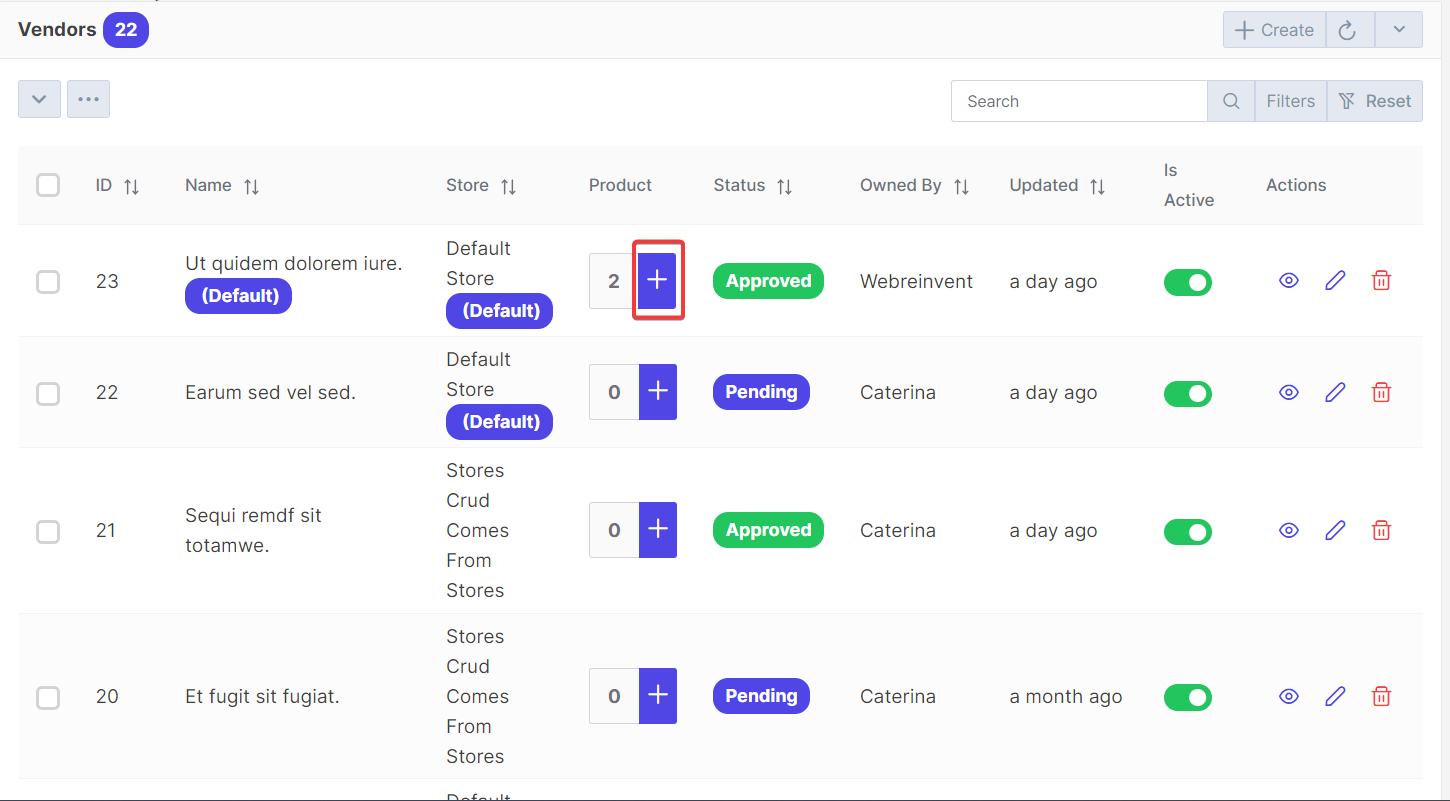
Step 4.
Clicking on the + option will open the Add Product page.
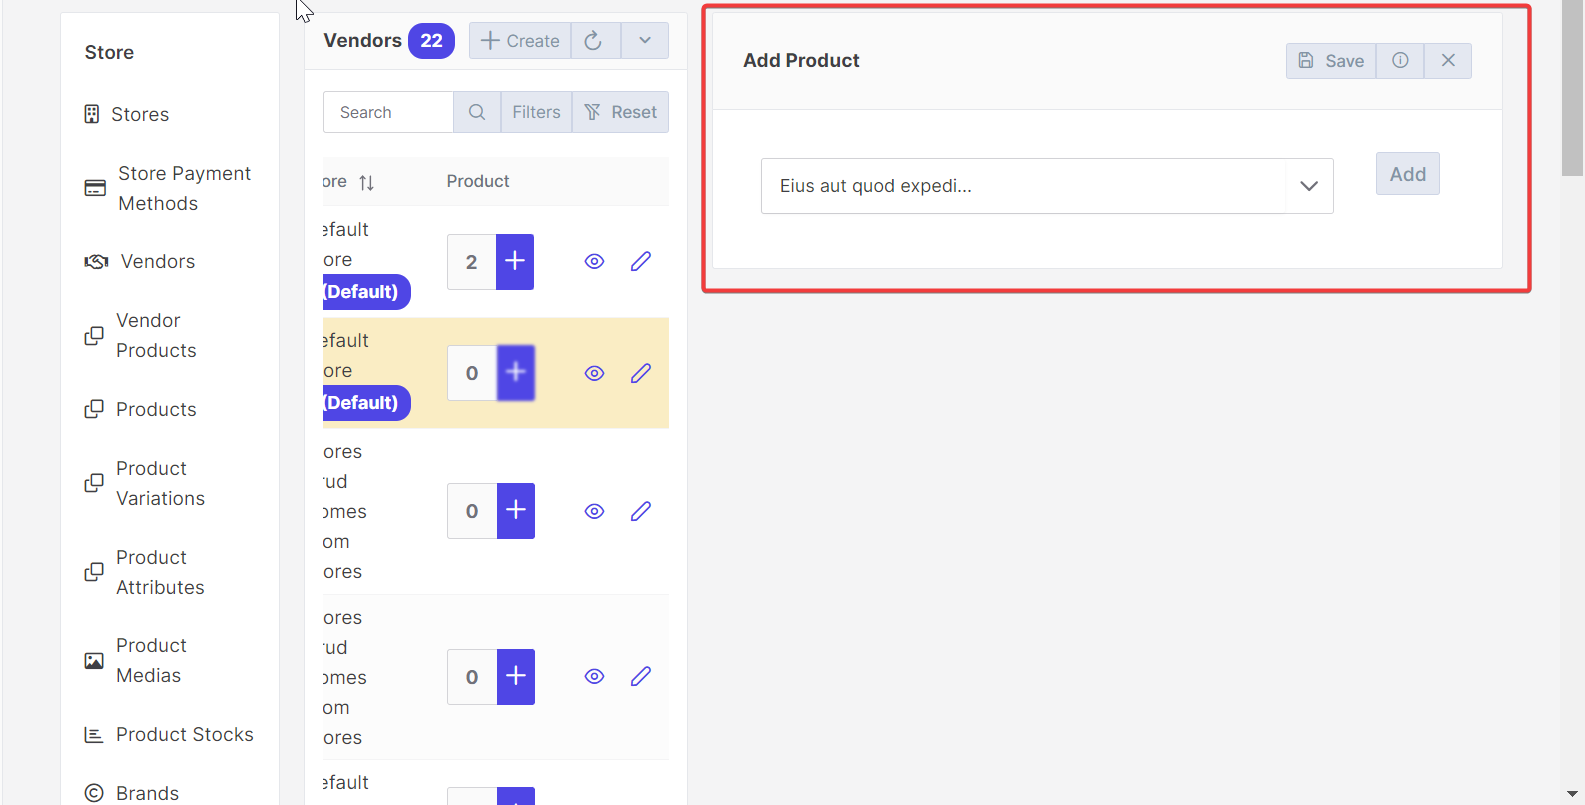
Step 5.
On the Add Product page, you will find a dropdown menu that allows you to select and add a product to the vendor.
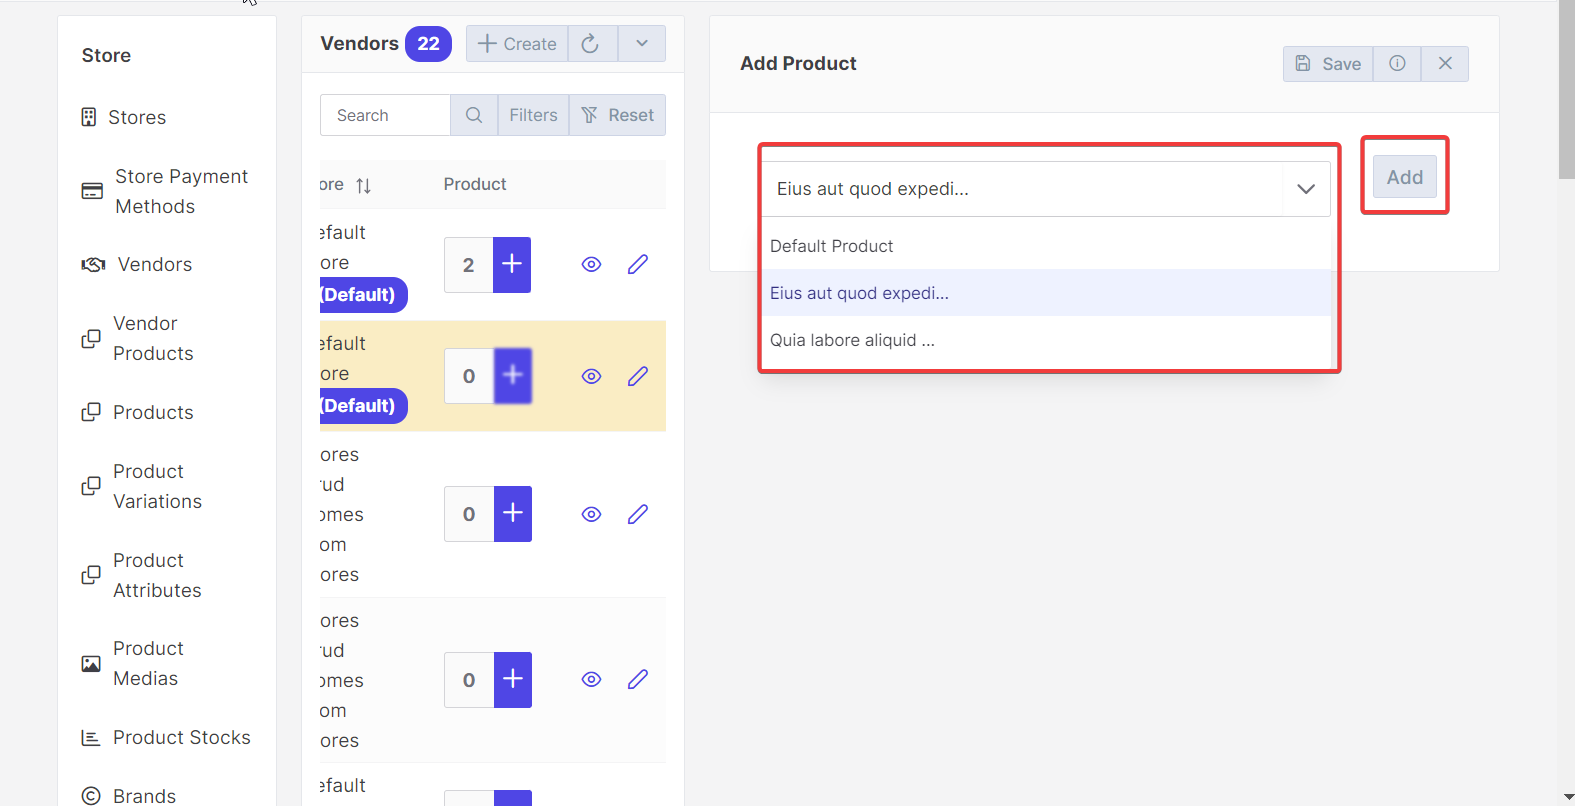
Step 6.
After selecting the desired product from the dropdown menu, it will be added to the vendor.
Step 7.
All the added products will be displayed in a table below. You can make any necessary changes to the product details in the table.
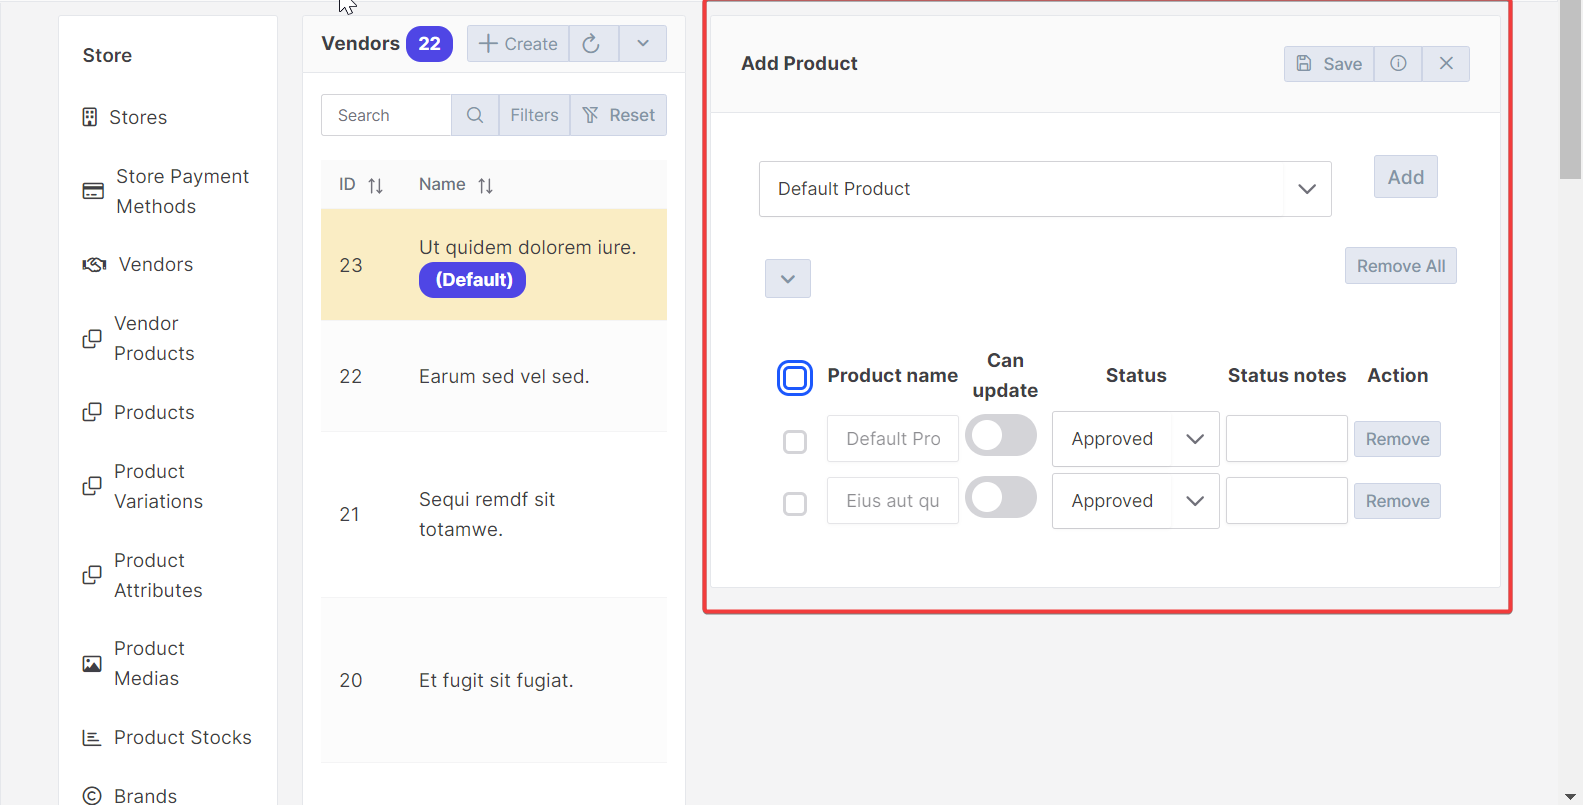
Step 8.
Once you have made the desired changes, click on the "Save" button to save the changes and associate the product with the vendor.
API
create
URL
POST <public-url>/public/api/store/vendors
Request samples
parameter = [
    "name",                             // String
    "slug",                             // String
    "vh_st_store_id",                   // Id
    "approved_by",                      // Id
    "owned_by",                         // Id
    "taxonomy_id_vendor_status",        // Id
    "status_notes",                     // String
    "is_default",                       // Boolean
    "auto_approve_products",            // Boolean
    "is_active",                        // Boolean
];
Response sample
{
    "status": "success",
    "messages": [
        "Saved"
    ],
    "data": {
        ...........
        ...........
        ...........
    }
}
Get List
URL
GET <public-url>/public/api/store/vendors?rows={number_of_rows}
Response sample
{
    "success": true,
    "data": {
        ...........
        ...........
        ...........
    }
}
Get Record
URL
GET <public-url>/public/api/store/vendors/{record_id}
Response sample
{
    "success": true,
    "data": {
        ...........
        ...........
        ...........
    }
}
Save Product
URL
POST <public-url>/public/api/store/vendors/product
Request samples
parameter = [
    ..........
    'same as create'
    ..........
    "products": {
        "can_update"                // Boolean
        "id"                        // product id
        "product"                   // Id
        "status"                    // Id
    },
];