Automation Setup for Flutter Application
Prerequisites:
- Android/iOS simulators should be setup and functional.
Setup Flutter
Before working on the automation script. We have to configure the flutter application to allow automation script to perform steps within the application.
Step 1: Download and Install Flutter SDK
First step is to download flutter sdk. Follow the steps mentioned below:
Note:
- If you already have flutter SDK installed, skip the steps mentioned below. Run the command given below in terminal to verify the version of flutter installed on your system
flutter --version - The below mentioned steps are only for MacOS users. For windows user, follow the steps given in this documentation.
- Download flutter SDK zip file based on your system configuration using this link. Choose according to your system's processor.
- Once the file is downloaded, unzip the file where you want to install the flutter sdk.
- Open the terminal and run the command mentioned below:
open ~/.zshrc - In a file that opens, add the below command at the top of the file.
export PATH=$HOME/flutter/bin:$PATH - Save the file and run command:
source ~/.zshrccommand. - Now, check the flutter version using the command:
flutter --version. - For further details, run this command to verify if the installation is correct:
flutter doctor -v - Now, open VSCode IDE and select
Extensionstab from the left menu. - Search 'flutter' and install the first flutter extenstion. With this, the installation of flutter SDK is complete.
Step 2: Create a Sample flutter App
To create a sample flutter application for testing. Follow the steps mentioned below:
- Open the terminal window in the directory you want to create your project.
- Enter the following command to create a sample project:
flutter create YOUR_PROJECT_NAMEIf you get an error:
"YOUR_PROJECT_NAME" is not a valid Dart package name.. Try using a different project in the command above. - Once the project is created, open it on VSCode IDE.
- For Android: Start your android emulator through Android Studio.
- For iOS: Open the iOS simulator by clicking on the simulator icon form the Dock.
- Open the terminal on VSCode and run the command given below to start debugging your application.
flutter run - When the command asks to select a device, choose the emulator/simulator which is running. If not, then continue.
- The application should be running in the emulator device after a while.
If you have any issues regarding the emulator setup and running. Reach out to our system administration department for assistance.
Configure Flutter Application
After setting up flutter and creating a sample application. We need to configure few files to allow webdriverio-appium to automate the app.
Follow the steps mentioned below to configure the flutter application:
Step 1: Update pubspec.yaml file
Navigate to the sample app project in VSCode and open file pubspec.yaml.
- If the app is still running, close the app. Click on the terminal in which the app is running and press
Ctrl+Con Keyboard. If asked forTerminate batch job (Y/N)?. Select Y. - Add the statements given below in the file.
test: ^1.24.1
flutter_test:
    sdk: flutter
flutter_driver:
    sdk: flutter
- After adding the above statements, run
flutter pub getcommand in the terminal to update the changes.
Step 2: Update main.dart file
Open main.dart file and add the following statements.
- Add the statement given below at the top of the file.
import 'package:flutter_driver/driver_extension.dart'; - Also add the below statement inside main() method.
enableFlutterDriverExtension(); - Refer to the screenshot given below:

Step 3: Add keys for automation testing
Open main.dart file and do the following changes:
- Add the below statement in the file. Note: In addition, please note that you'll need to scroll down the code to find the text where you should insert this line.
key: const Key('counter'), - Similarly add the code given below in the location.
Refer to the screenshot given below:
key: const Key('plus_btn'),
Step 4: Run the application
To get the apk/ios-app needed, open your Android Studio, and Launch the emulator or open your iOS simulator. Then run command flutter run in your flutter project terminal.
You can close the emulator/simulator for now.
With this, the configuration for the flutter application is now complete.
Setup WebdriverIO project
In this we are going to setup a WebdriverIO project for automating the mobile application we just created in the prior steps.
To setup the project, follow the steps mentioned in the documentation till Step 9 of Setup WebdriverIO project section. Now follow the steps given below:
- For "Which type of environment would you like?". Select Mobile.
- For "Which mobile environment would you like to automate?". Select Android for now. We will setup iOS automation as well.
- For "Which framework do you want to use?". Select Mocha.
- For "Do you want to use a compiler?". Select No.
- For "Do you want WebdriverIO to autogenerate some test files?". Type n and press Enter.
- Choose spec reporter for test case reporting.
- For "Do you want to add plugins to your test setup?". Select wait-for. Press Space and then Enter.

- For "Would you like to include Visual Testing to your setup?". Press Enter.
- For "Do you want to add a service to your test setup?". Select Appium.
- When "Do you want me install
npm installis prompted. Press Enter. - Wait for the command
npm installto complete. - After the setup is complete, it will ask you to "Continue with Appium setup using appium-installer". Press Enter.
- If it asks for 'Ok to proceed?'. Enter y and press Enter.
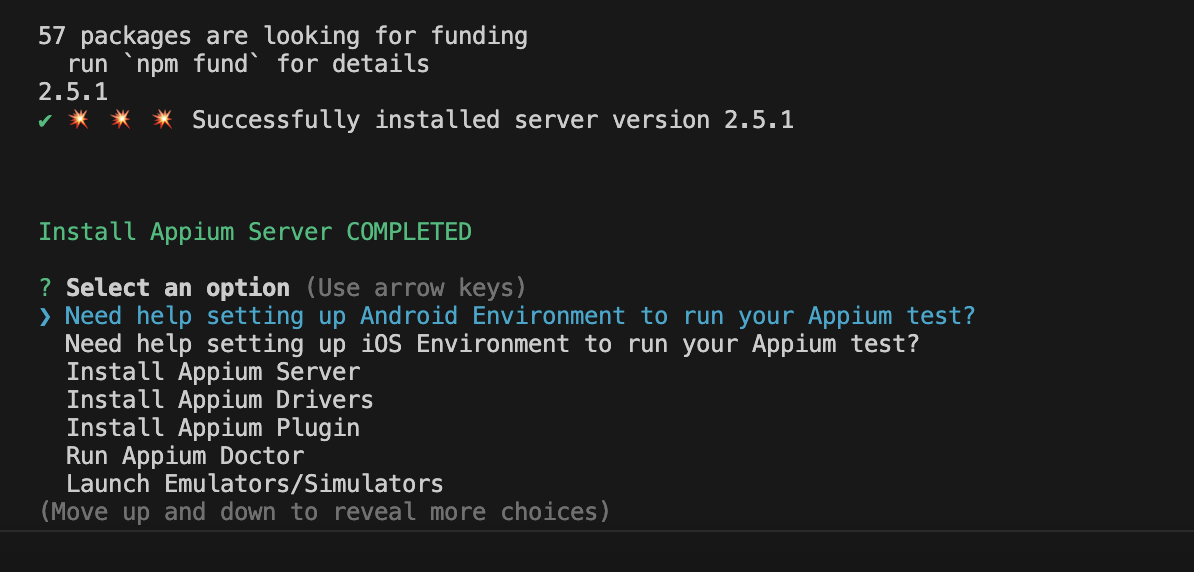
- After a while it will ask you to "Select an option (Use arrow keys)". Select option Install Appium Server. Then select Select latest Server version:.
- Wait till the appium server is installed.
- After the installation is complete, a success message will be visible. Refer to the screenshot below:
- Similarly, select Run Appium Doctor. Then select Android
- At last select Exit. (Press Space and then Enter.)
- If the terminal shows some error similar to below (For windows user), ignore and proceed with the documentation.
⚠️  Ups, something went wrong: Error calling: npx wdio config!
npm ERR! code 1
npm ERR! path D:\FP
npm ERR! command failed
npm ERR! command C:\Windows\system32\cmd.exe /d /s /c create-wdio
Configuration
Now, before running the test scripts we need to install several packages, configure the wdio.conf.js file. We also need to create env file so that the capabilities for different platforms can be added.
Install Dependencies
To install the required dependencies and configure package.json file, follow the steps given below:
- Run following commands in the terminal of the Code Editor (Make sure the path is set to your project directory).
- First we will install
appiumin our project.npm i appium --save-dev - After this,
appium-flutter-driveris installed which performs actions on mobile app. To know more, refer npm.jsnpm i appium-flutter-driver --save-dev - Similarly, we will install
appium-flutter-finder. This will be used to locate elements in flutter app. To know more, refer npm.jsnpm i appium-flutter-finder --save-dev - Next, we will install
assertmodule to make assertions in out test script.npm i assert --save-dev - Similarly, we will install
chaito use various expect methods in it.npm i chai --save-dev - Finally, run this command:
npm i chalk cli-color cross-env ts-node typescript --save-dev
- First we will install
- In
package.jsonfile, replace the code in script with the below code:"scripts": { "wdio": "cross-env wdio run ./wdio.conf.js", "wdio debug": "cross-env NODE_WDIO_DEBUG=true wdio run ./wdio.conf.js", "wdio ios": "cross-env NODE_WDIO_OS=ios wdio run ./wdio.conf.js", "wdio android": "cross-env NODE_WDIO_OS=android wdio run ./wdio.conf.js" } - Also add
"type":"module"inside package.json file. Refer to the code below:... "type": "module", "devDependencies": { ... }
Configure ENV file
- Create a new file in the root folder of the project, where the file
wdio.conf.jsfile is located. - Name the file
wdio.env.js. - Add the code given below inside the file:
class Env { constructor() { this.params = { debug: false, env: null, log_level: 'error', small_pause: 5000, medium_pause: 10000, long_pause: 25000, app_id: 'com.toolstation.mobile_app.dev', version: null, capabilities: [{ platformName: 'Android', 'appium:deviceName': 'P7A34', 'appium:platformVersion': '14', 'appium:automationName': 'Flutter', 'appium:app': 'path of the apk file', 'appium:fullReset': true, 'appium:noReset': false, 'appium:autoGrantPermissions': true, }] }; } //------------------------------------------------- setId(){ const env = process.argv[4]; if(env == 'ios') this.params.app_id = 'com.toolstation.mobile-app.dev' else this.params.app_id = 'com.toolstation.mobile_app.dev' } setCapabilities() { const env = process.argv[4]; switch(env) { case 'android': this.params.capabilities = [{ platformName: 'Android', 'appium:deviceName': 'P7A34', 'appium:platformVersion': '14', 'appium:automationName': 'Flutter', 'appium:app': 'path of apk file', 'appium:fullReset': true, 'appium:noReset': false, 'appium:autoGrantPermissions': true, }] break; case 'ios': this.params.capabilities = [{ platformName: 'iOS', 'appium:deviceName': 'iPhone 15 Pro', 'appium:platformVersion': '17.2', 'appium:automationName': 'Flutter', 'appium:app':'path of the iOS runner file', 'appium:noReset': false, 'appium:autoLaunch': true, 'appium:autoAcceptAlerts': true }] break; } } //------------------------------------------------- getParams () { this.setId(); this.setCapabilities(); console.log('params-->', this.params); return this.params; } } export default Env;Note: In the capabilities, specify the value of different objects as per the description given below:
- appium:deviceName: Add the name of your emulator/simulator.
- appium:platformVersion': Add the version of the emulation/simulator software.
- appium:app: Add the path of the apk/app file that you want to test.
How to find the path of the apk/app file
For Android:
- Open the flutter app project in Code Editor (VSCode)
- Navigate to this
build/app/outputs/flutter-apkdirectory in your flutter project. - Locate the .apk file in the directory. Ignore the file with .sha extension.
- Right click on the apk file and select 'Copy Path' option.
- Paste the path of your apk file in the env file of your automation project.
For iOS:
- Open the flutter app project in Code Editor (VSCode)
- Navigate to this
build/ios/iphonesimulator/Runner.appdirectory in your flutter project. - Locate the .app file in the directory.
- Right click on the apk file and select 'Copy Path' option.
- Paste the path of your apk file in the env file of your automation project.
Configure wdio.conf.js file
After this, we need to configure the wdio.conf.js file. Open the file and follow the steps mentioned below:
- Add the following code at the top of the file in order to import
wdio.env.jsfile created in step 3 of Configure ENV File section.import env from "./wdio.env.js"; const envObj = new env(); const params = envObj.getParams(); - Replace
exports.configtoexport const config. Refer to the code snippet below:export const config = { ... } - Enter this code:
env: params,inside exports.config. Refer to the code below:export const config = { env: params, // // ==================== // Runner Configuration // ==================== ... } - For the
capabilitiesreplace the code withcapabilities: params.capabilities,. Refer to the code below:export const config = { ... maxInstances: 10, ... capabilities: params.capabilities, // Add this statement ... }
Now, the configuration is completed. But we still need to do some changes with the test files before we can start running our script.
Configure test files.
Now, we will create and configure the test files before working on automation script.
- Create a directory named:
testsin the project root directory. - Create another directory named:
specinsidetestsdirectory created earlear. - Create a file named:
test.e2e.jsinsidespecdirectory. - Configure
test.e2e.jsfile Open thetest.e2e.jsfile. Add the code snippet given below in the file:import find from 'appium-flutter-finder' import {expect} from 'chai' describe('Flutter Automation Testing', () => { it('Verify if the counter button is functional or not', async () => { const plus_btn = find.byValueKey('plus_btn'); const counter = find.byValueKey('counter'); await driver.elementClick(plus_btn); await driver.elementClick(plus_btn); expect(await driver.getElementText(counter)).to.be.equal('2'); }) })
Executing the test script
Before running the test script, add the path of the test script in the wdio.conf.js. Open the file and locate specs keyword. Add the below code for the specs.
specs: [
    './tests/spec/test.e2e.js'
],
Running Tests on Android Emulator
Before running the script, update the following data as suggested:
- Open
wdio.env.jsfile and update the following in capabilities from both params and setcapabilities:- appium:deviceName: Add the name of your emulator.
- appium:platformVersion': Add the android version running on the emulator.
- appium:app: Add the path of the apk file that you want to test.
Note: In the setcapabilities() method, update the points mentioned above only in the android switch case.
- Save and run the command given below:
npm run wdio android
Running Tests on iOS Simulator
Before running the script, update the following data as suggested:
- Open
wdio.env.jsfile and update the following in capabilities from setcapabilities() method:- appium:deviceName: Add the name of your iOS simulator.
- appium:platformVersion': Add the version of the iOS running on the simulator.
- appium:app: Add the path of the runner app for iOS device.
Note: In the setcapabilities() method, update the points mentioned above only in the iOS switch case.
- Save and run the command given below:
npm run wdio ios
Possible Error:
- If you get an
ECONNREFUSED 127.0.0.1:4723error. Just run the script again by entering the command above. - If further issues are encountered while running the script, refer to Common Issues and Solution docs.