Git
Introduction
We use git in all our project products, packages, modules and themes.
Branching Strategy
We use GitFlow as a default strategy for git branch management.
What is GitFlow?
Gitflow is a branching model, a particularly useful framework for streamlining collaboration and scaling teams.
It contains following branches:
| Branch | Purpose |
|---|---|
| Master or Main | This contains your production code. |
| Develop | This is the most active branch in which all branches are merged. This contains the most updated code. |
| Feature | These are the branches created by developers to develop features. These branches are merged by Merge Request or Pull Request to develop branch. |
| Release | These are the branches created from the develop branch to eventually merge in master & develop. |
| Hotfix | These are the branches created from the master branch to eventually merge in master & develop. |
Read more about it at: https://www.gitkraken.com/learn/git/git-flow
Commits
Please follow following logic for your commit messages:
<type>: <description>


[optional body]

[optional footer]
Where type can have following values:
Addedfor new features.Changedfor changes in existing functionality.Deprecatedfor soon-to-be removed features.Removedfor now removed features.Fixedfor any bug fixes.Securityin case of vulnerabilities.
Read more at https://keepachangelog.com/en/1.0.0/
Squash Commits
What is Squash Commits?
To squash in Git means to combine multiple commits into one.
When you squash commits, you're essentially saying, "I want to take several of these individual commits and combine them into one commit." This can make the commit history cleaner and easier to follow because it reduces the number of commits in your branch's history.
NOTE
Squash commits primarily work within a single branch, and they are not used
to combine commits from multiple branches.
Why we use Squash Commits?
1. Efficient Sharing
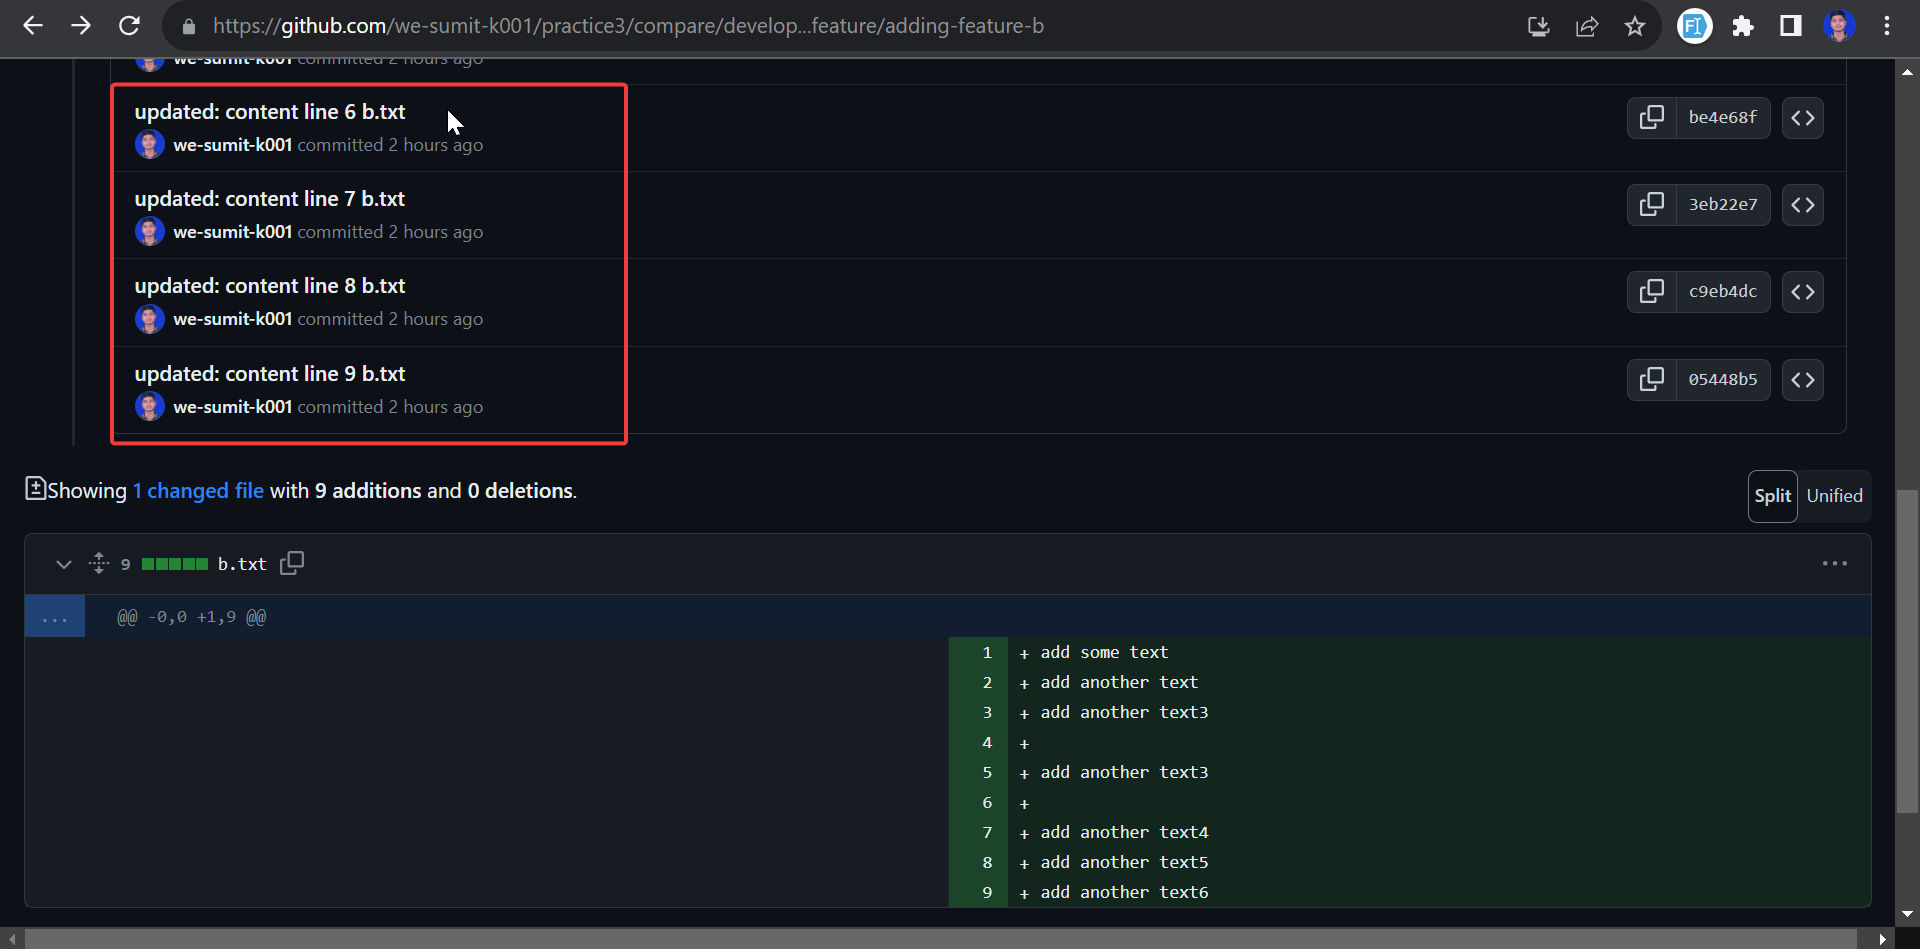
Imagine you're working on a feature or a change in a Git repository, and you make multiple commits as you progress. Each commit represents a step in your work, like saving your progress in a video game. If you share a link to each of these commits with a reviewer, it can be time-consuming for them to open and review each individual commit.
In the depicted image, there's a list of recent commits in a Git repository
2. Simplifying Review
Squash commits help simplify the review process. Instead of sending a long list of individual commit links, you can group them together into a single, coherent commit. It's like condensing all your progress into one well-documented step.
3. Time-Saving
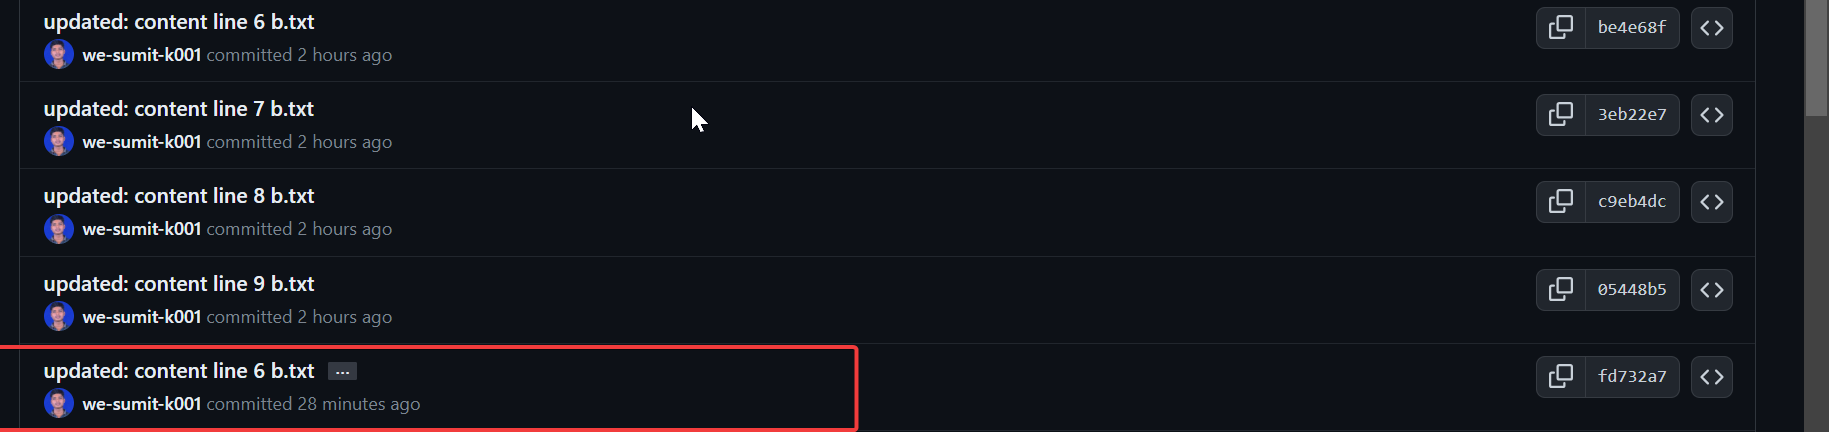
Here is the squash commit, it takes the default name from one of the commits in the list you can change the default name as well. With this feature, you can simply click on this squash commit, which combines multiple commits into one for a cleaner history. Then, you can send the resulting link to the reviewer, making it easier for them to review the changes as a single coherent unit.
By using squash commits, you save time for both yourself and the reviewer. You present your work as a single, comprehensive change, making it easier for the reviewer to understand and provide feedback. This efficiency benefits everyone involved in the collaboration process.
Implement of Squash Commit
1. Open Your Repository
Launch GitKraken and open the Git repository where you want to squash commits.
2. Open the Commit Graph
In the GitKraken interface, you'll see a visual representation of your commit history called the "Commit Graph" on the right side of the window. This graph displays all the commits in your branch.
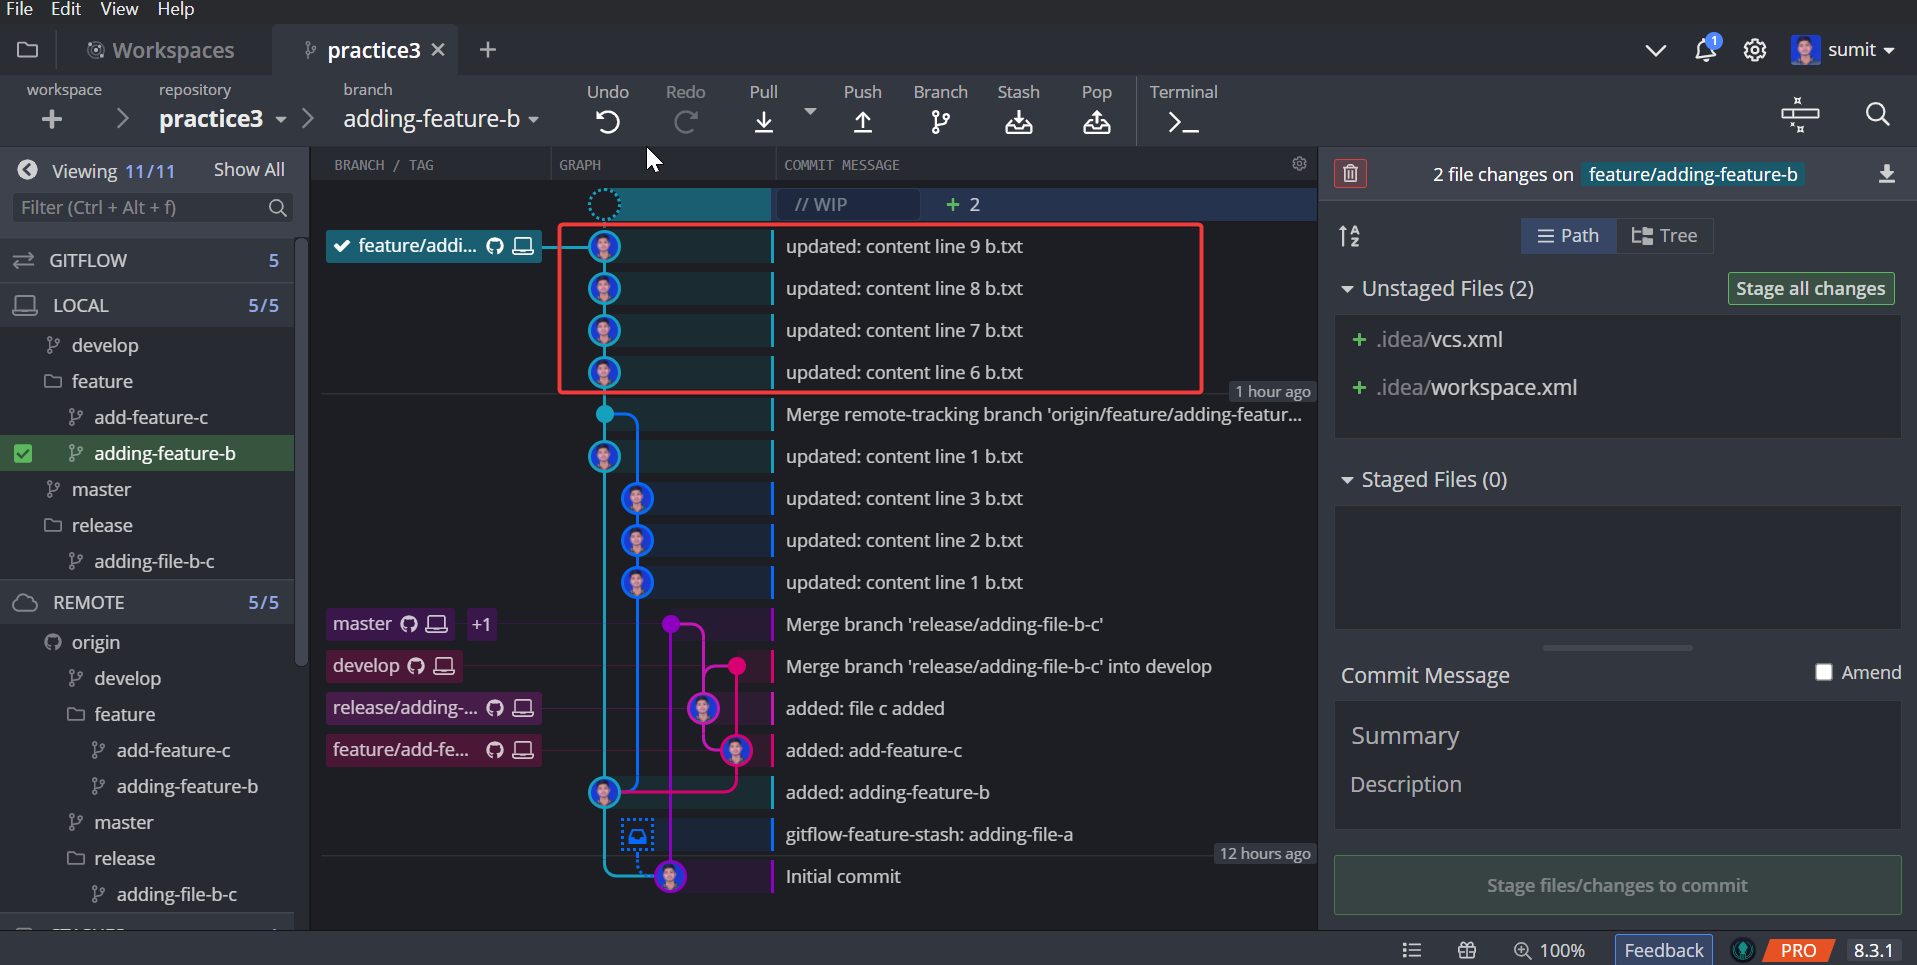
In the image, I've highlighted a series of commits using a red rectangle. These highlighted commits are the ones that I'll combine into a squash commit. This process condenses multiple individual commits into a single, unified commit, making it easier to manage and understand the project's commit history.
3. Select Commits to Squash
To begin the squashing process, first identify the commits you want to squash together in the Commit Graph. You can do this by clicking and dragging to select multiple commits, or you can use the "Ctrl" or "Cmd" key while clicking to select multiple commits individually.

4. Right-Click and Choose "Squash"
After selecting the desired commits, right-click on one of them. From the context menu that appears, choose "Squash Commits."

5. Edit the Commit Message (Optional)
GitKraken will open a dialog where you can edit the commit message for the new squashed commit. By default, it will include the commit messages of the selected commits. You can modify this message as needed.
6. Push Changes
If you have already pushed these commits to a remote repository, GitKraken may prompt you to push the changes to the remote branch.
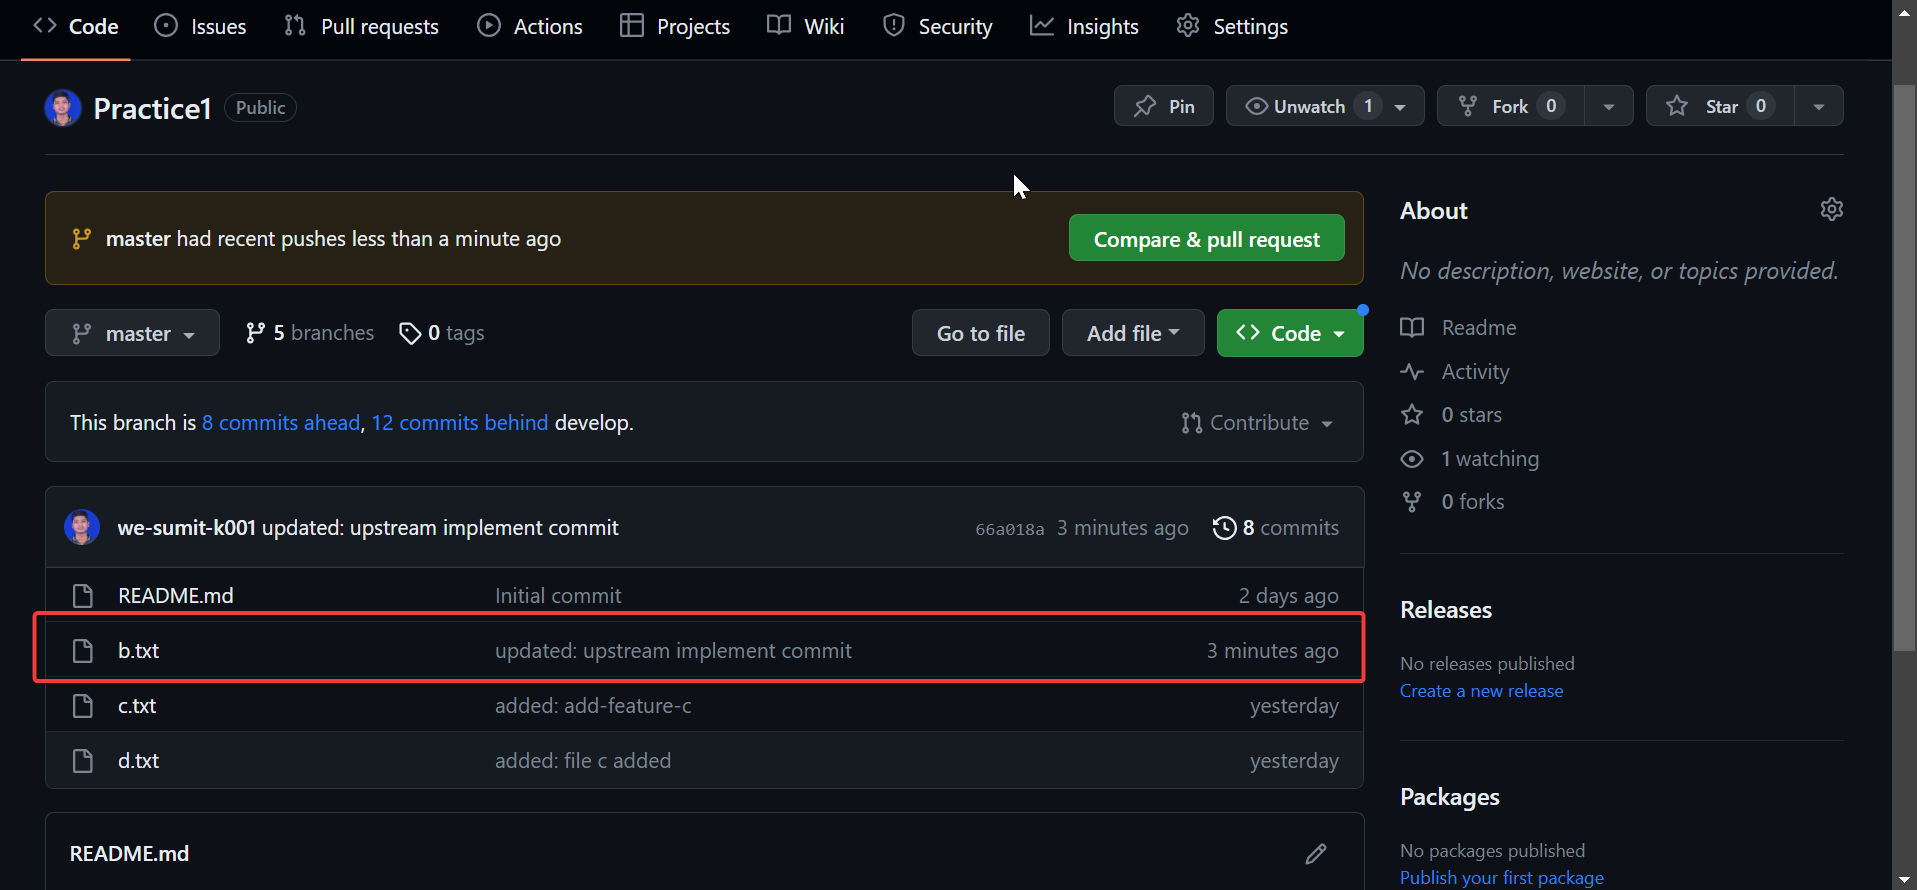
Upstream Branch On Git
What is Upstream Branch ?
An upstream branch in Git refers to a branch in your local repository that is associated with and
tracks a branch in a remote repository. This remote branch is typically the one from which you
originally cloned the repository.
Use of Upstream Branch
An upstream branch in Git acts as a bridge connecting your local repository branch to the branch in the remote repository stored on a remote server. It simplifies sharing your changes with others by allowing you to push your code from your local repository branch to the remote repository branch.
1. Collaboration and Contribution
Upstream branches are especially helpful when collaborating with others on a Git project. If you're working on a team or contributing to an open-source project, the upstream branch allows you to keep your local branch synchronized with the main project's branch. You can easily pull the latest changes made by others and, in turn, push your own contributions back to the main project.
2. Using Multiple Origins
Suppose you've cloned a repository, made changes, and pushed code. Now, what if you want to work on another repository without re-cloning it? GitKraken offers a solution: you can set up multiple origins for a repository within GitKraken. By selecting the branch as the upstream, when you push your code, GitKraken will prompt you to choose the specific origin to which you want to push your code. This feature provides flexibility when working on multiple repositories.
3. Tracking Progress
Upstream branches help you track the progress of a project or repository. By following the changes in the upstream branch, you can see what others are working on, including new features, bug fixes, or improvements. This provides valuable insight into the project's development.
4. Keeping Local Repositories Updated
Upstream branches ensure that your local repositories are up to date with the latest changes from the remote repository. This is essential for avoiding conflicts and working with the most recent code. You can regularly fetch or pull changes from the upstream branch to stay current.
Implementing Upstream on GitKraken
In GitKraken, when you push your code from your local repository branch to the remote repository that you've cloned, it essentially goes to the upstream branch. This is the default behavior in GitKraken, where the repository you clone on your local system and the code you push are associated with the upstream branch.
1. Open GitKraken
Launch GitKraken and ensure you have the repository you want to work with loaded.
2. Select the Branch
To set a branch as the new upstream branch, start by locating the branch list on the left-hand side. Simply click on the branch that you wish to designate as the new upstream branch. If you're unsure about how to perform this action , don't worry; we'll provide a more detailed explanation in the following steps.
NOTE
the upstream branch in Git is the branch in the remote repository where your code is sent when you push it from your local repository.
It's automatically set to be the same as the branch you cloned when you first set up your repository.
So, if you cloned a repository from a remote server, the upstream branch is initially the same
branch you cloned.
3. Setting a New Origin/Remote
Setting a new origin or remote, it's essentially about defining where you push your code using the upstream branch. By default, the origin or remote is initially set to the same location as the branch you cloned when you first set up your repository. However, you can modify this setting to work with multiple origins and push your code to different remote repositories, providing you with the flexibility to manage your code across various locations.
In the below image you can click on the remote add button
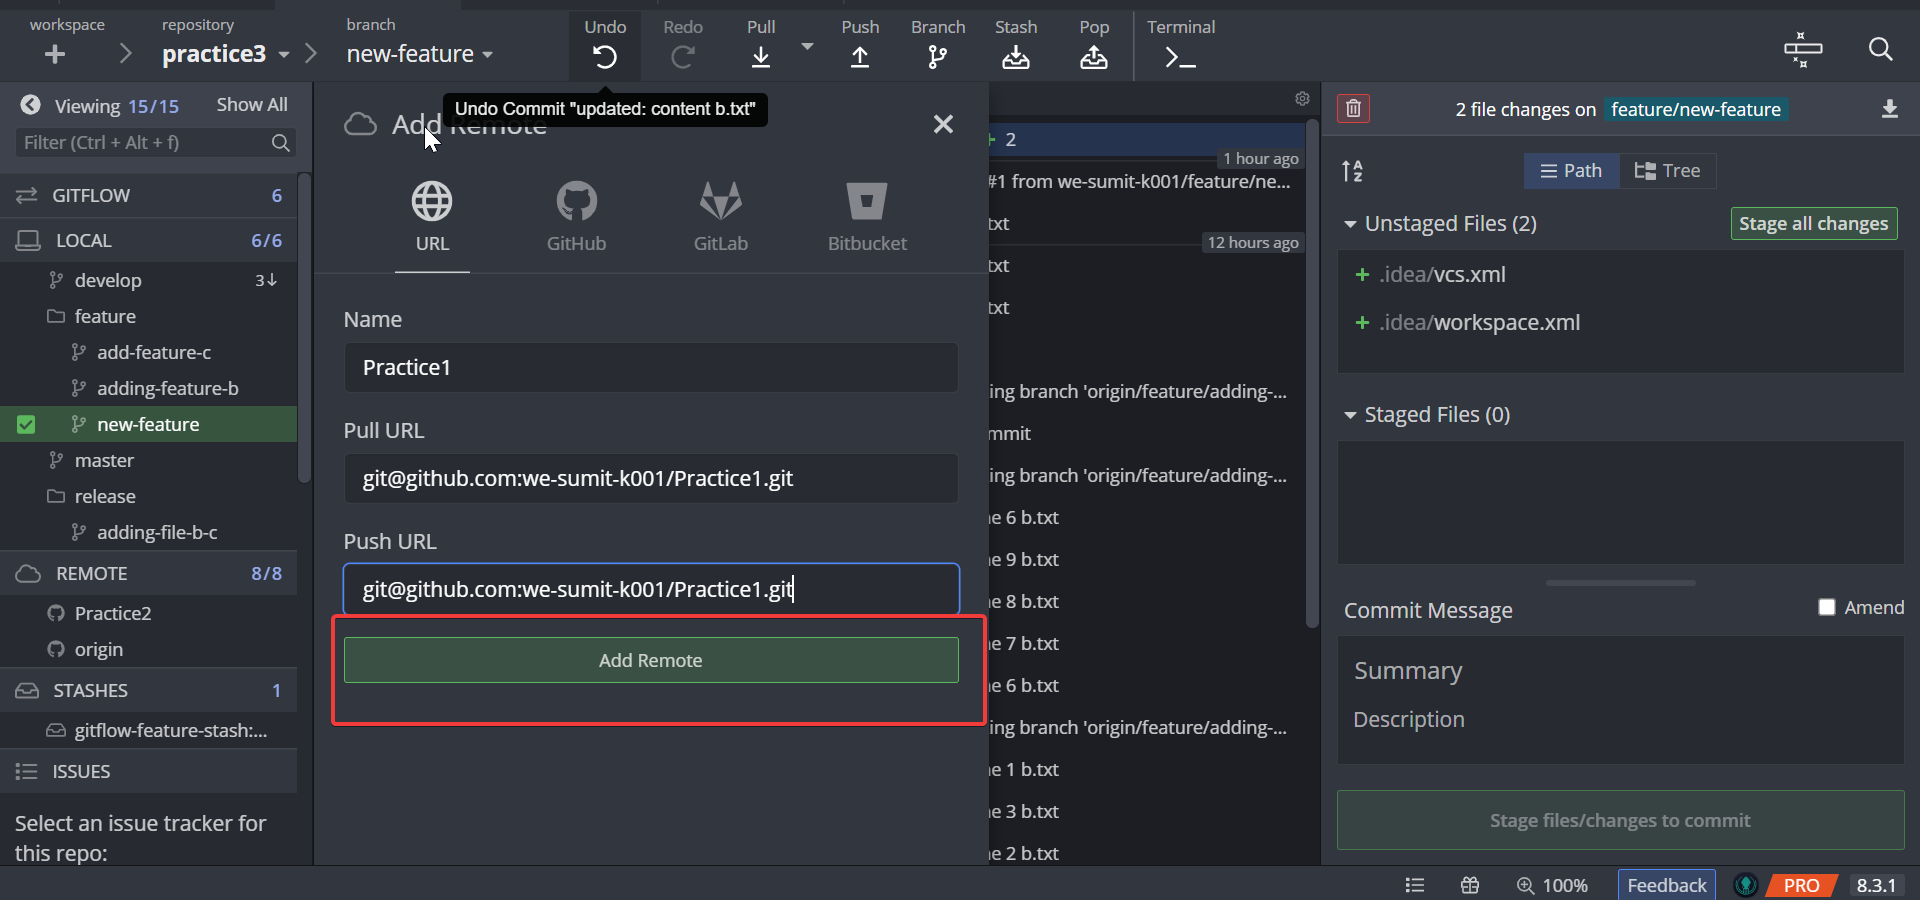
4. Fill the Remote Details
when you click on the Add button in the remote settings, it opens a dialog box where you can set
the URL for your remote. In this form, you need to specify the remote's name, which you can choose
freely. The next part is the Pull URL, which designates the URL from which you pull code into your
local repository. The third section is the Push URL, where you provide the same
details as in the Pull URL. This process allows you to configure the remote's settings
for pulling and pushing code.

NOTE
Currently, I am working on the "practice3" repository, which I cloned. However, I need to
push some code to another repository i.e "practice1". To do this, I am using the upstream branch.
5. Open Github
1.Open GitHub in your web browser and navigate to the specific branch where you intend to push your code from your local repository.
2.Click on the Code button to access the repository's code.
3.Copy the SSH URL from the repository. It is essential for connecting your local repository with the remote repository.
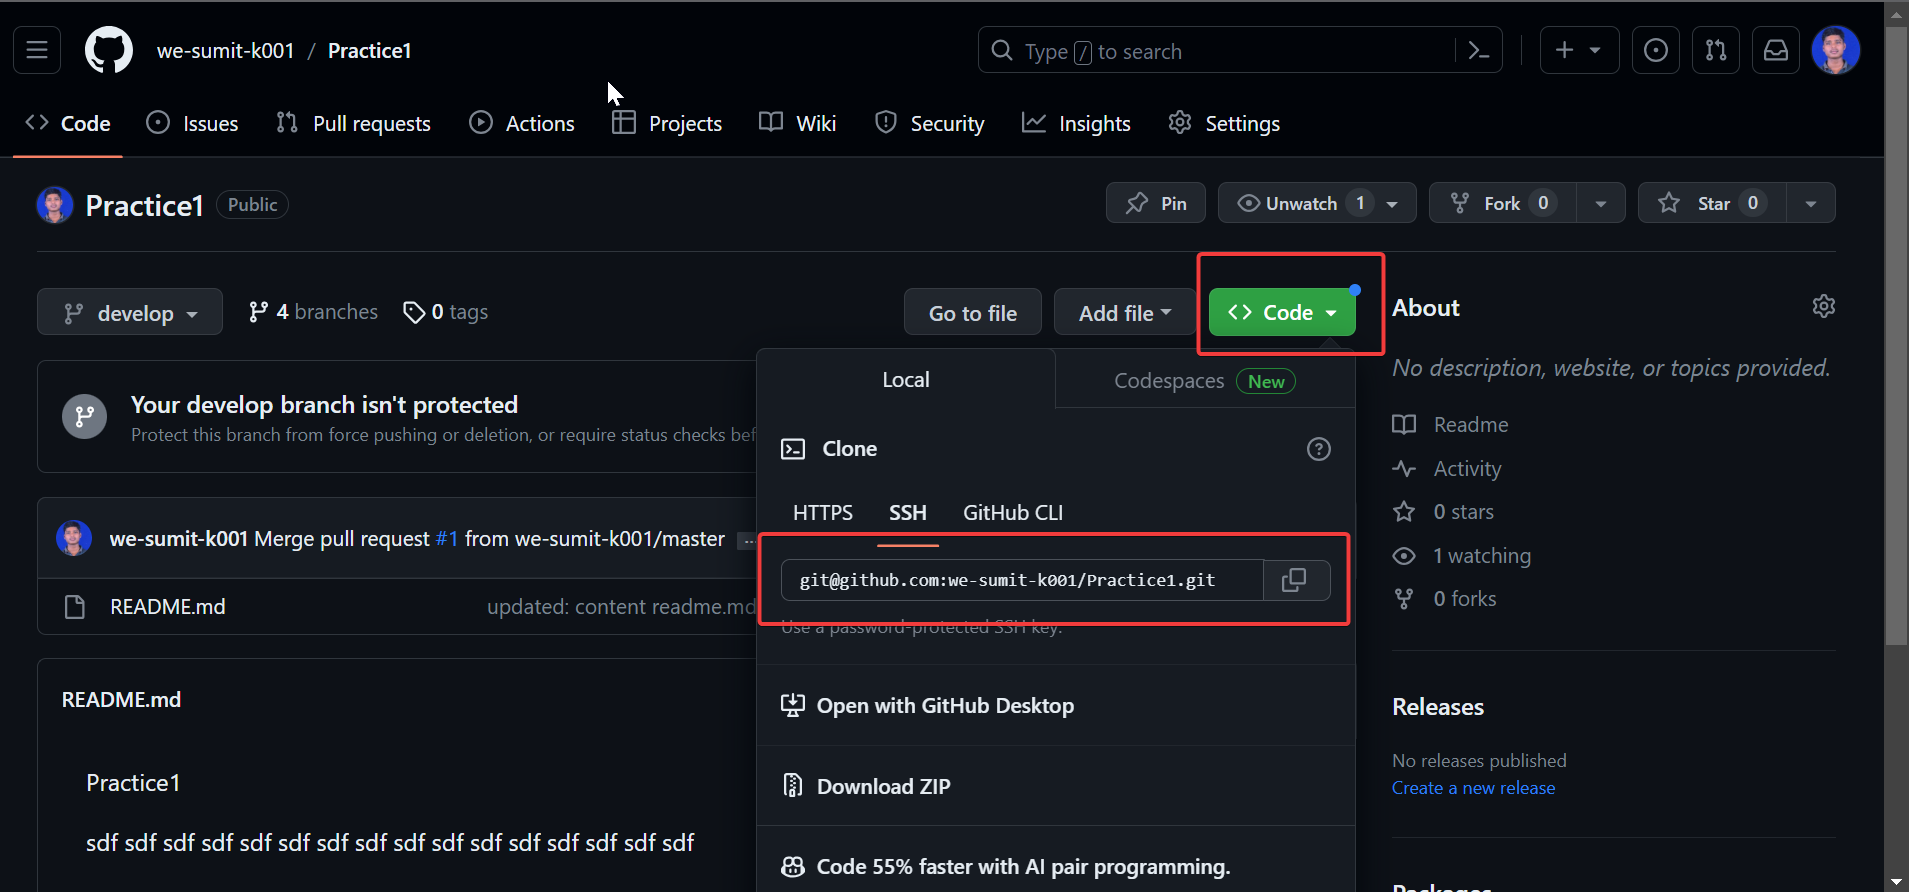
4.Now, open GitKraken, and go to the Remote section.
5.Fill in the name of the remote repository, which can be a descriptive name of your choice.
6.Paste the previously copied SSH URL into both the Push URL and Pull URL fields in GitKraken.
This URL will link your local repository to the remote repository, enabling you to push and pull
code changes seamlessly and last click on the add remote.
6. Choose the Desired Upstream Branch
After selecting the branch, you'll see a Set upstream option. Click on this option.
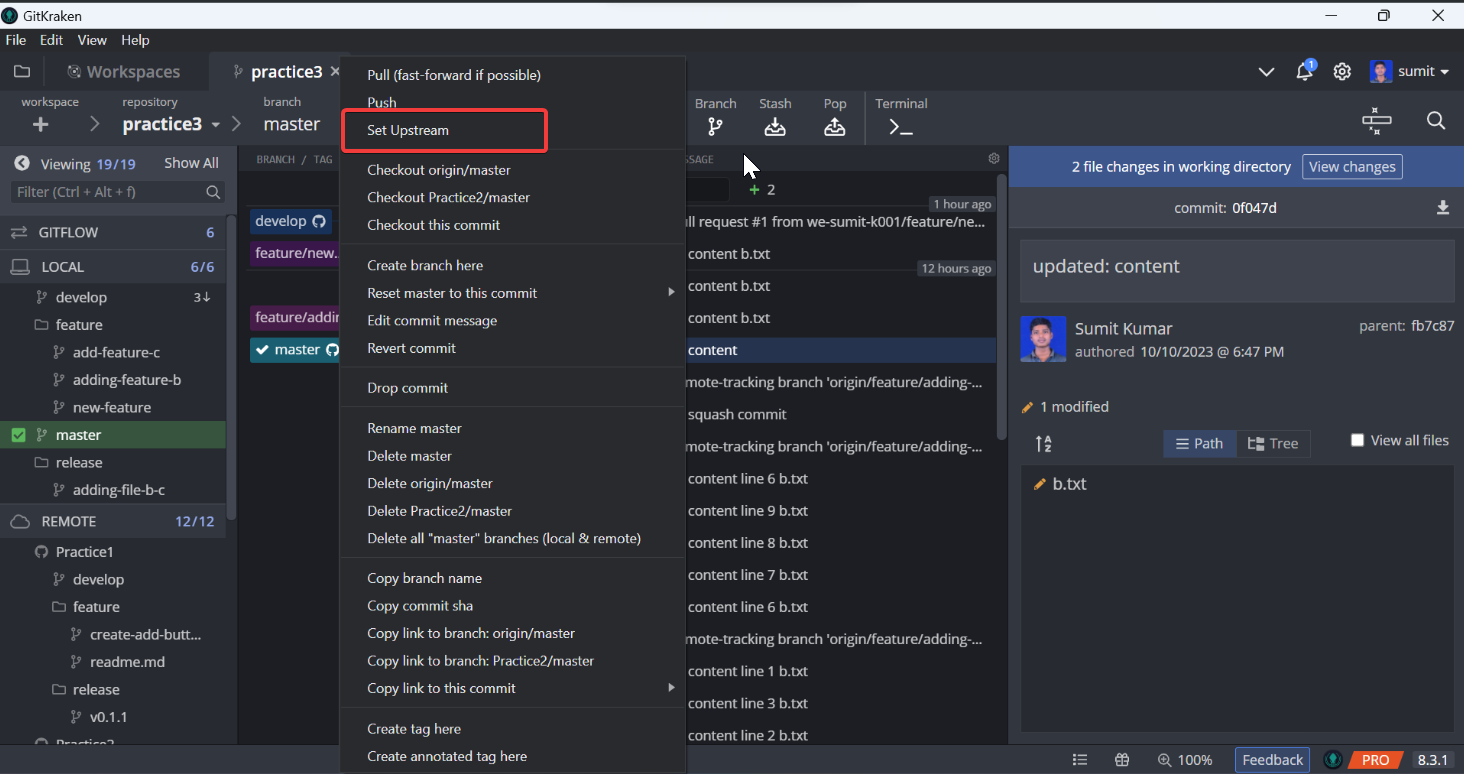
7. Confirmation
GitKraken will prompt you to confirm setting the branch as the new upstream.
In this example, I am selecting the Practice1 branch, but you can choose any branch when adding
the remote details. Confirm the action to proceed.
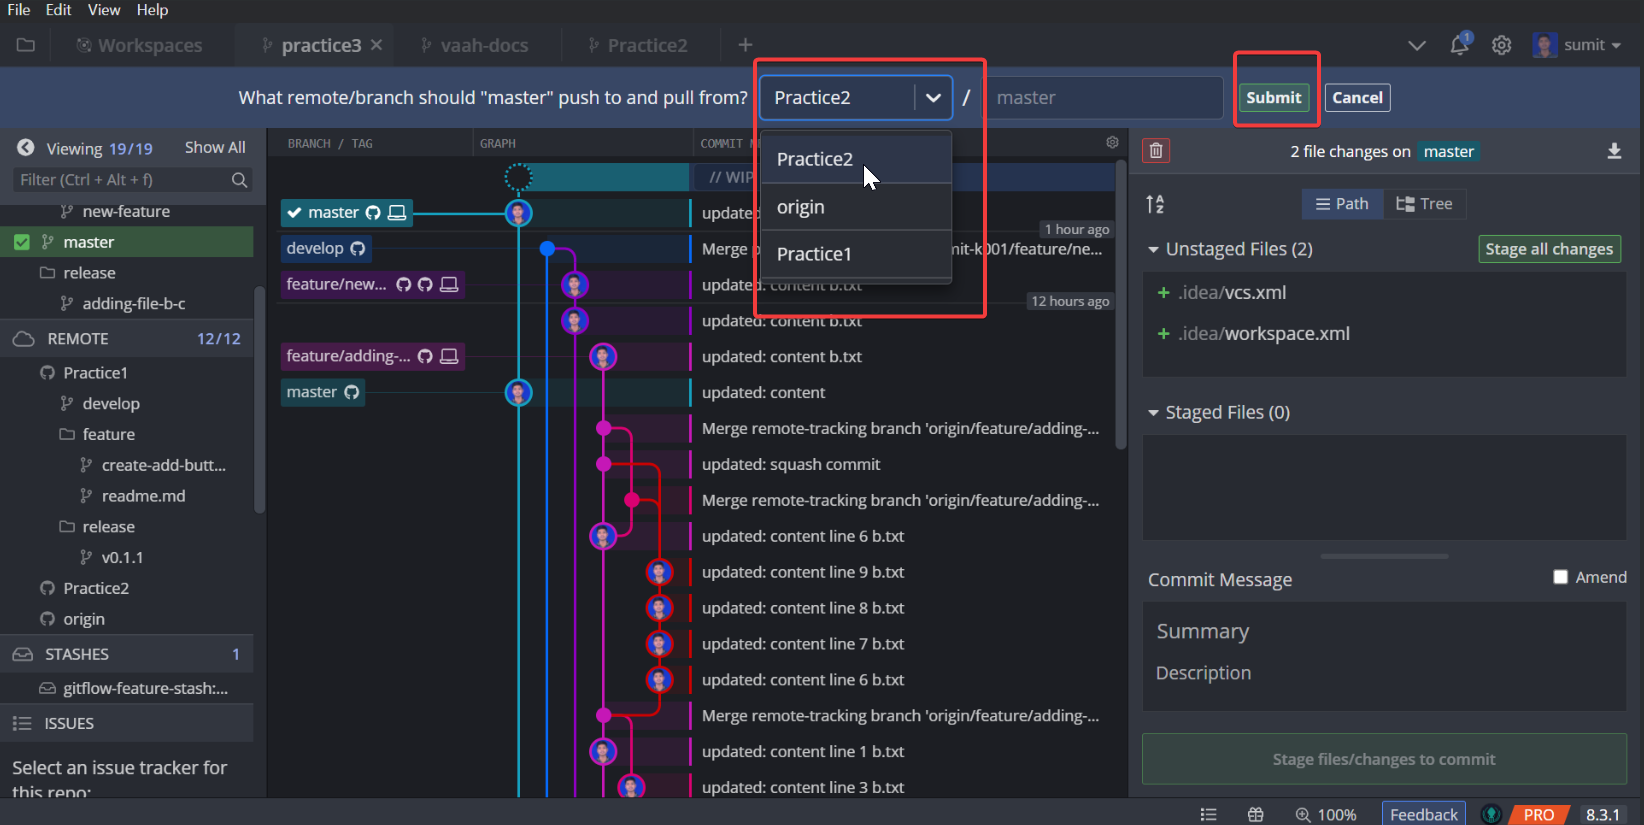
8. Pushing Changes to the Upstream Repository
After clicking the Submit button, the code you've made changes to is pushed from your local
repository to the specified target repository that you've configured as your upstream. In simpler
terms, it means your code updates are sent to the chosen repository for synchronization using
the upstream branch.
How to Create a Good Pull Request Template
A PR(Pull Request) template is a predefined format or structure that contributors use when submitting their code changes to a project's repository. It serves as a guideline or checklist that ensures contributors include essential information and follow specific conventions when creating a PR.
Use of PR Template
A PR template serves as a structured framework that contributors follow when submitting code changes to a project's repository. It plays a pivotal role in streamlining the PR process and provides the following benefits:
1. Clarity
PR templates require contributors to describe the purpose of their changes, which helps reviewers understand the context and objectives.
2. Testing Information
They enable contributors to document the tests conducted to validate their changes, enhancing transparency.
Default Template For PR
A PR template is a structured format used when creating pull requests. It offers a checklist of items, such as the PR's purpose, testing details, and coding standards adherence. Contributors can customize this checklist to match their specific PR, ensuring all necessary information is included.
[Your Task Name  ](Your Task URL)
Time invested: 00:00 format | Billable:  00:00 | Non-Billable: 00:00

Client's comment or requirement

Proof of your testing, video, or image link?

 Demo Url:-(video link ,image link etc)


### Self Review Checklist

#### Naming Conventions
> For a detailed information click [here](https://docs.vaah.dev/guide/code.html#naming-conventions)

- [x] Are your Controller names `meaningful`, `singular` and have `Controller` suffix?
- [x] Are your Model names `singular` and named after the table they are modelling?
- [x] Are your Table names `snake_case` and `plural`?
- [ ] Are your Table Column names `snake_case` without model name?
- [ ] Are your Seeder names `descriptive` about which table they are seeding?
- [x] Are your method/function names `short`, `descriptive` and `camelCased`?
- [x] Are your variable names `short`, `descriptive` and `snake_cased`?

#### Constants and Configs
> For a detailed information click [here](https://docs.vaah.dev/guide/code.html#naming-conventions)

- [x] API keys, Secret Keys, URL's etc., are stored as env variables.
- [x] I am accessing env variables via config.
- [x] I have used config and language files, constants instead of text in the code .
- [x] I have not hardcoded any value.

#### Fat methods  and CRUD
> For a detailed information click [here](https://docs.vaah.dev/guide/code.html#laravel-community-guidelines-for-good-coding-practices)

- [x] All requests are being validated
- [x] I am not using raw SQL queries. I am using `Eloquent` queries.
- [x] DB related logic are in `Eloquent models` or in `Repository`/`Helper` classes.
- [x] I have not included business logic in Controllers. They are in `Repository`/`Helper` classes.
- [ ] My methods adhere to the `Single Responsibility Principle`.
- [x] My code doesn't contain extensive if-else nesting. I am checking negative conditions first.
- [x] I have removed all unwanted commented code.
- [ ] I have done my tech debt analysis and any unavoidable code leading to tech debt is marked with `@todo` .

#### Other practices

- [x] All my migrations have `down` method that reverses operations performed by `up` method.
- [x] Any new column added/altered in table has been also updated in the `fillable` property of its model.
- [x] For seeders that are not populating sample data, it is not truncating table before seeding again.
- [ ] For seeders that are not populating sample data, the data is being populated from a separate external file.
- [x] There are no business logic or queries in routes.
- [x] I have not put queries in Blade templates.
- [x] I have not put JS and CSS in Blade templates and have not put any HTML in PHP classes.
- [x] I have removed all debug code.

#### Nuxt coding practices

- [ ] My Vue Components names are `short`, describes what it's intended use is and is in `PascalCase`
- [ ] All the components exclusive to the page are in the page's `components` folder
- [ ] I have preferred using Composition API.
- [ ] I have preferred using `<script setup>` tag instead of the `setup()`.
- [ ] I have used asyncData or fetch hook (avoid mounted or created hooks) to fetch any initial data that will make the component load later than page.
- [ ] I have marked any component that does not have reactive elements as `functional`.
- [x] I have used `key` for any `v-for` used.
- [x] I have not used `v-for` and `v-if` in the same element.
- [x] I have declared `props` with `camelCase` but used in templates with `kebab-case`.
- [x] I have validated my `props` with good definition, and have set there default values
- [ ] I have added a `Readme.md` file for each component I have created.
- [x] All my page specific methods and variables are in the page's store.

---

### Feature Merge Request Checklist

- [x] have you rebased your `feature` with `develop`?
- [ ] have run `npm run prod` after `rebase` with `develop` branch in all your `Modules` & `Themes`? Notes, you have to reactivate modules and themes to publish assets.
- [ ] have you updated the `patch` (`x.x.<update-this>`) version `config.php` and `composer.json` of module & theme?
- [x] have you read all the `comments` & `notes` in `wireframe` and verified that you have taken care of that?
- [x] verify that the `UI` must match with `design` & `wireframe` if available?
- [x] have you applied `data-wdio` tag to `links`, `forms` & all `form inputs` like `input`, `select`?
- [x] did you verify the latest commit of `develop` exists in your `feature` branch after rebase?
- [x] have you tested the `feature` as per the client requirement?
- [x] did you follow the proper naming conventions in your code?
- [ ] have you commented on your code with proper explanation?
Importance of a PR Template
PR templates are important because they bring structure and consistency to the PR process. They serve several vital purposes:
1. Documentation
In projects that require updated documentation with code changes, PR templates ensure that this aspect is addressed and documented.
2. Code Quality
Templates may include checks for coding standards and code quality, maintaining high standards in the project.